# VPC
## Create VPC
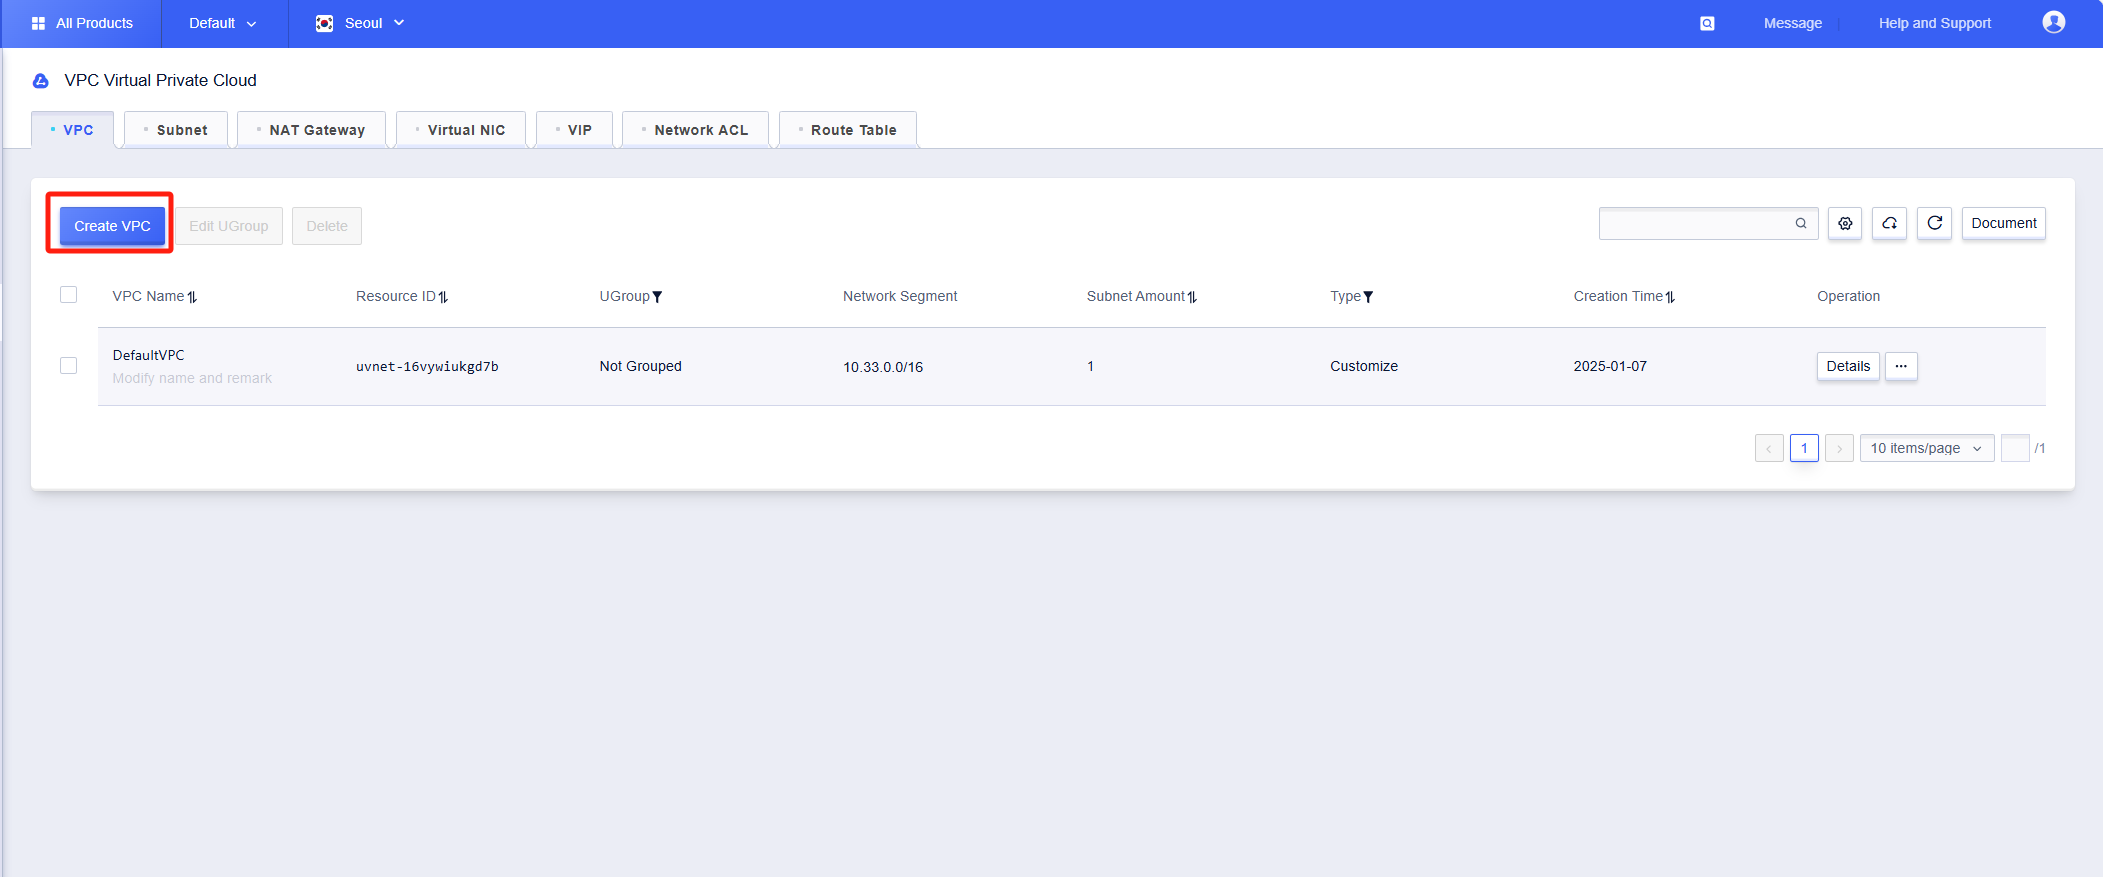
Select "Virtual Private Cloud (UVPC)" in "All Products", and click the "Create VPC" button in the "VPC" tab to create it.
Fill in the VPC name on the pop-up page, select the network segment you need (the default is 192.168.0.0/16), and click "OK".
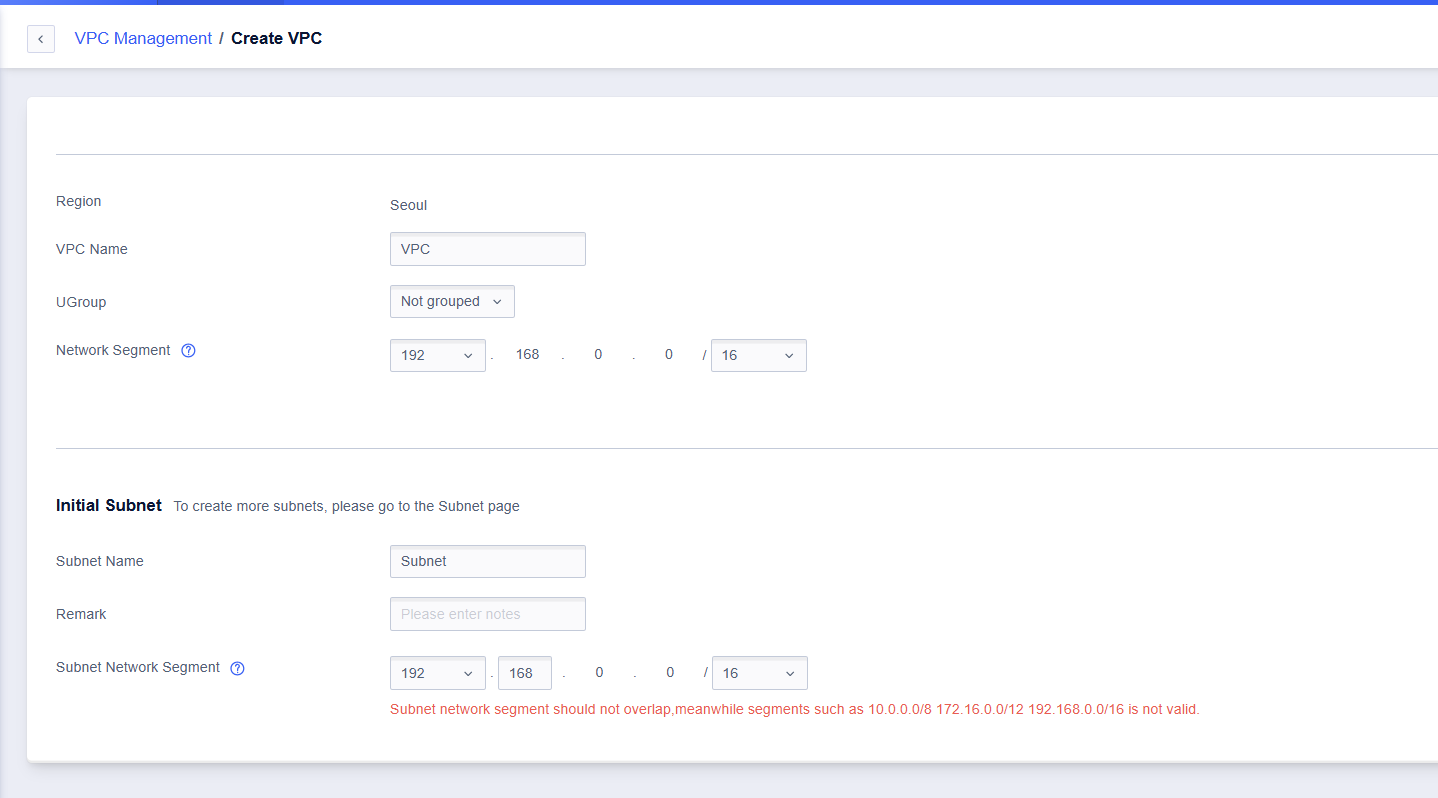
Many independent address segments can exist within a VPC, as long as there is no overlapping of addresses.
## Add Network Segment
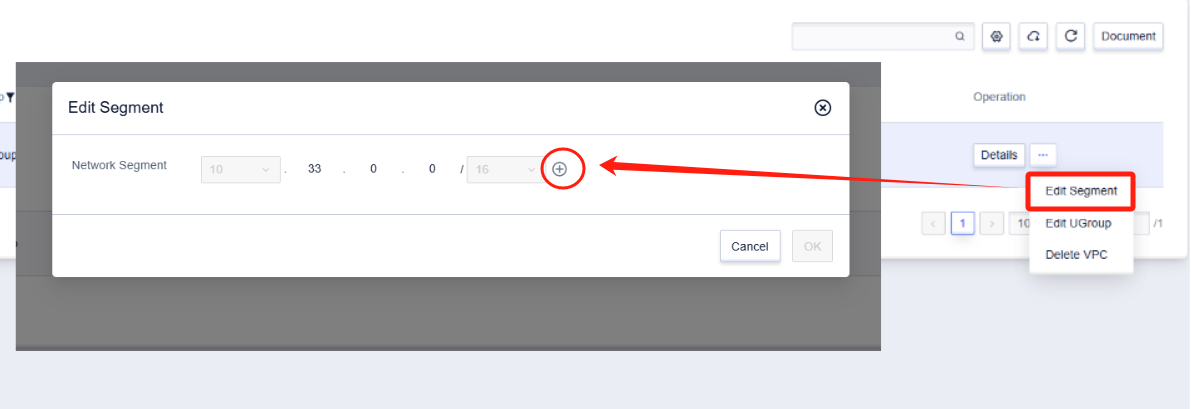
After the VPC is created, multiple non-overlapping network segments can be added at any time.
Click the "Add Network Segment" button in the "VPC" tab.
## View VPC Details
Click the "Details" button in the "VPC" tab to enter the details page of a VPC.
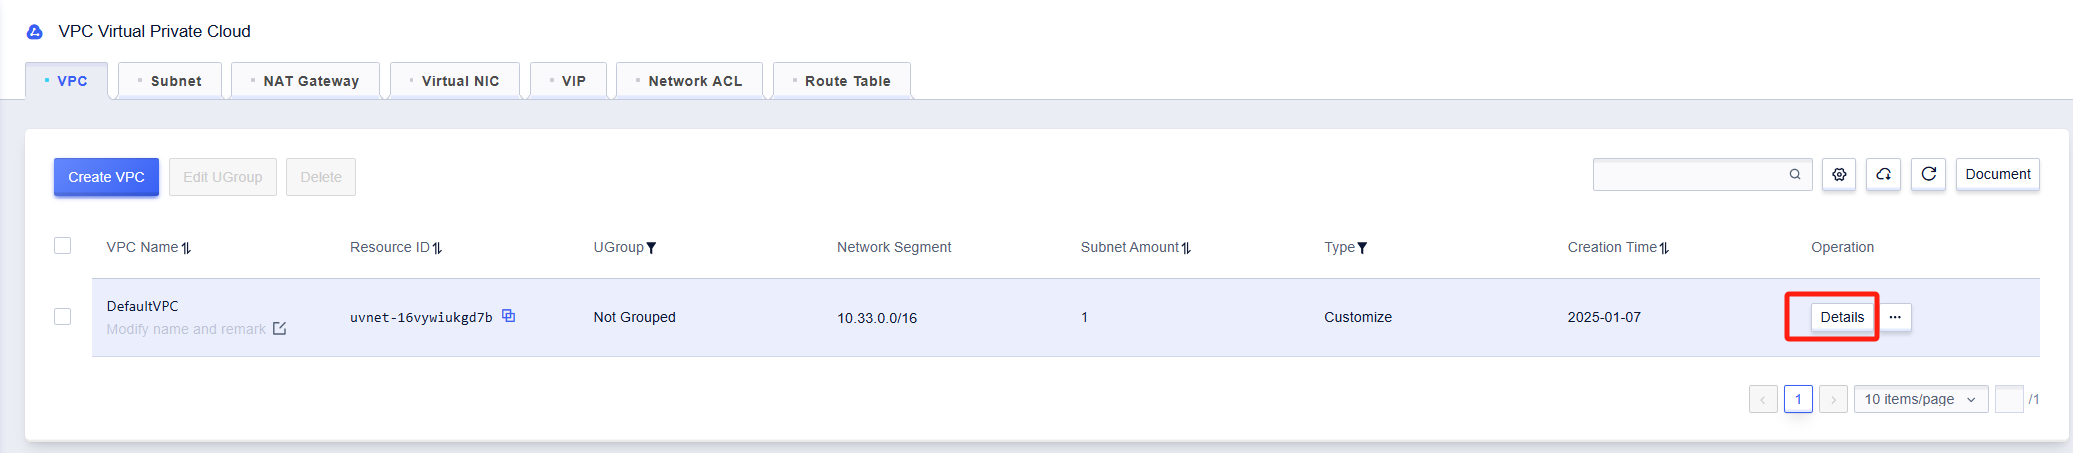
On the details page, you can see basic information of the VPC such as the VPC name, resource id, remark, business group, subnet number, and network segment.

## Delete VPC
In the VPC list, select the VPC to be deleted and click the "Delete" button.
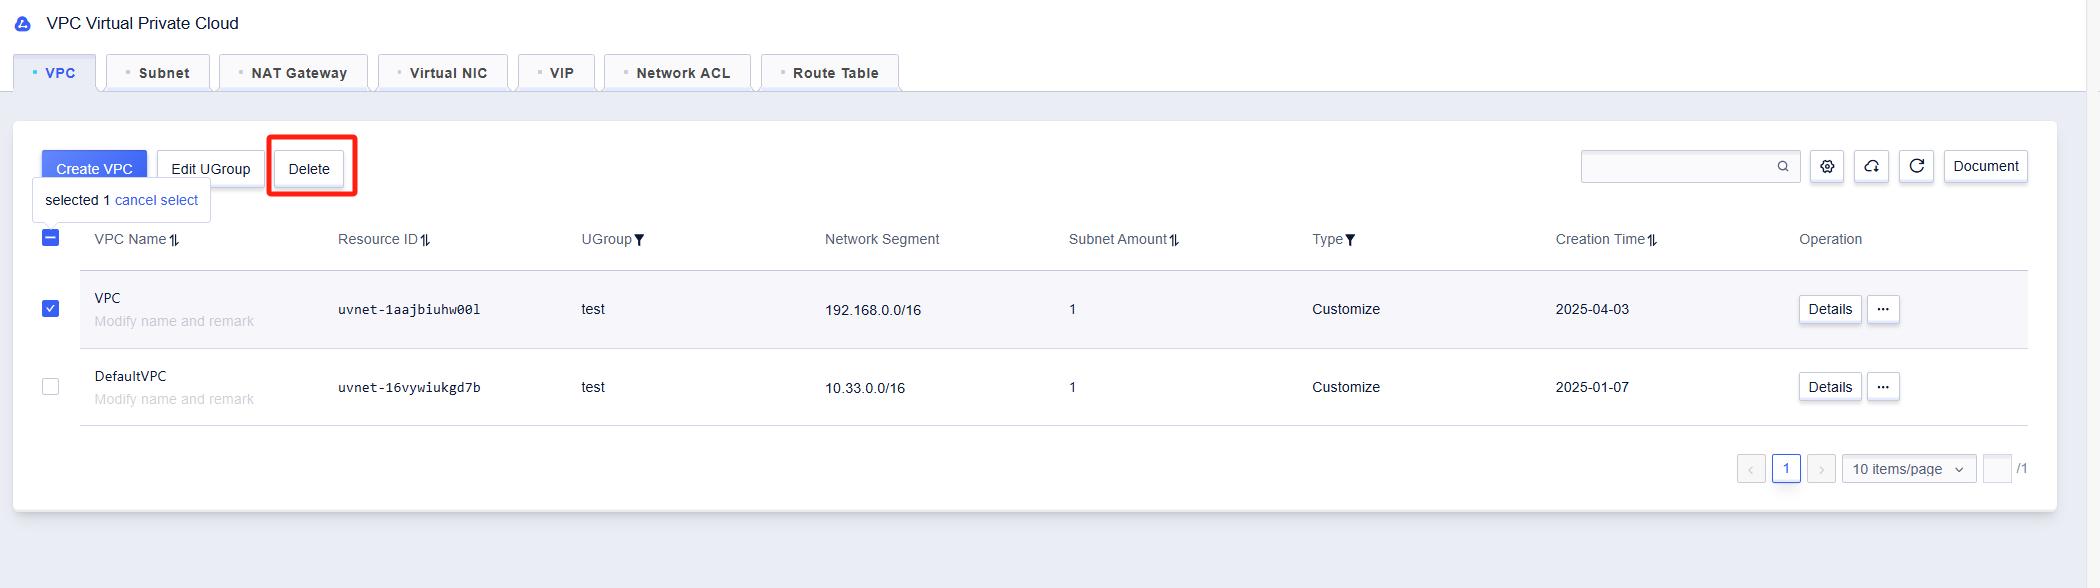
In the popped-up "Delete VPC" dialog box, click "OK" to confirm the deletion.
