Security Group Operation Manual
Create a Security Group
Steps of Creating a Security Group
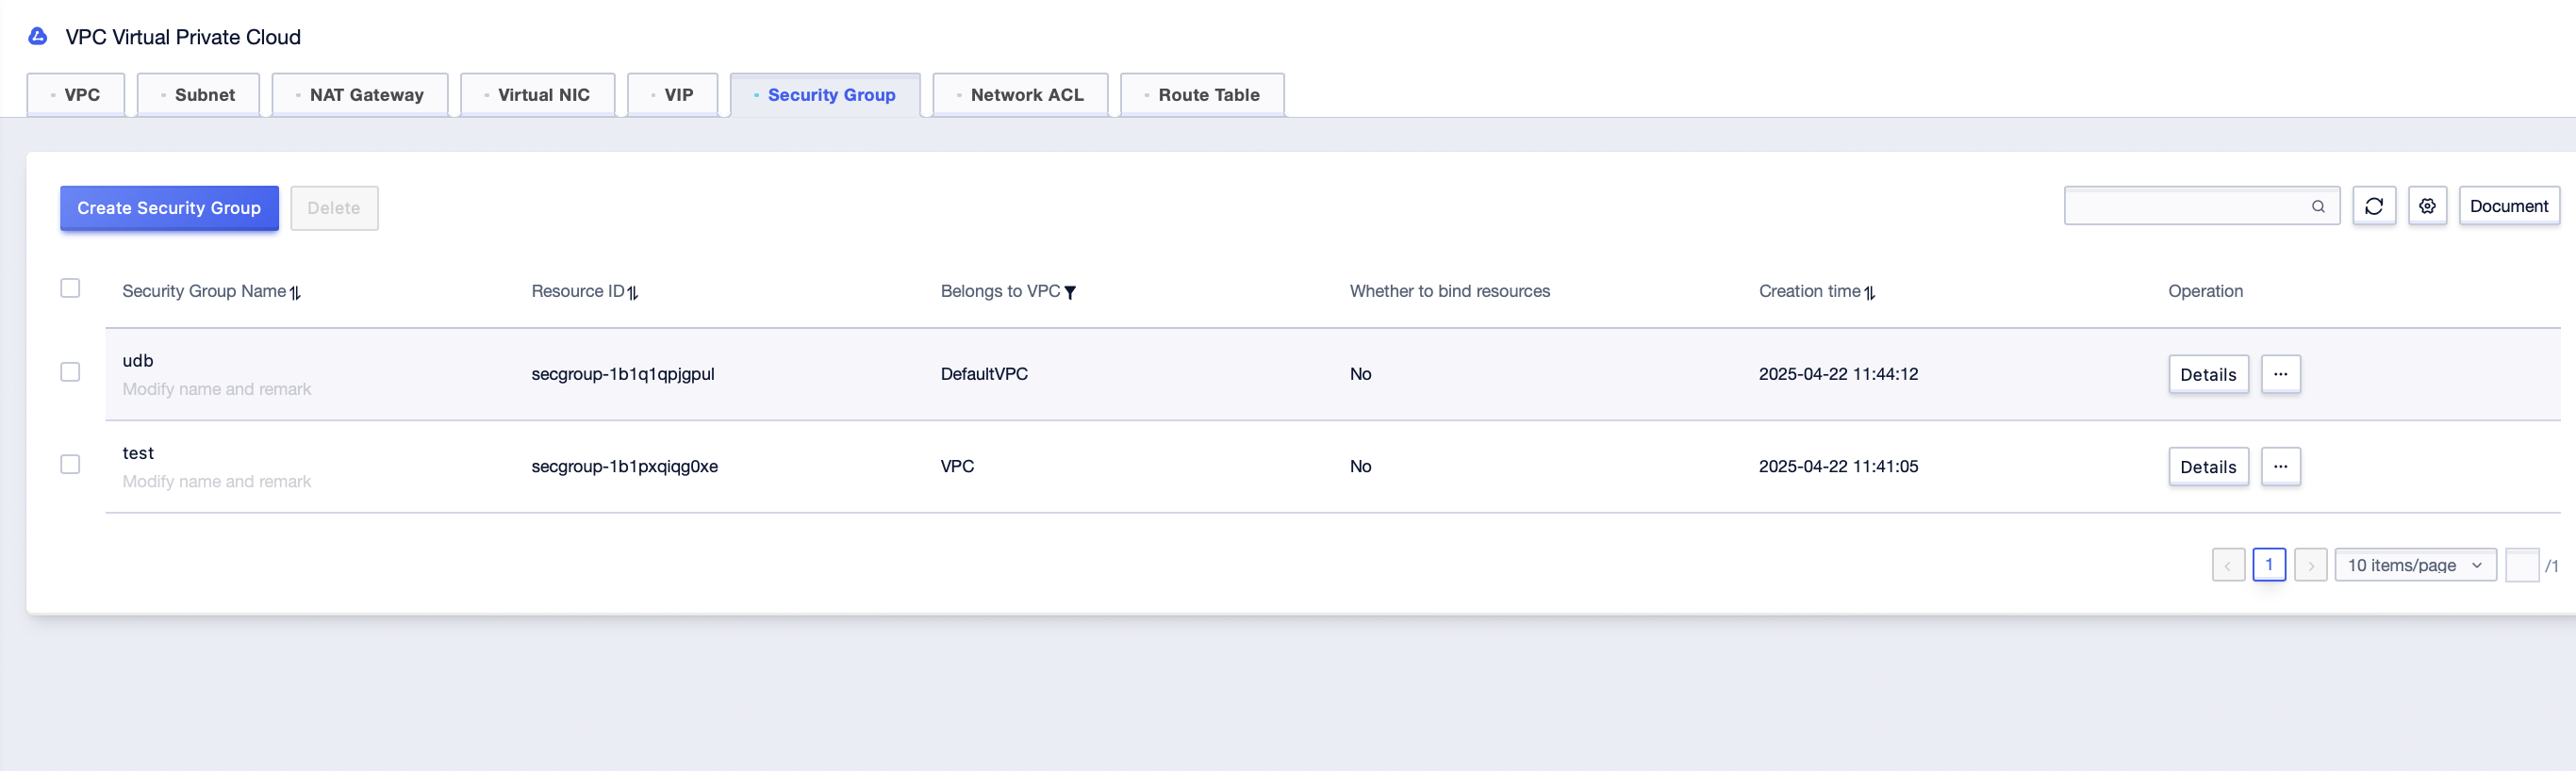
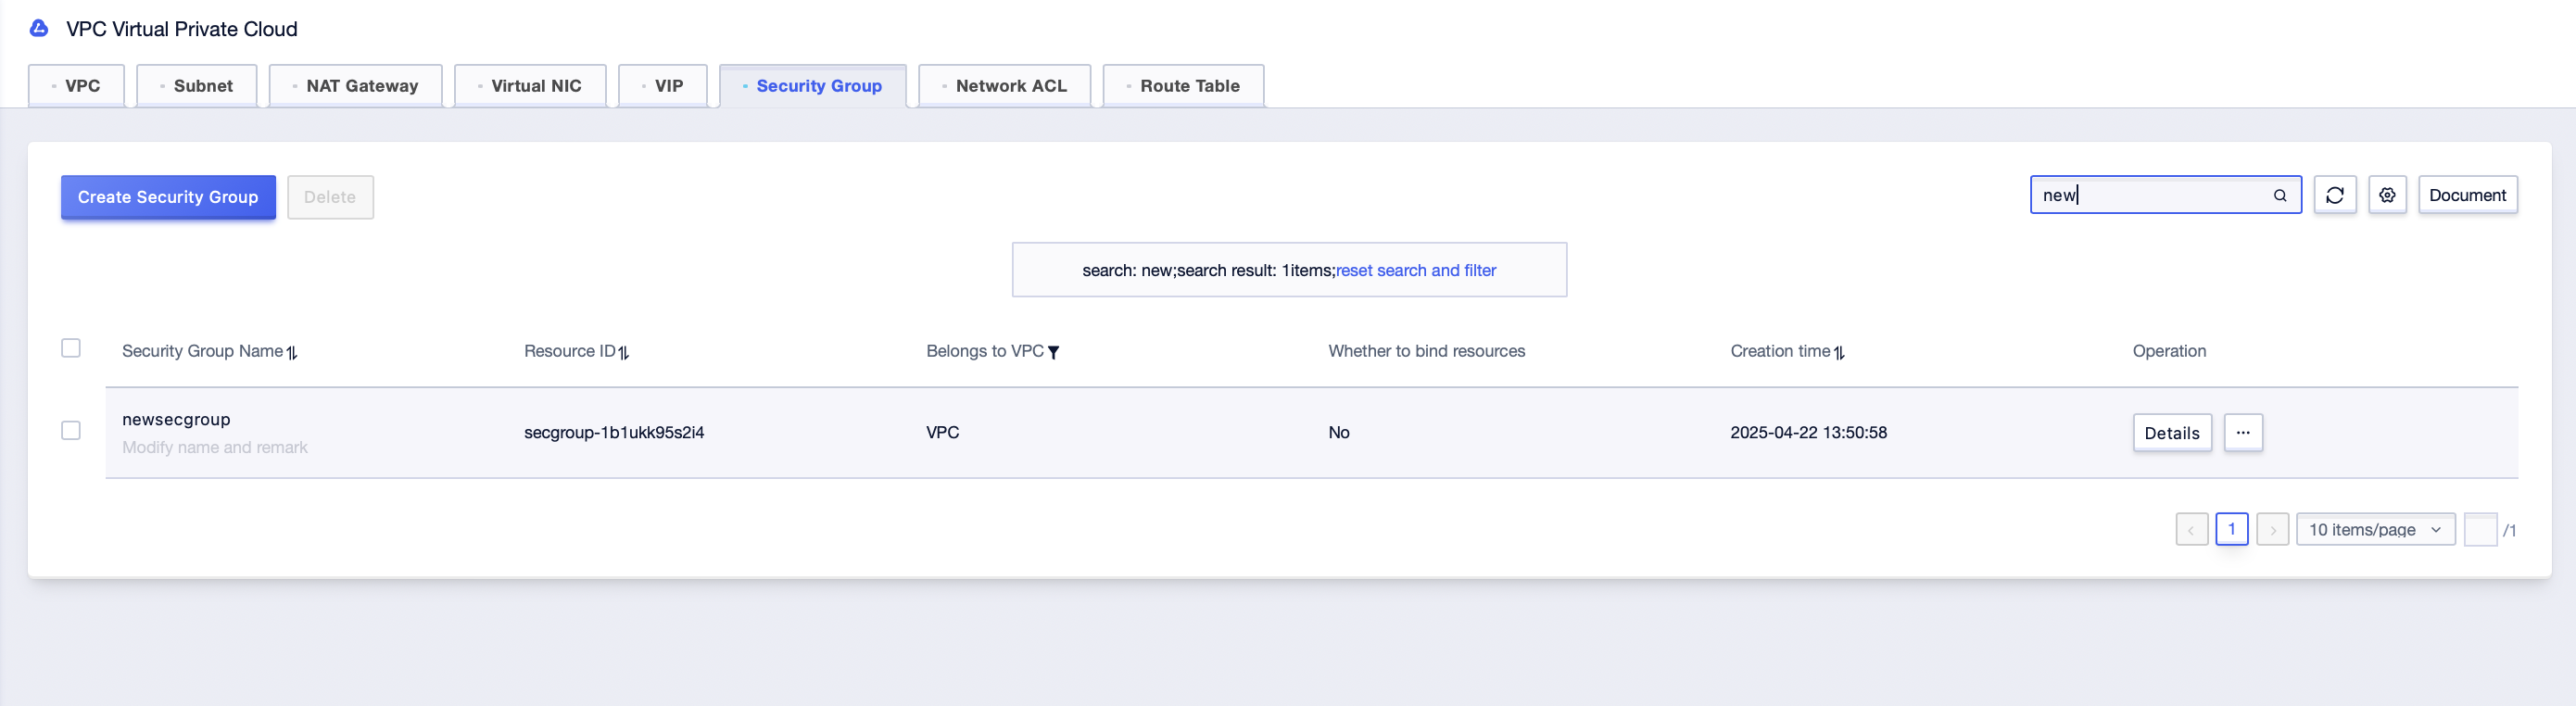
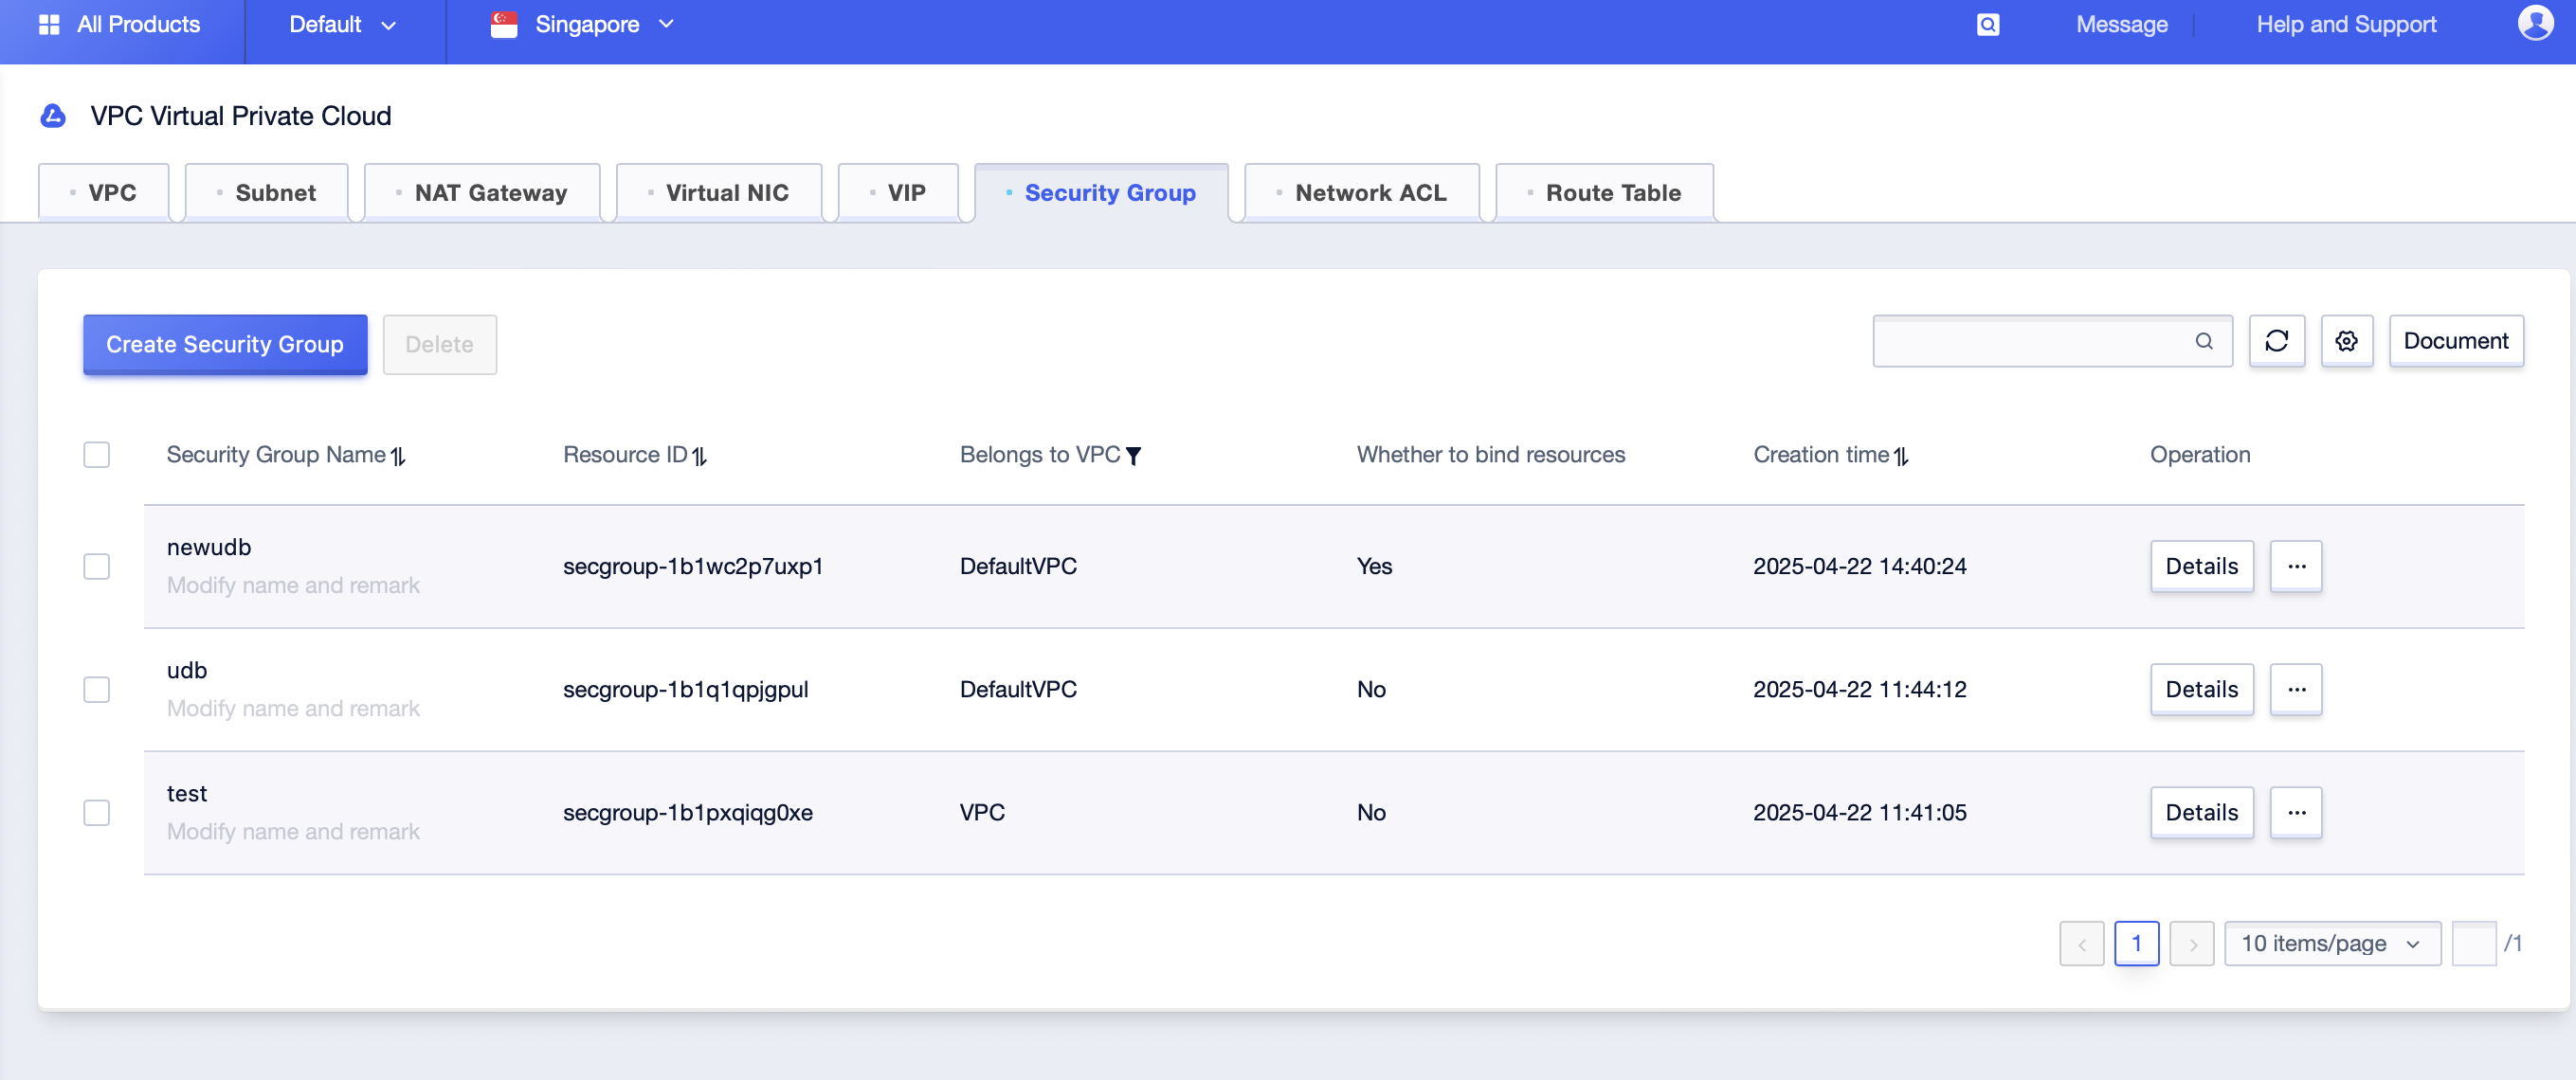
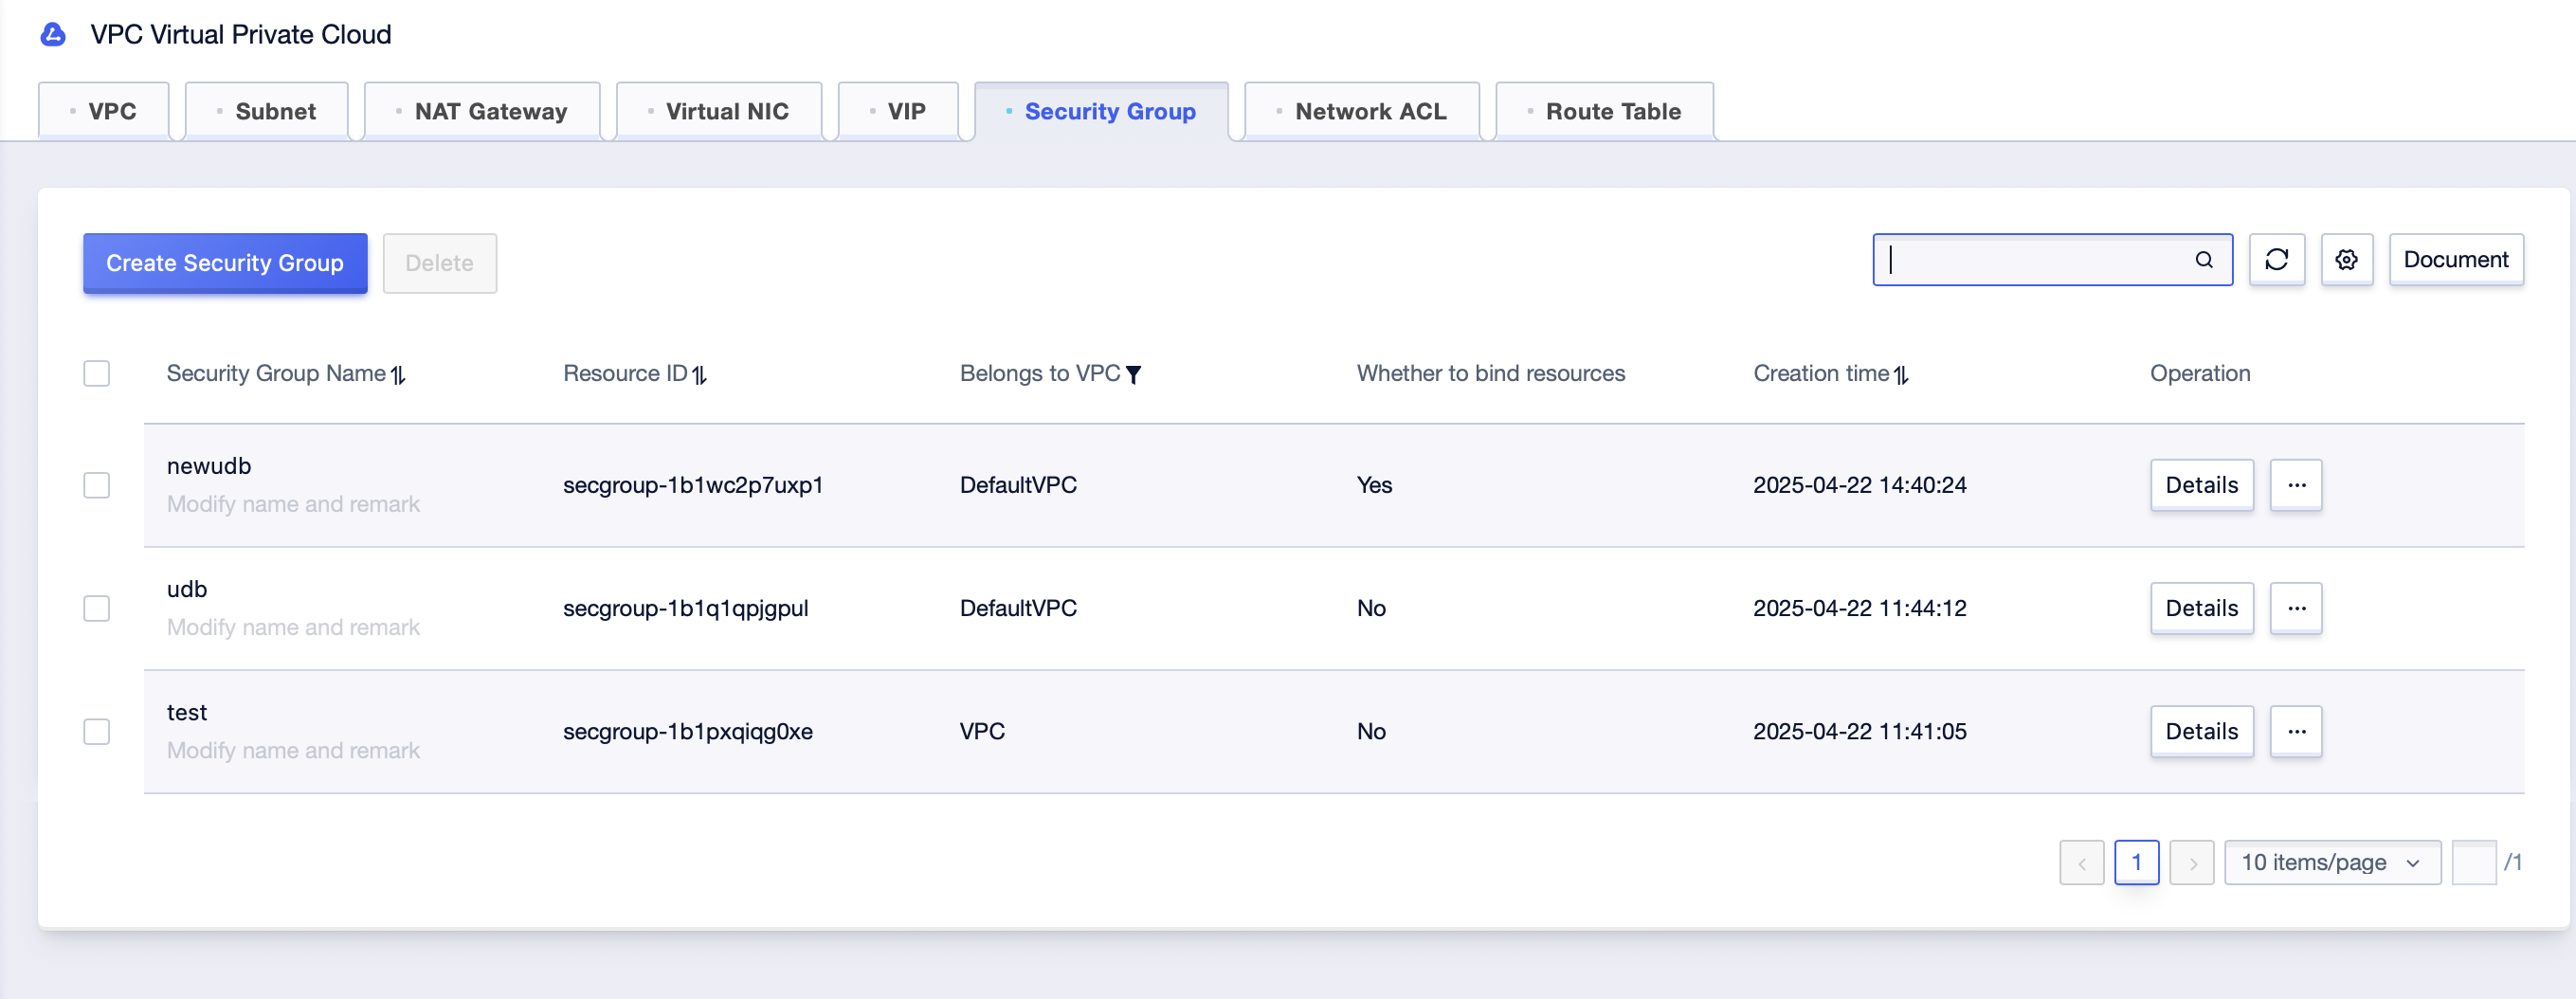
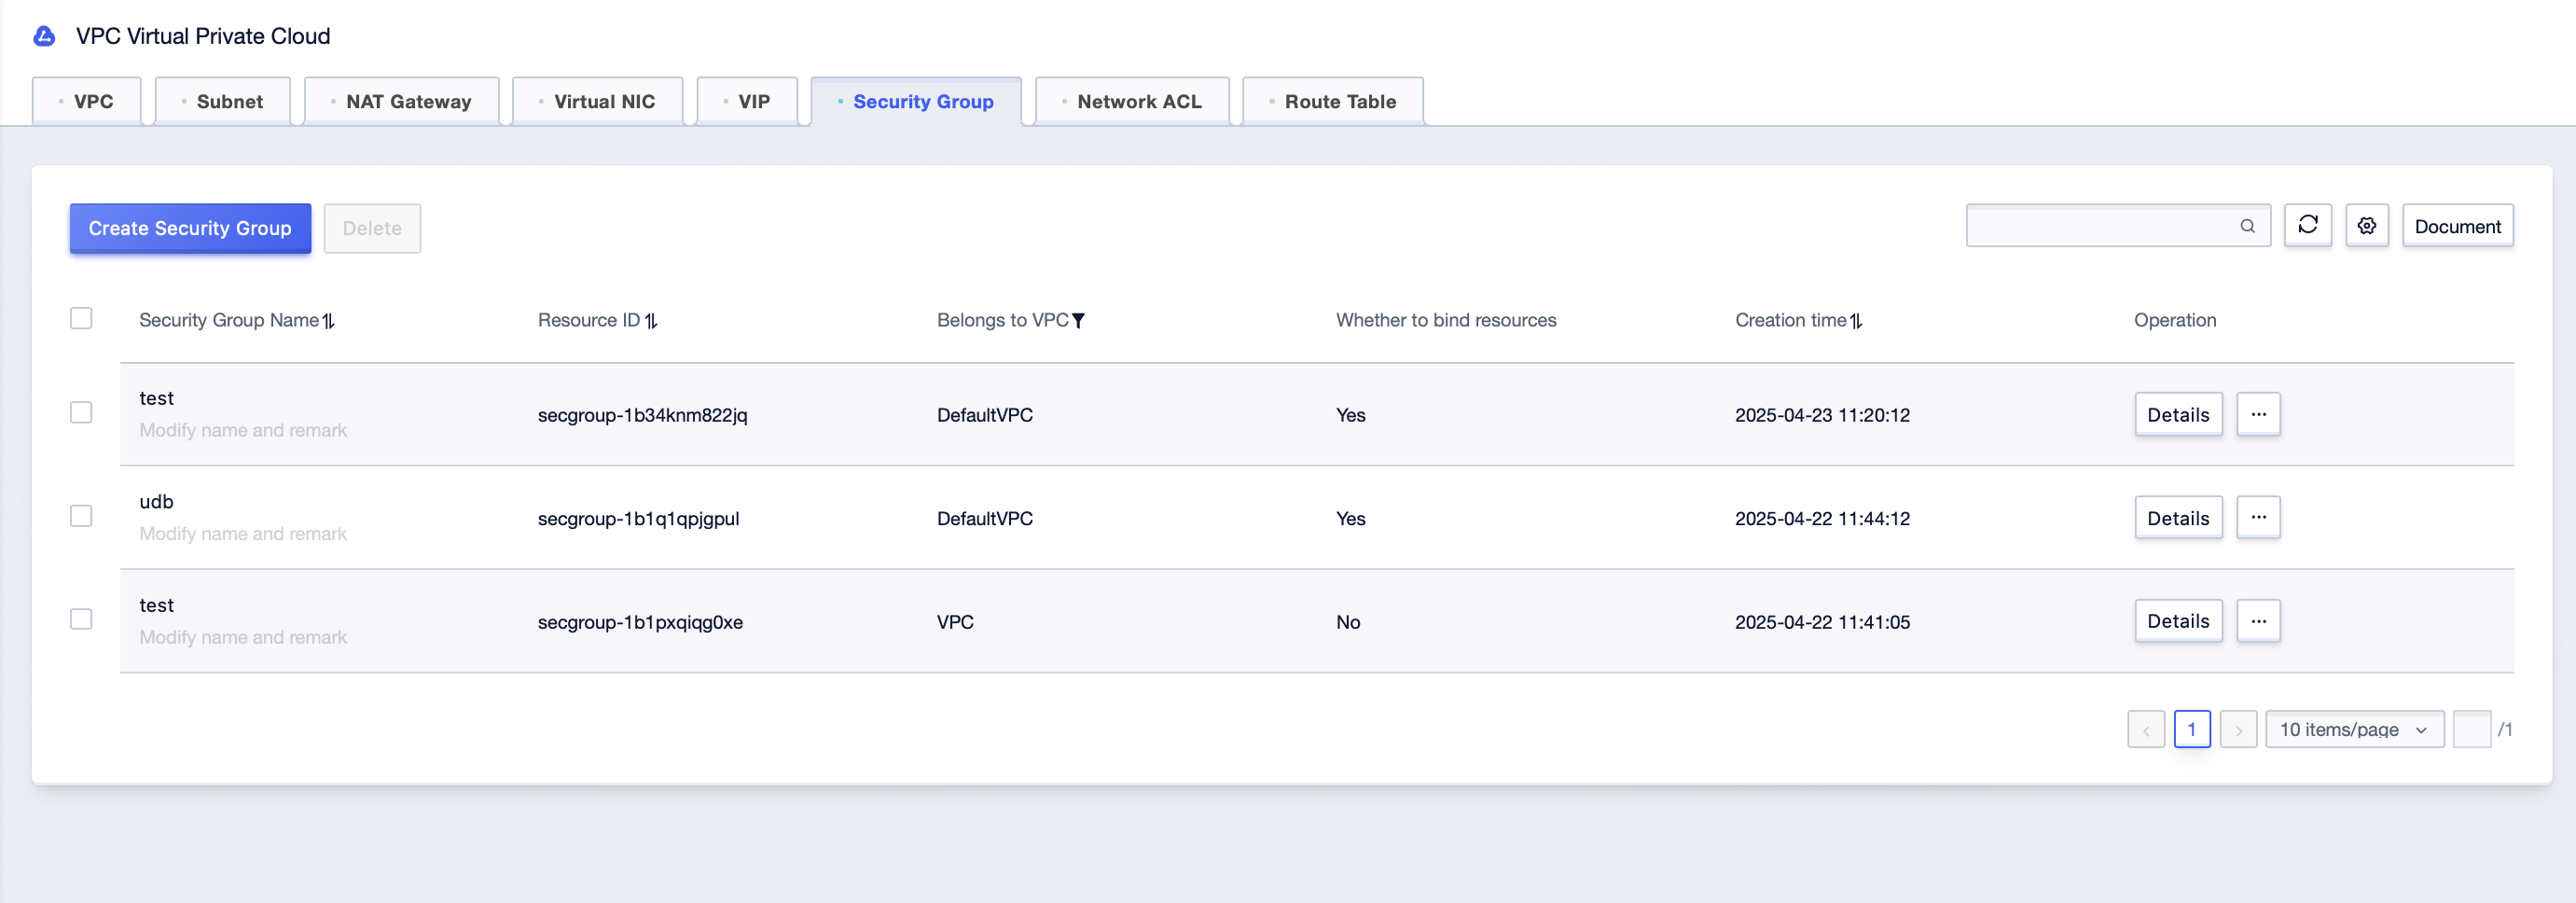
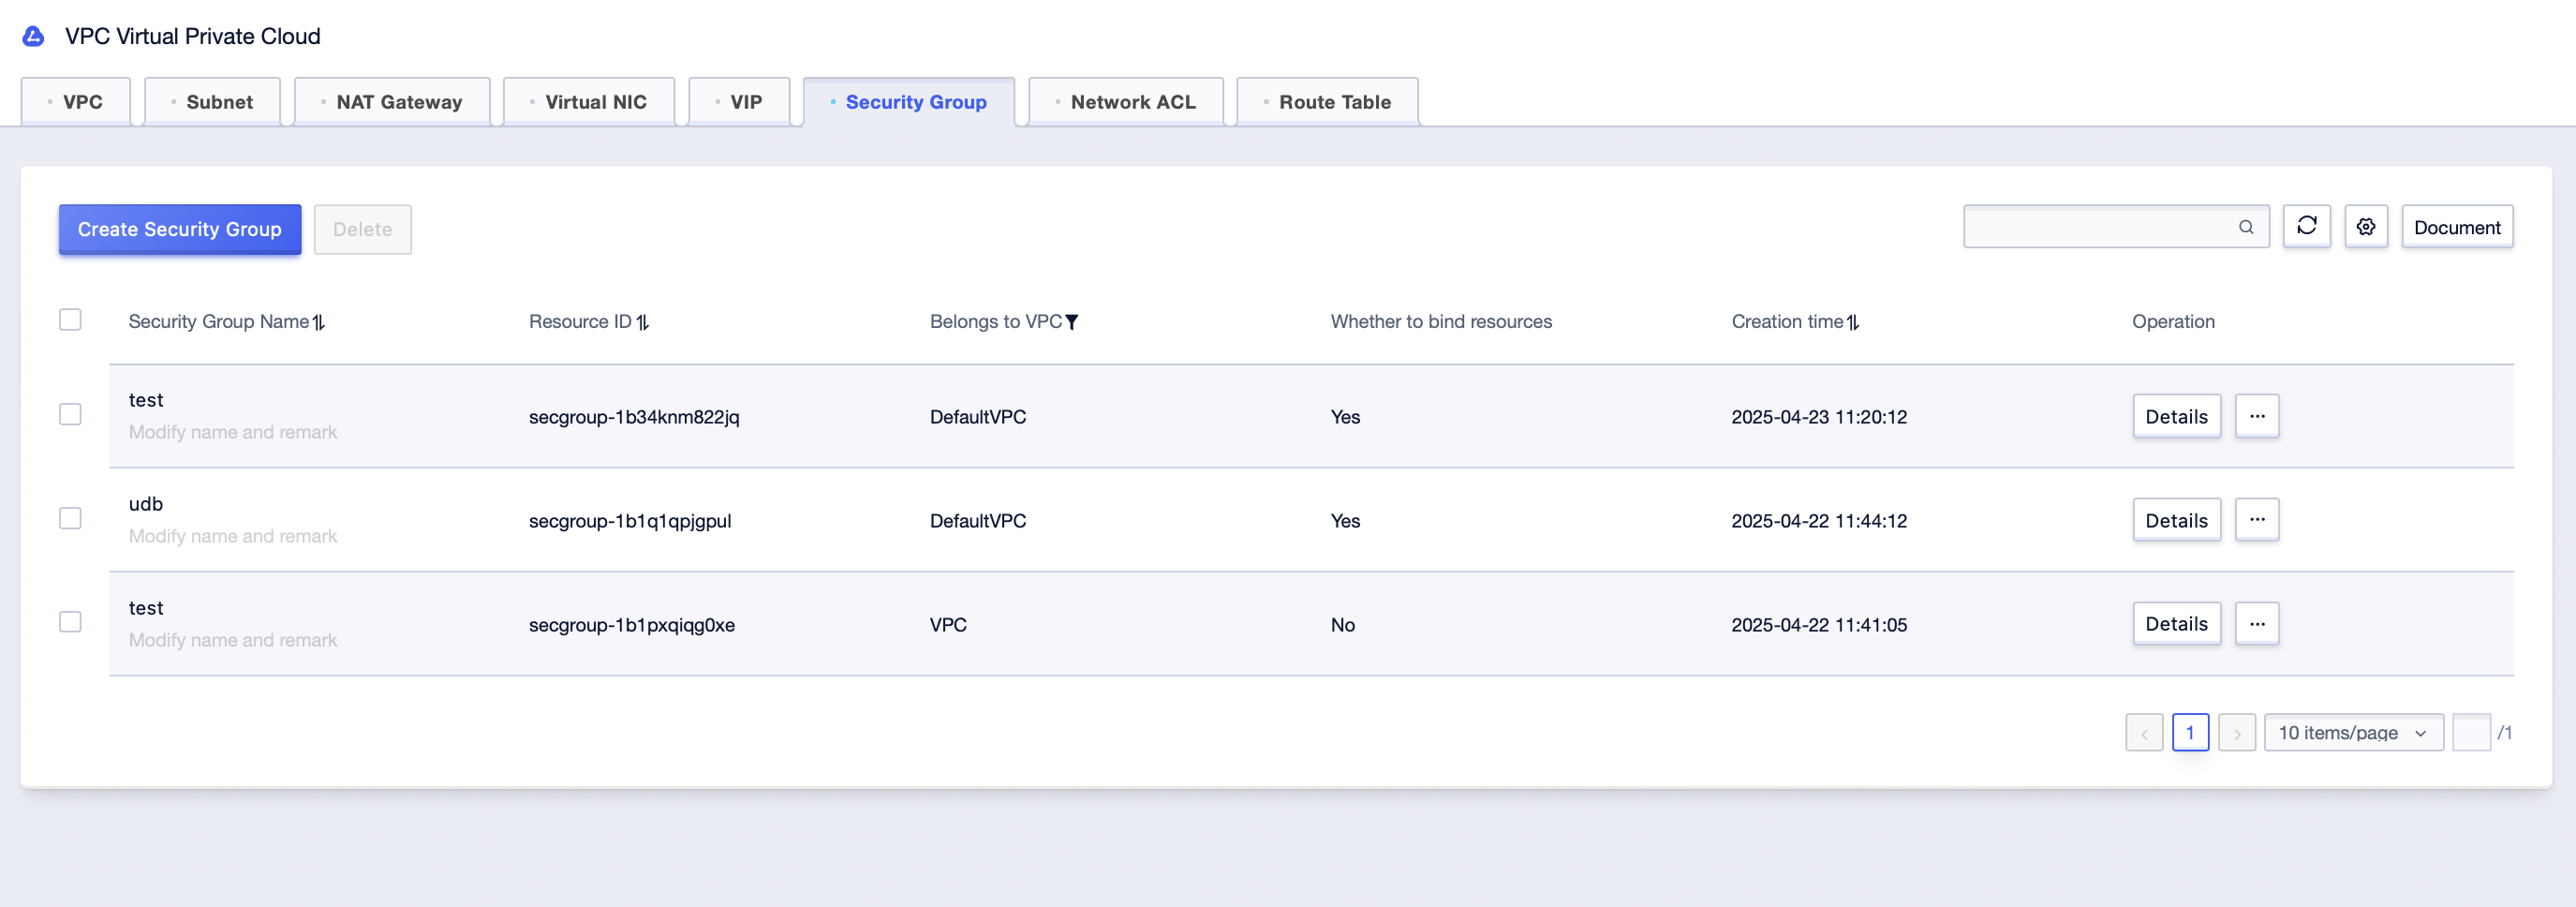
Step1: Select [All Products]-[VPC Virtual Private Cloud]-[Security Group] to enter the security group management interface, as shown in the figure below:
Step2: Click [Create Security Group], enter the “Security Group Name” in the pop-up dialog box, select “Associated VPC” and “Rule Template”;
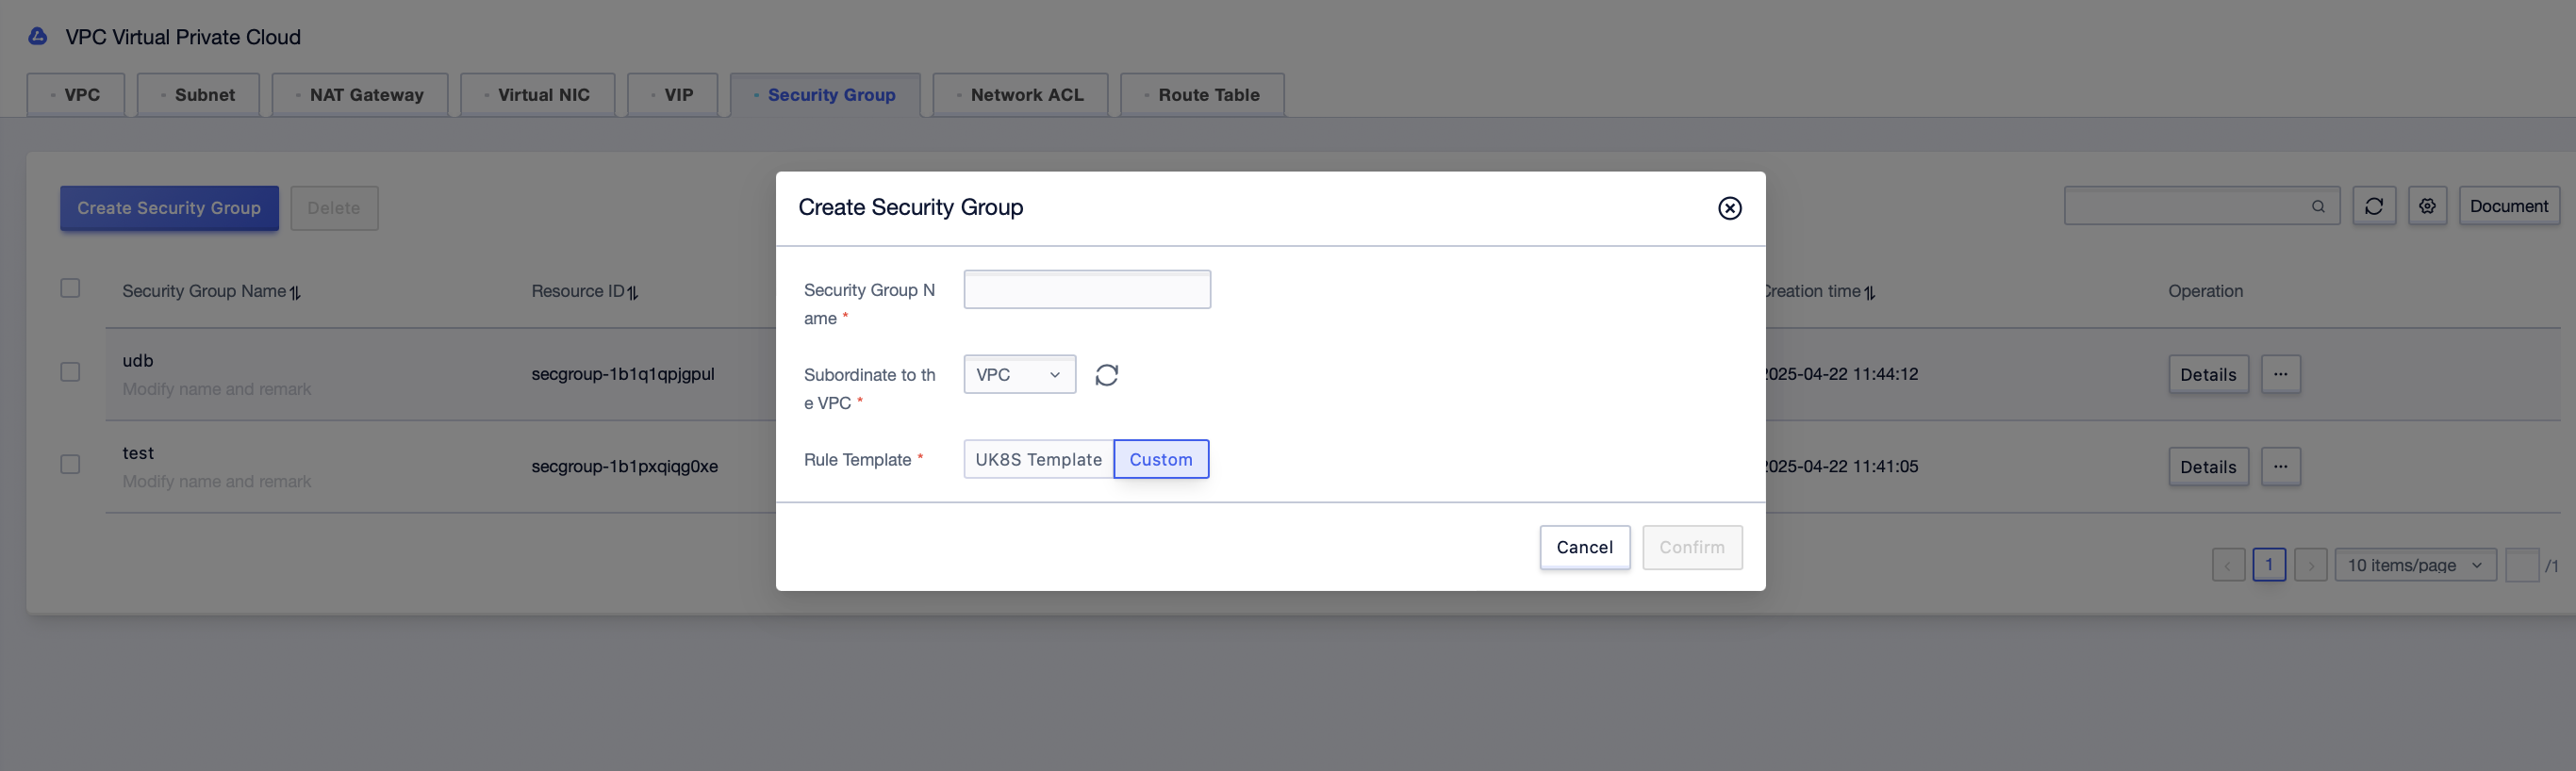
Step3: After filling in the necessary information, click [Confirm] to successfully create a security group.

Parameter Description
| Parameter Name | Parameter Description |
|---|---|
| Security Group Name | The name of the security group (required). The name can only contain Chinese characters, English letters, numbers, ”_”, ”-”, and ”.”, and must not contain spaces. The maximum length is 20 characters. The security group name can be modified, but it is recommended to avoid duplication. |
| Associated VPC | Select the VPC to which the security group belongs (required). |
| Rule Template | Predefined security group rules for quick setup. Available templates include: - General Web Server Template: Opens by default TCP ports 22, 3389, 80, 443, ICMP protocol, and allows all internal network traffic. - None: Customize security group rules manually. |
| Remarks | The description of the security group (optional). The description content must not exceed 100 characters. |
Add Security Group Rules
Steps to Add Rules
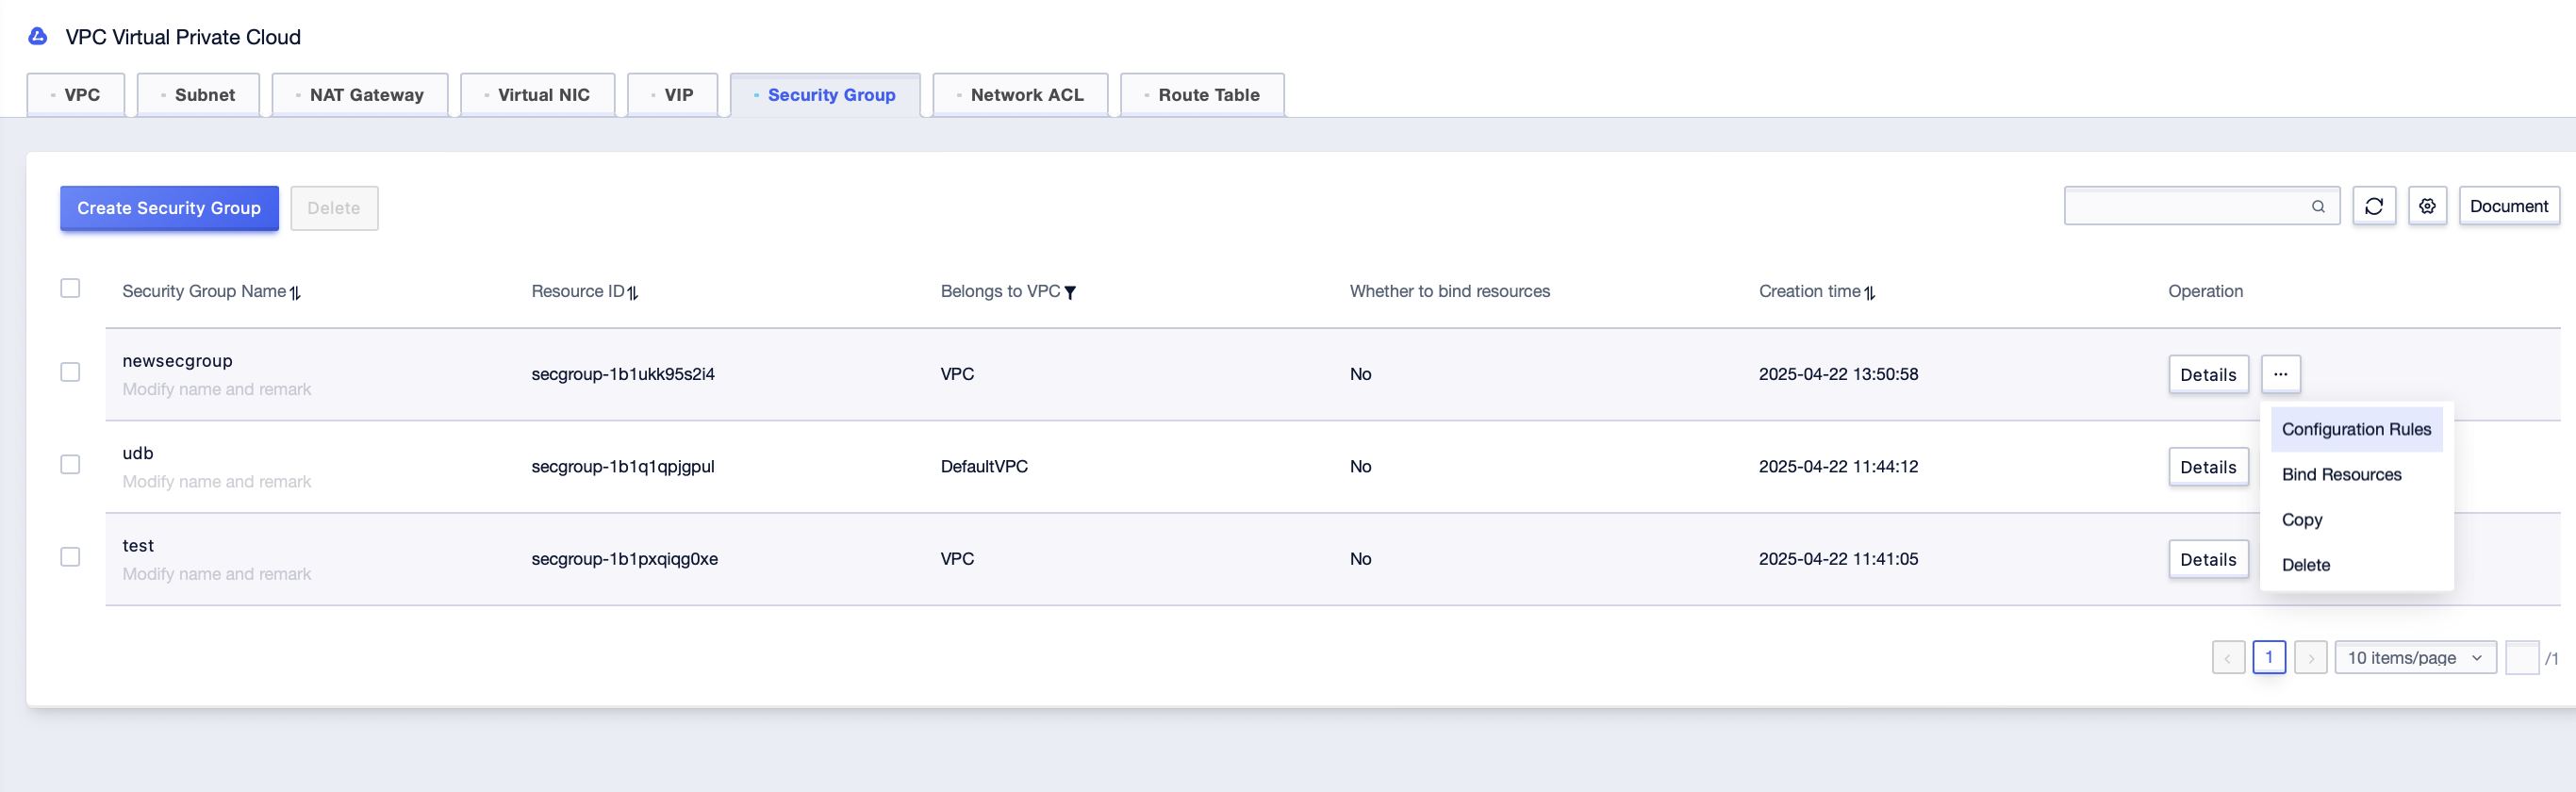
Step1: Select the [Configure Rules] button after the created security group, or click the [Details] button of the created security group;
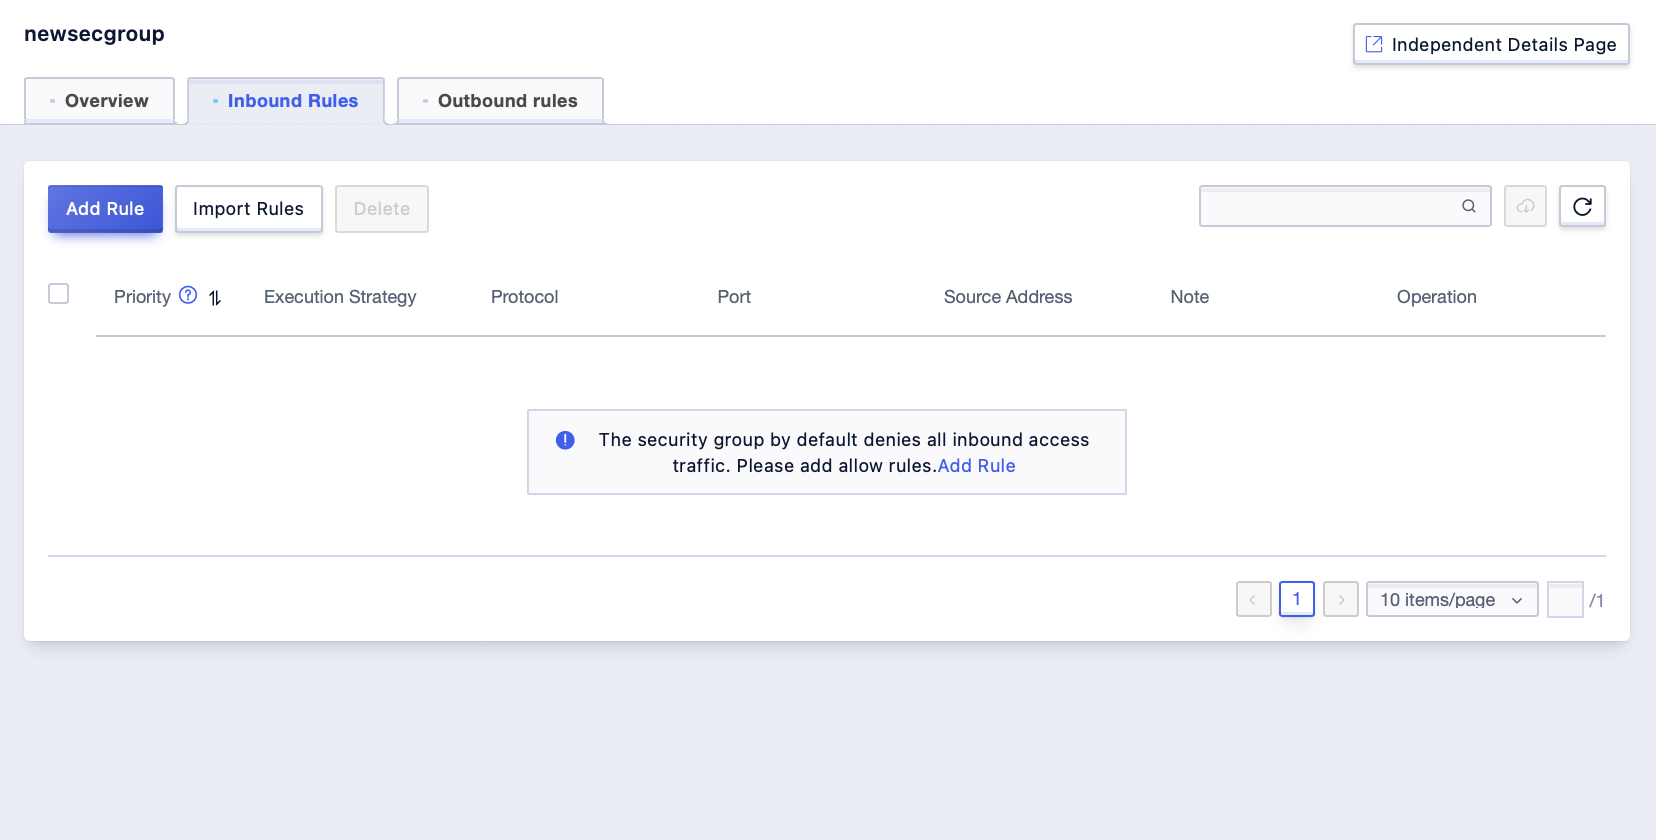
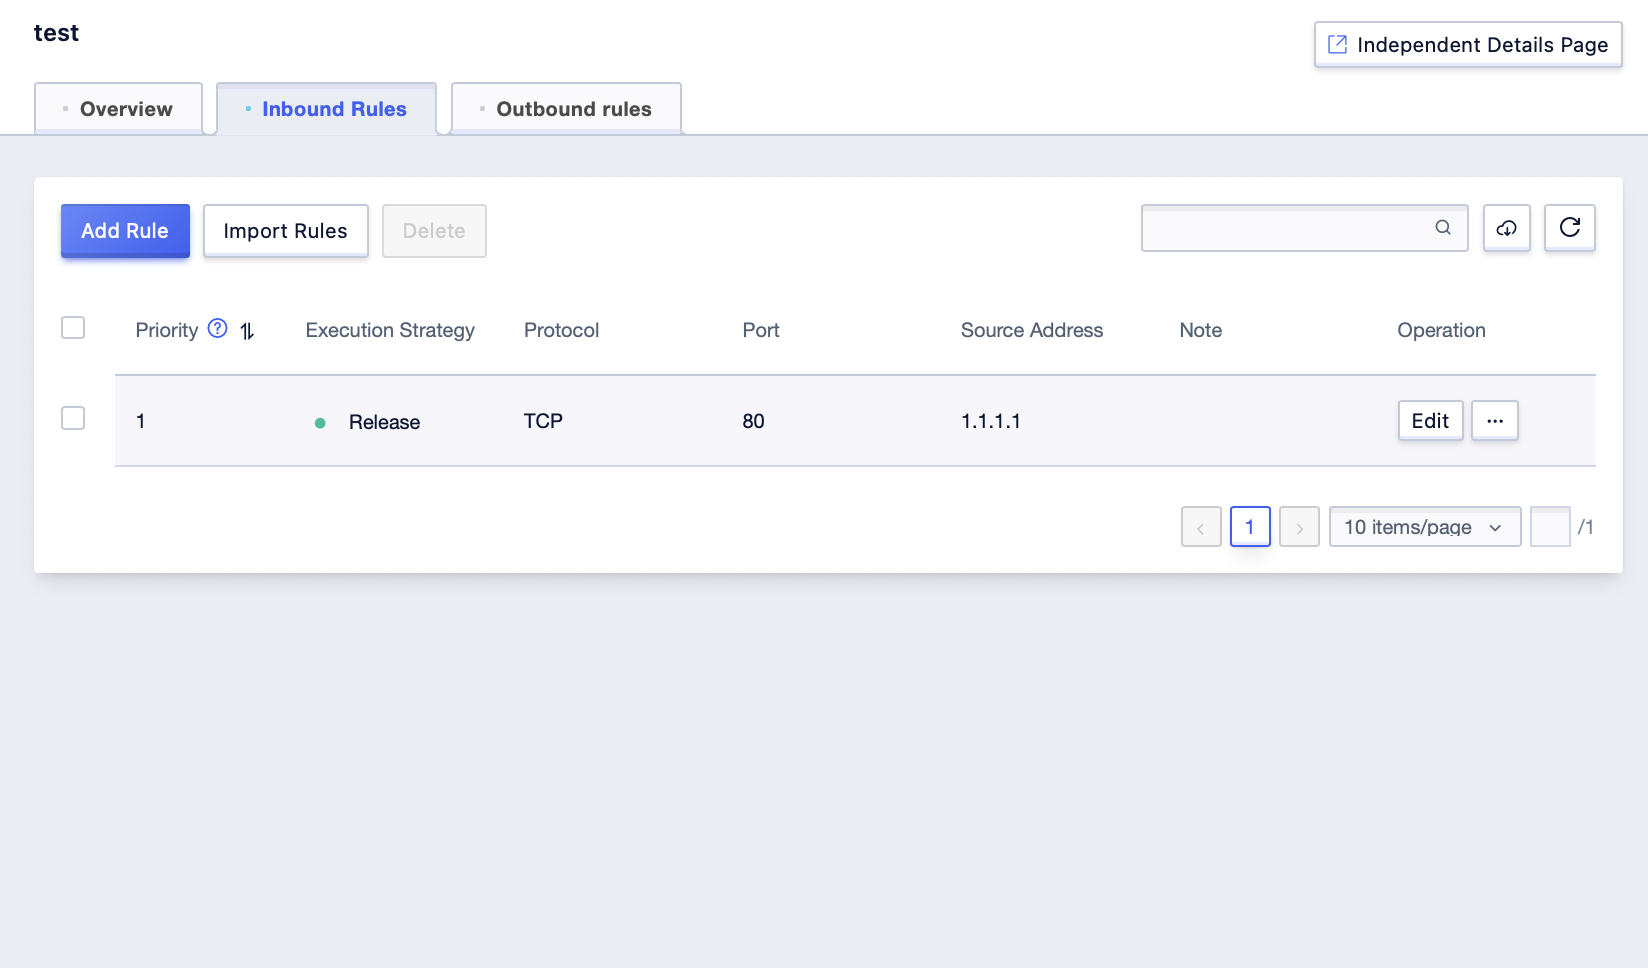
Step2: Click on “Inbound Rules” or “Outbound Rules” on the entered interface;

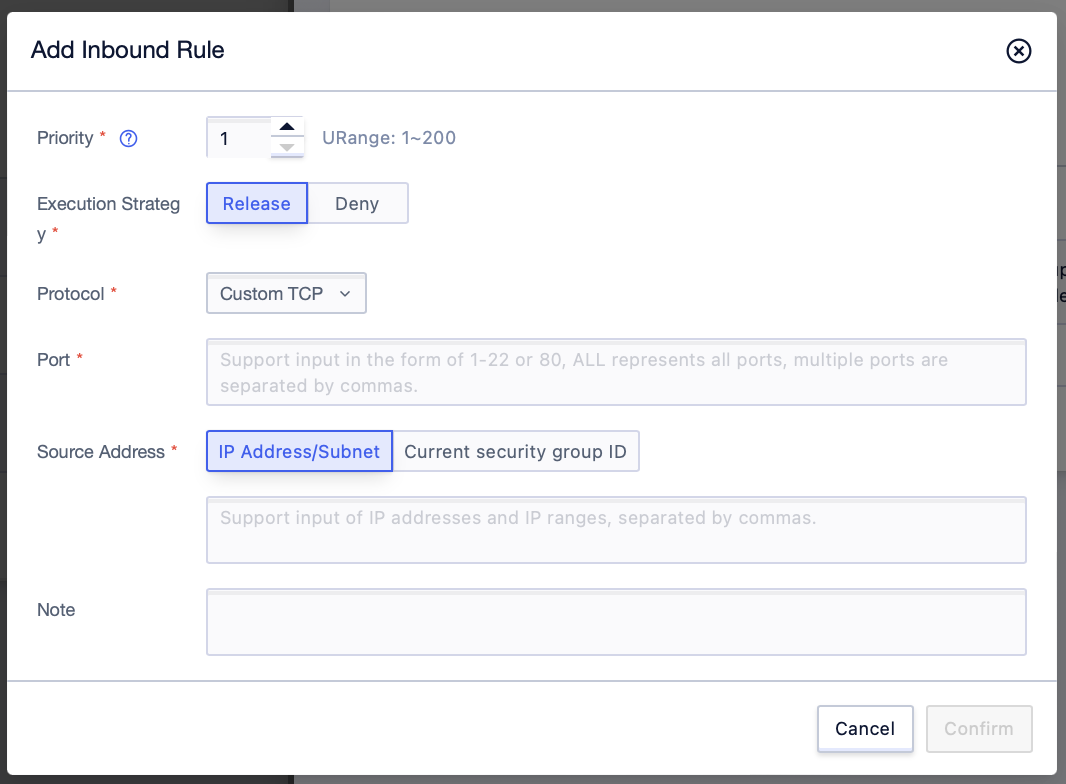
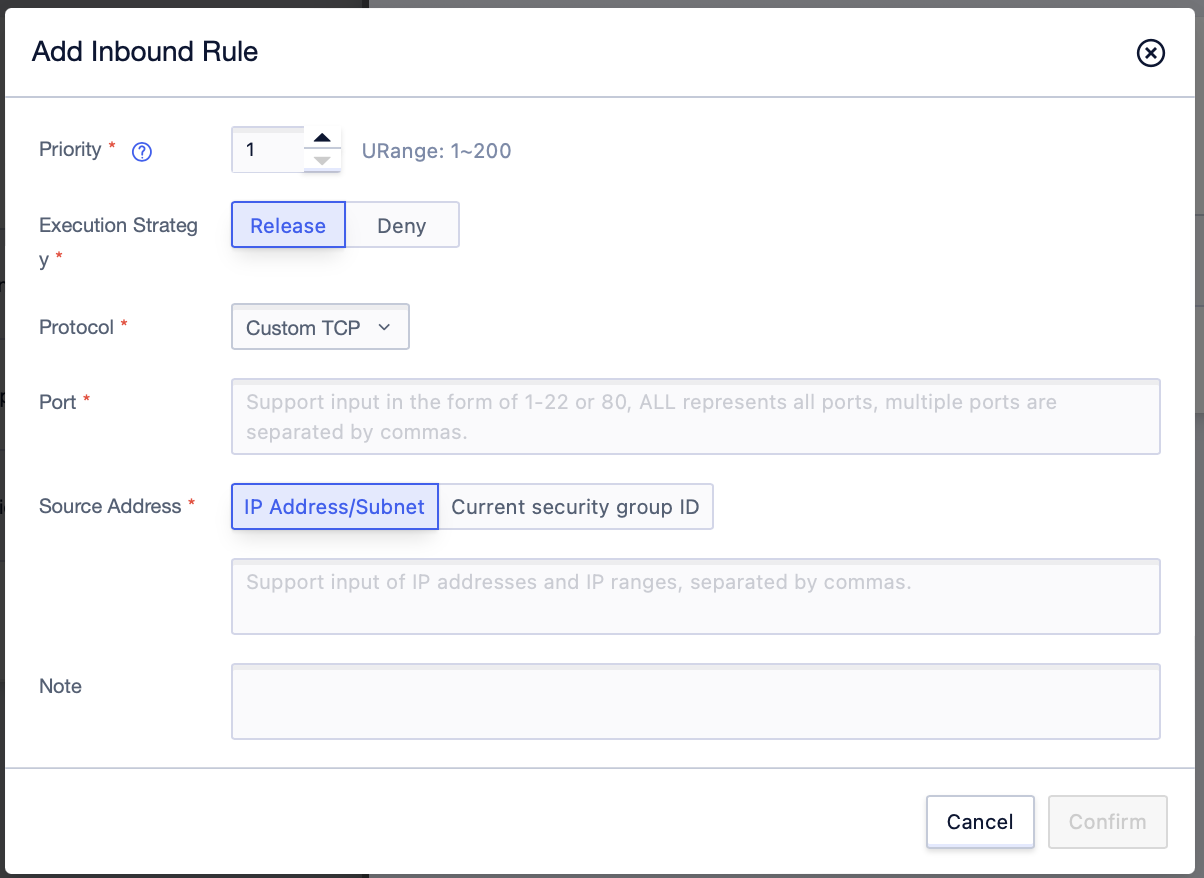
Step3: Click [Add Rules];
Step4: Add the appropriate rules in the pop-up interface, and click [Confirm] to submit when finished. The configuration operation of outbound rules can be done in the same format as that of inbound rules.
Parameter Description
Table 1: Inbound Rule Parameter Description
| Parameter Name | Parameter Description |
|---|---|
| Priority | Priority level of the security group rule. - Valid range: 1-200 (unique values required). - Default: 1 (the highest priority). - Smaller numbers indicate higher priority. |
| Execution Policy | Action policy for the security group rule. |
| Protocol | Network protocol. Supported options: - “All” - “Custom TCP” - “Custom UDP” - “ALL ICMP” - “ALL GRE”. |
| Port | Required for “Custom TCP” or “Custom UDP” protocols. - Continuous ports: Use hyphens (e.g., 22-34, 40-42).- Non-continuous ports: Use commas (e.g., 80, 443). |
| Source Address | Source address can be: - IP address - Security group ID (auto-filled if selected) - IP address range. If the security group ID is selected, self security group ID is selected by default. |
| Remarks | Description of the security group rule (optional). - Maximum length: 100 characters. |
Table 2: Outbound Rule Parameter Description
| Parameter Name | Parameter Description |
|---|---|
| Priority | Priority level of the security group rule. - Valid range: 1-200 (unique values required). - Default: 1 (highest priority). - Smaller numbers indicate higher priority. |
| Execution Policy | Action policy for the security group rule (e.g., Allow or Deny). |
| Protocol | Network protocol. Supported options: - “All” - “Custom TCP” - “Custom UDP” - “ALL ICMP” - “ALL GRE”. |
| Port | Required for “Custom TCP” or “Custom UDP” protocols. - Continuous ports: Use hyphens (e.g., 22-34, 40-42).- Non-continuous ports: Use commas (e.g., 80, 443). |
| Target Address | Target address can be: - IP address - Security group ID (auto-filled if selected) - IP address range. If the security group ID is selected, self security group ID is selected by default. |
| Remarks | Description of the security group rule (optional). - Maximum length: 100 characters. |
Bind a Security Group to an Instance
Binding an Instance in Security Group Management Interface
Step1: Click [All Products]-[VPC Virtual Private Cloud]-[Security Group], select the corresponding “Project Name” and “Availability Zone” under the account, and enter the security group management interface;
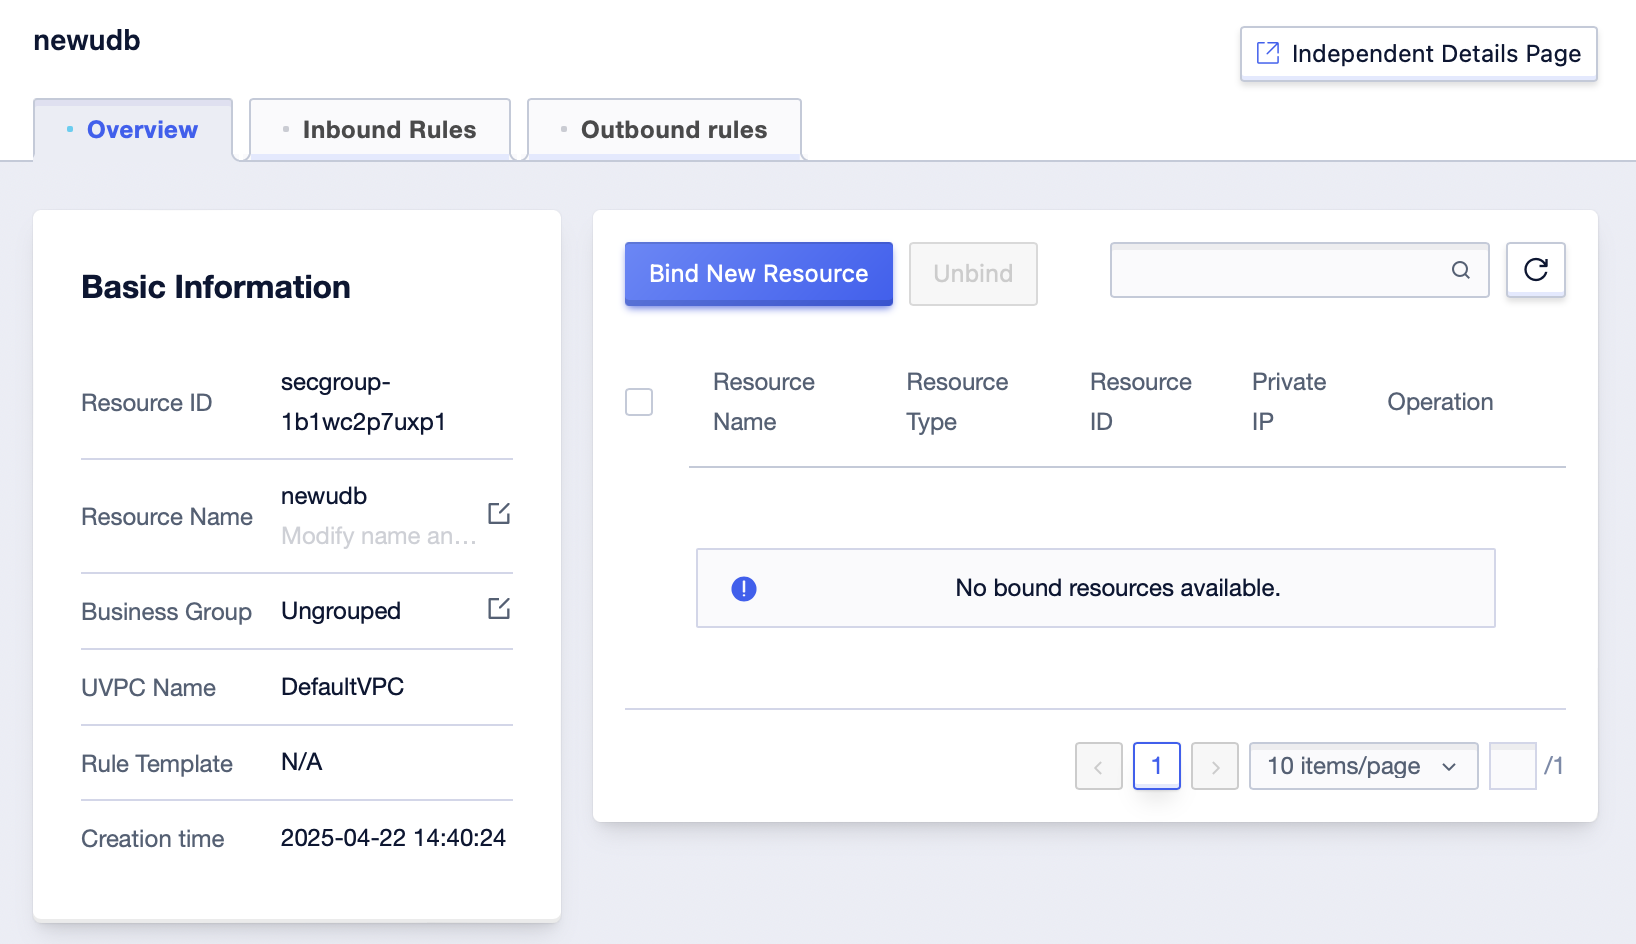
Step2: In the security group management interface, click the [Bind Resources] button, or click the [Details] button;
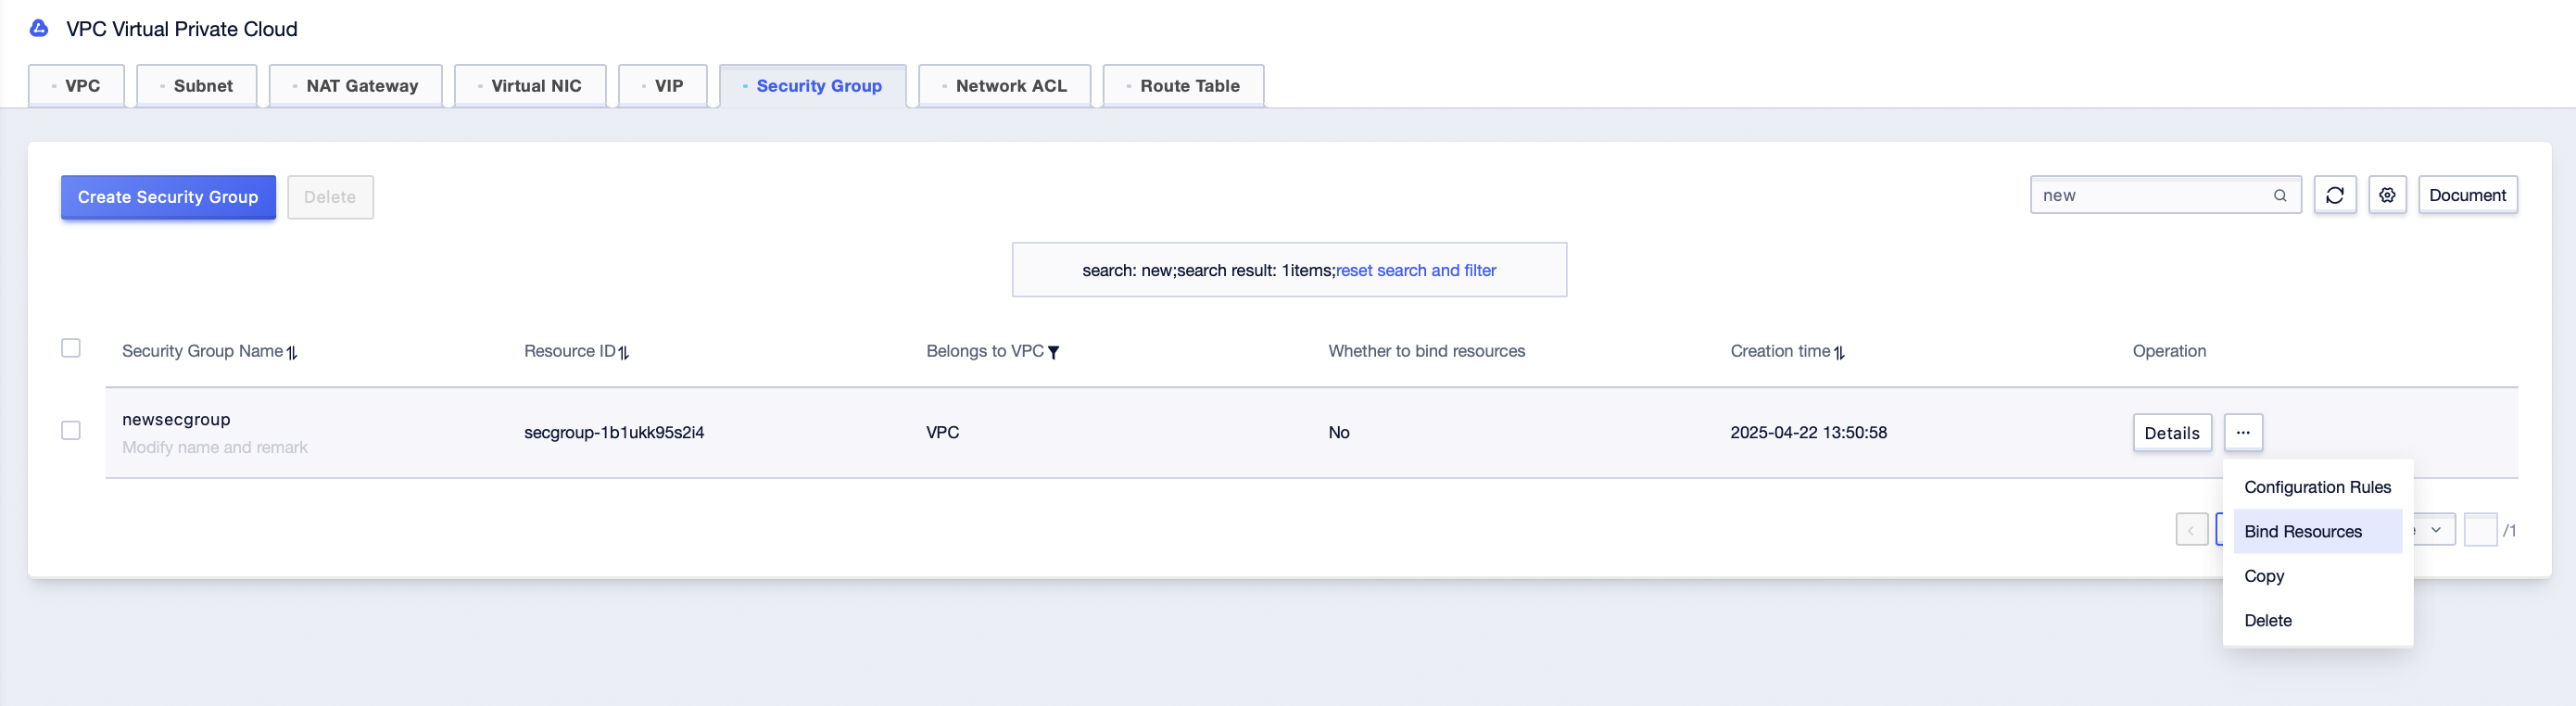
Step3: In the pop-up interface, select the “Resource Type” to be bound, select the resources objects to be bound at the same time, confirm them and submit;
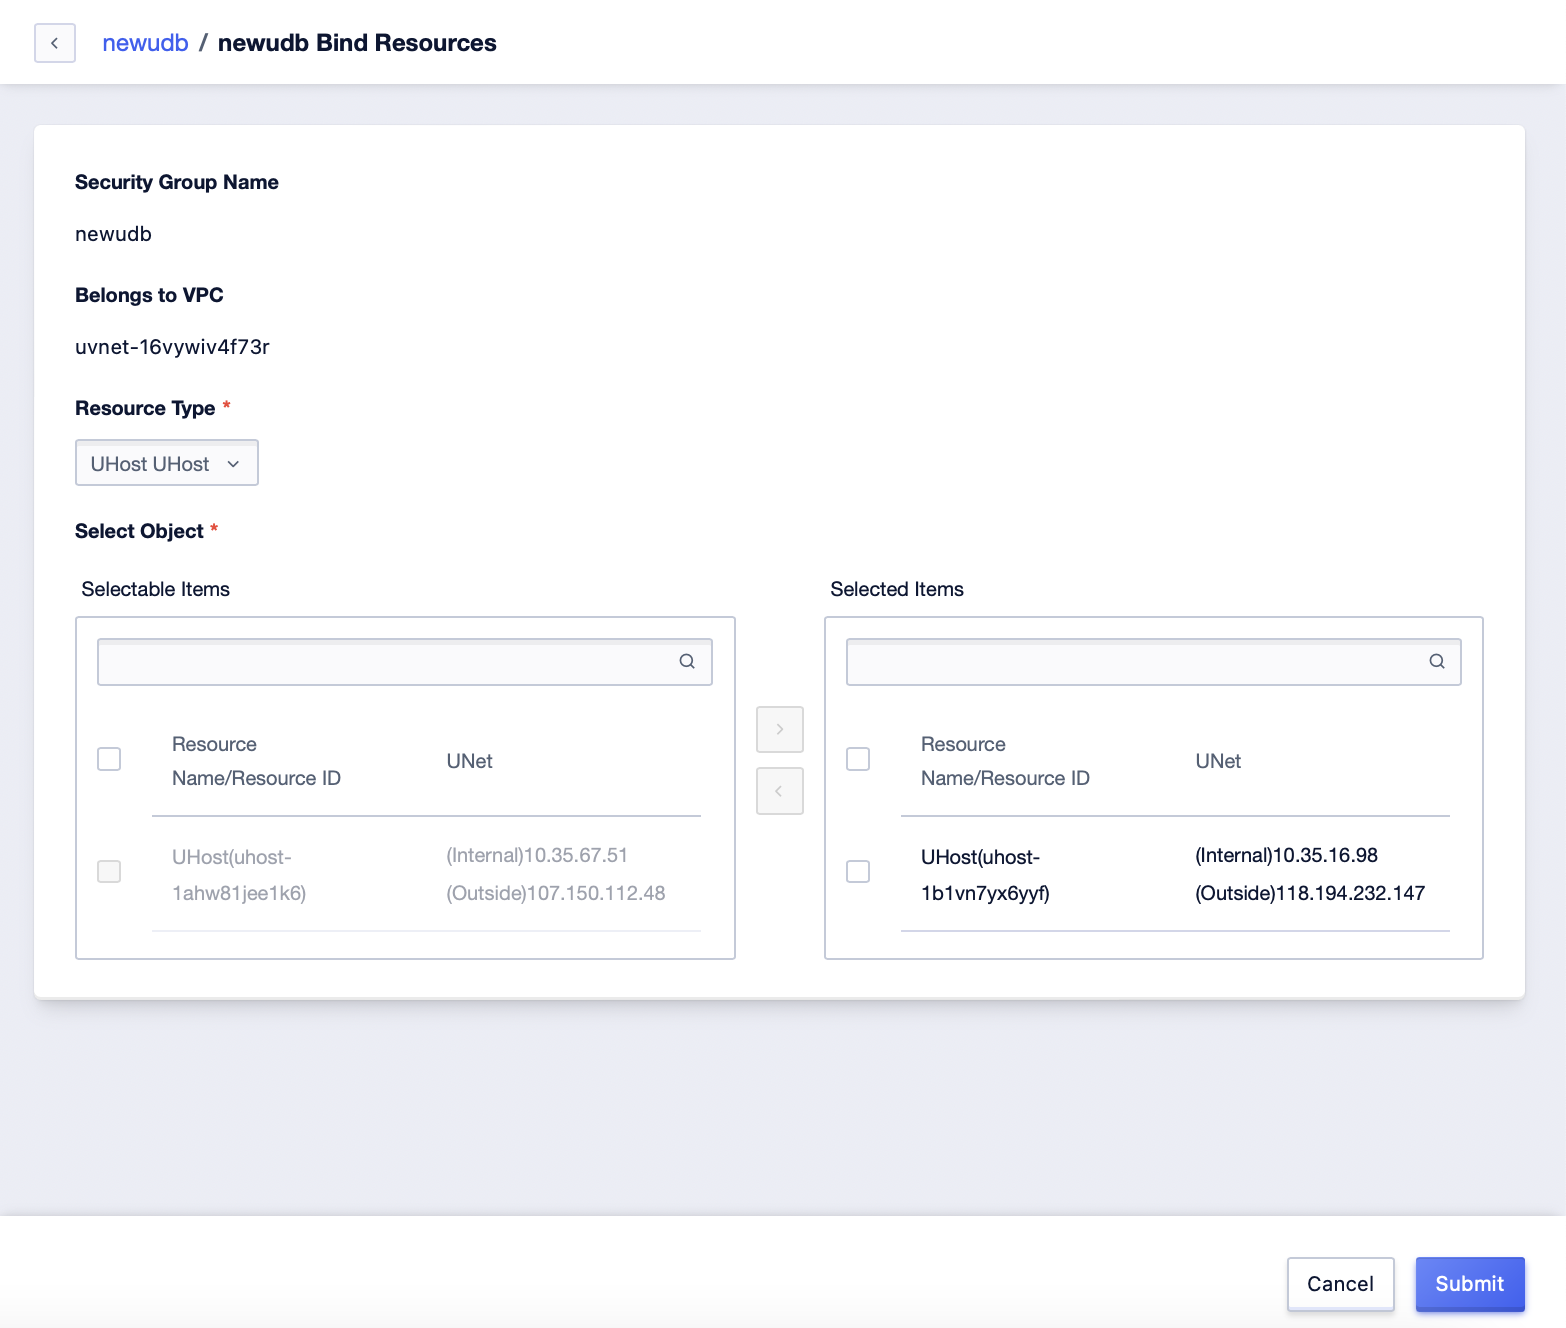
Step4: After successful binding, the corresponding data entries can be generated in the corresponding management list;
Bind Security Group in Host Management Interface
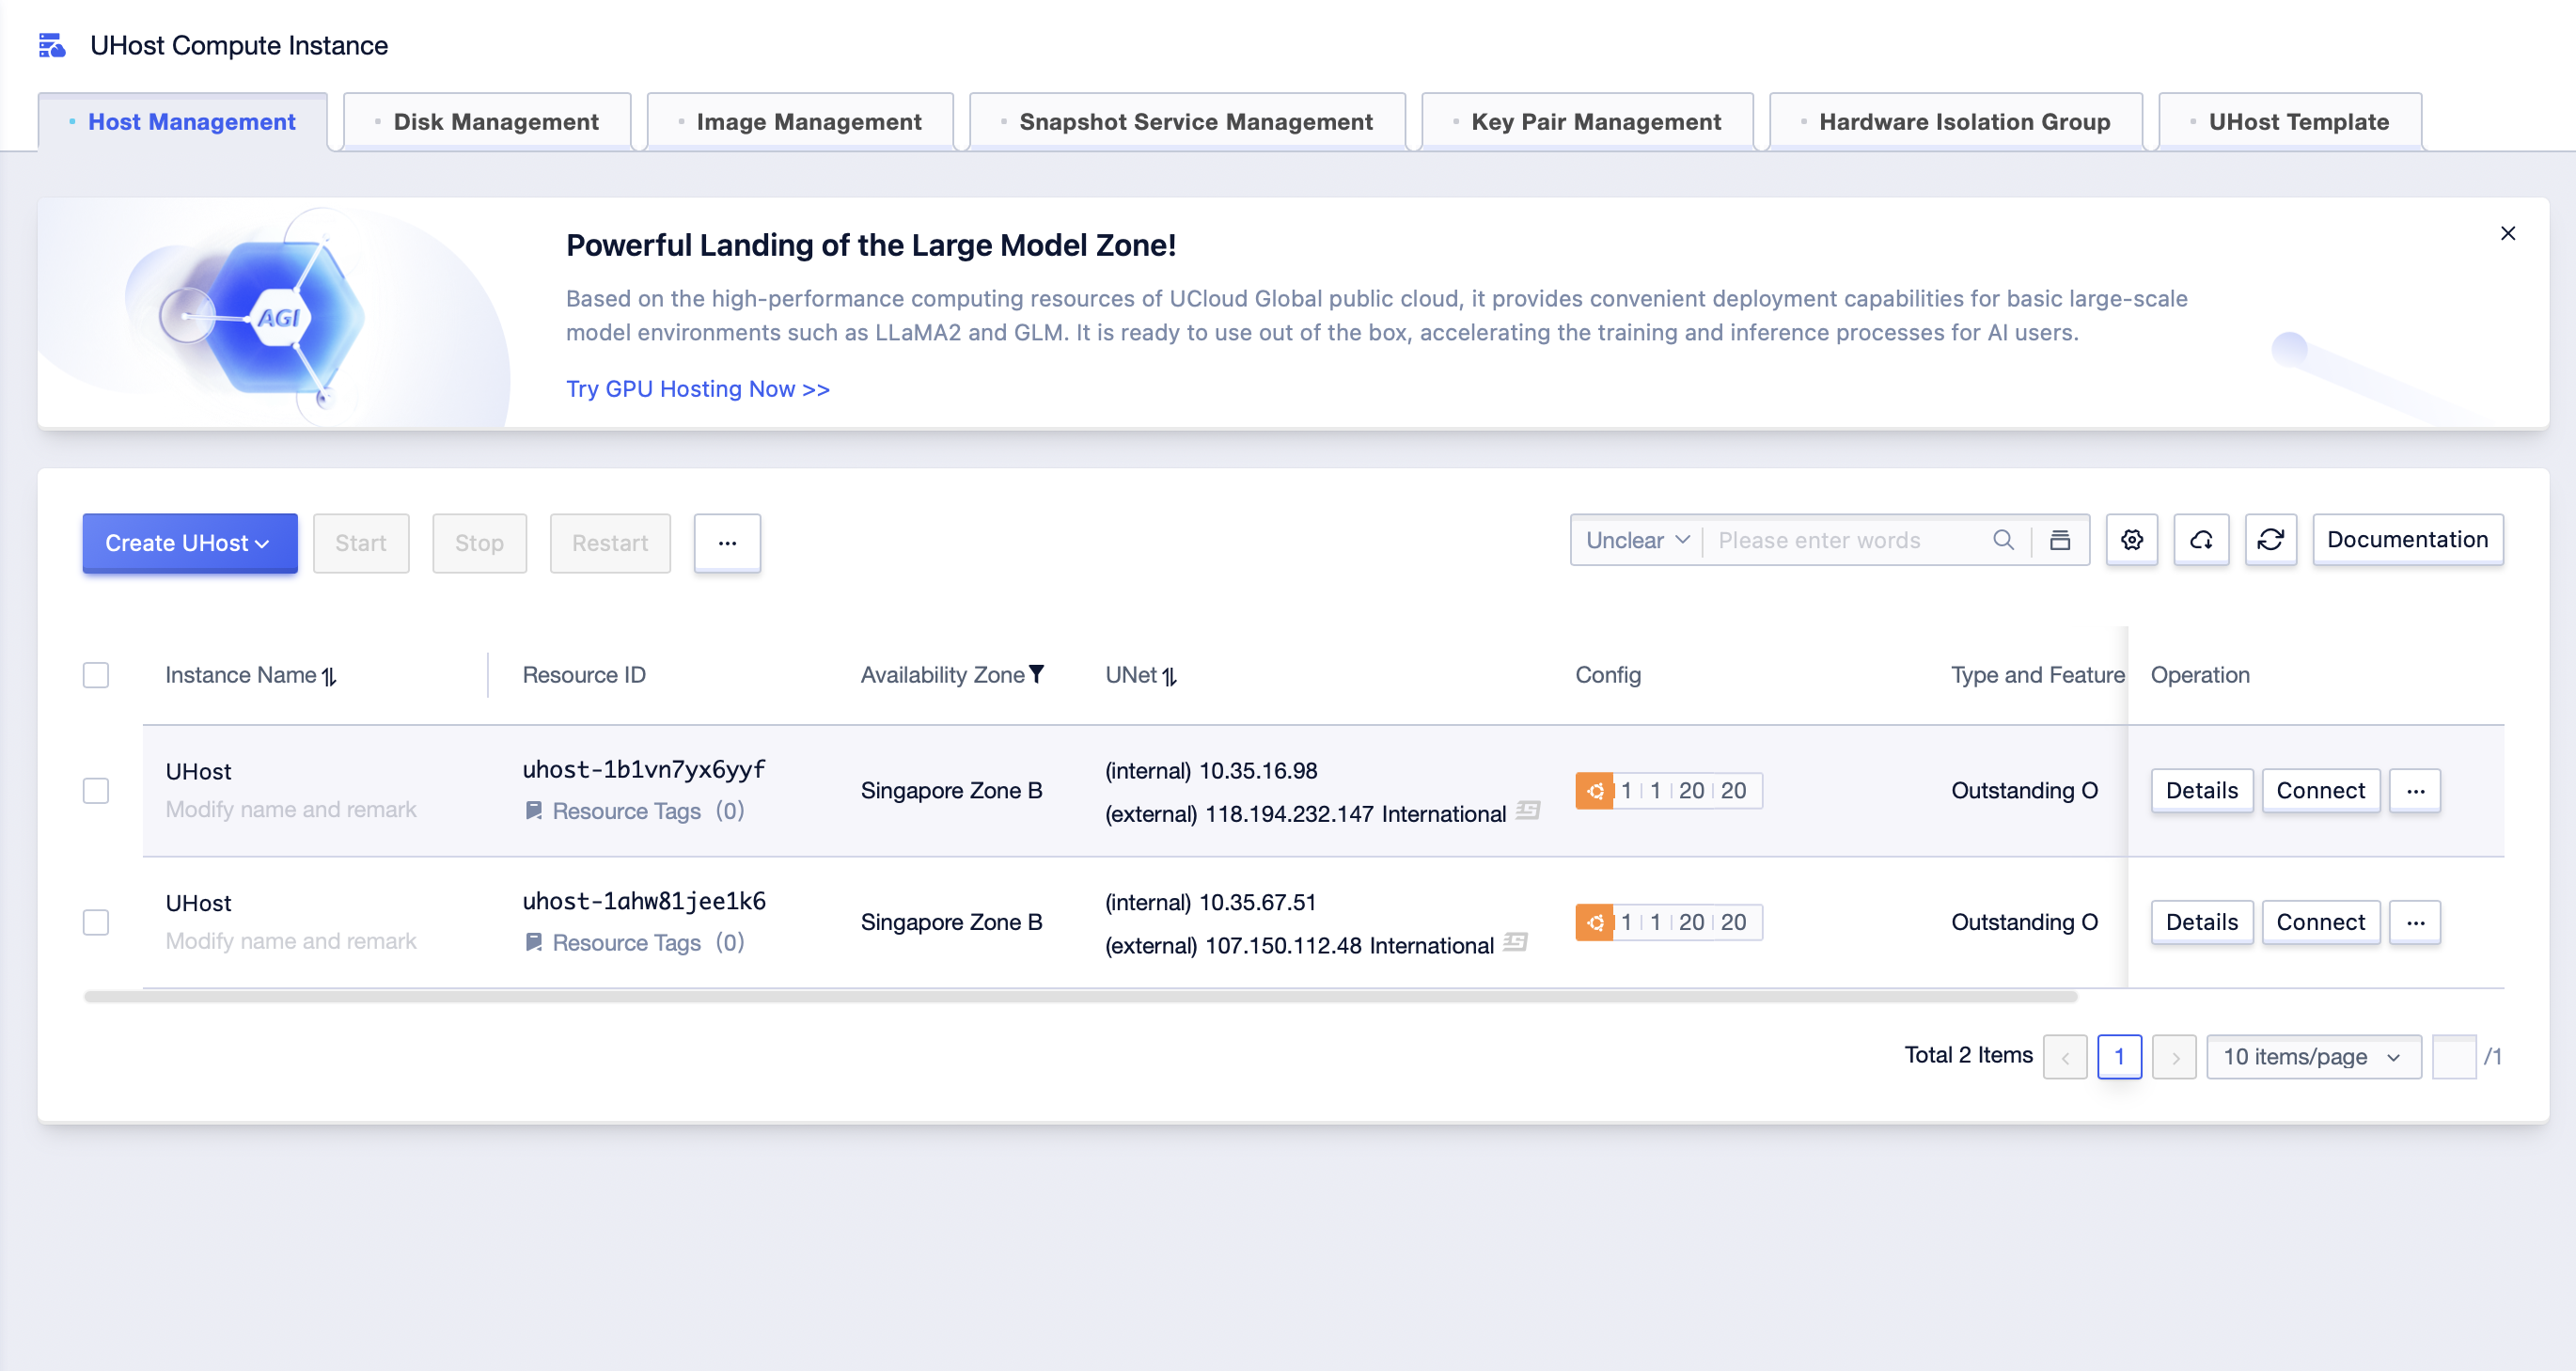
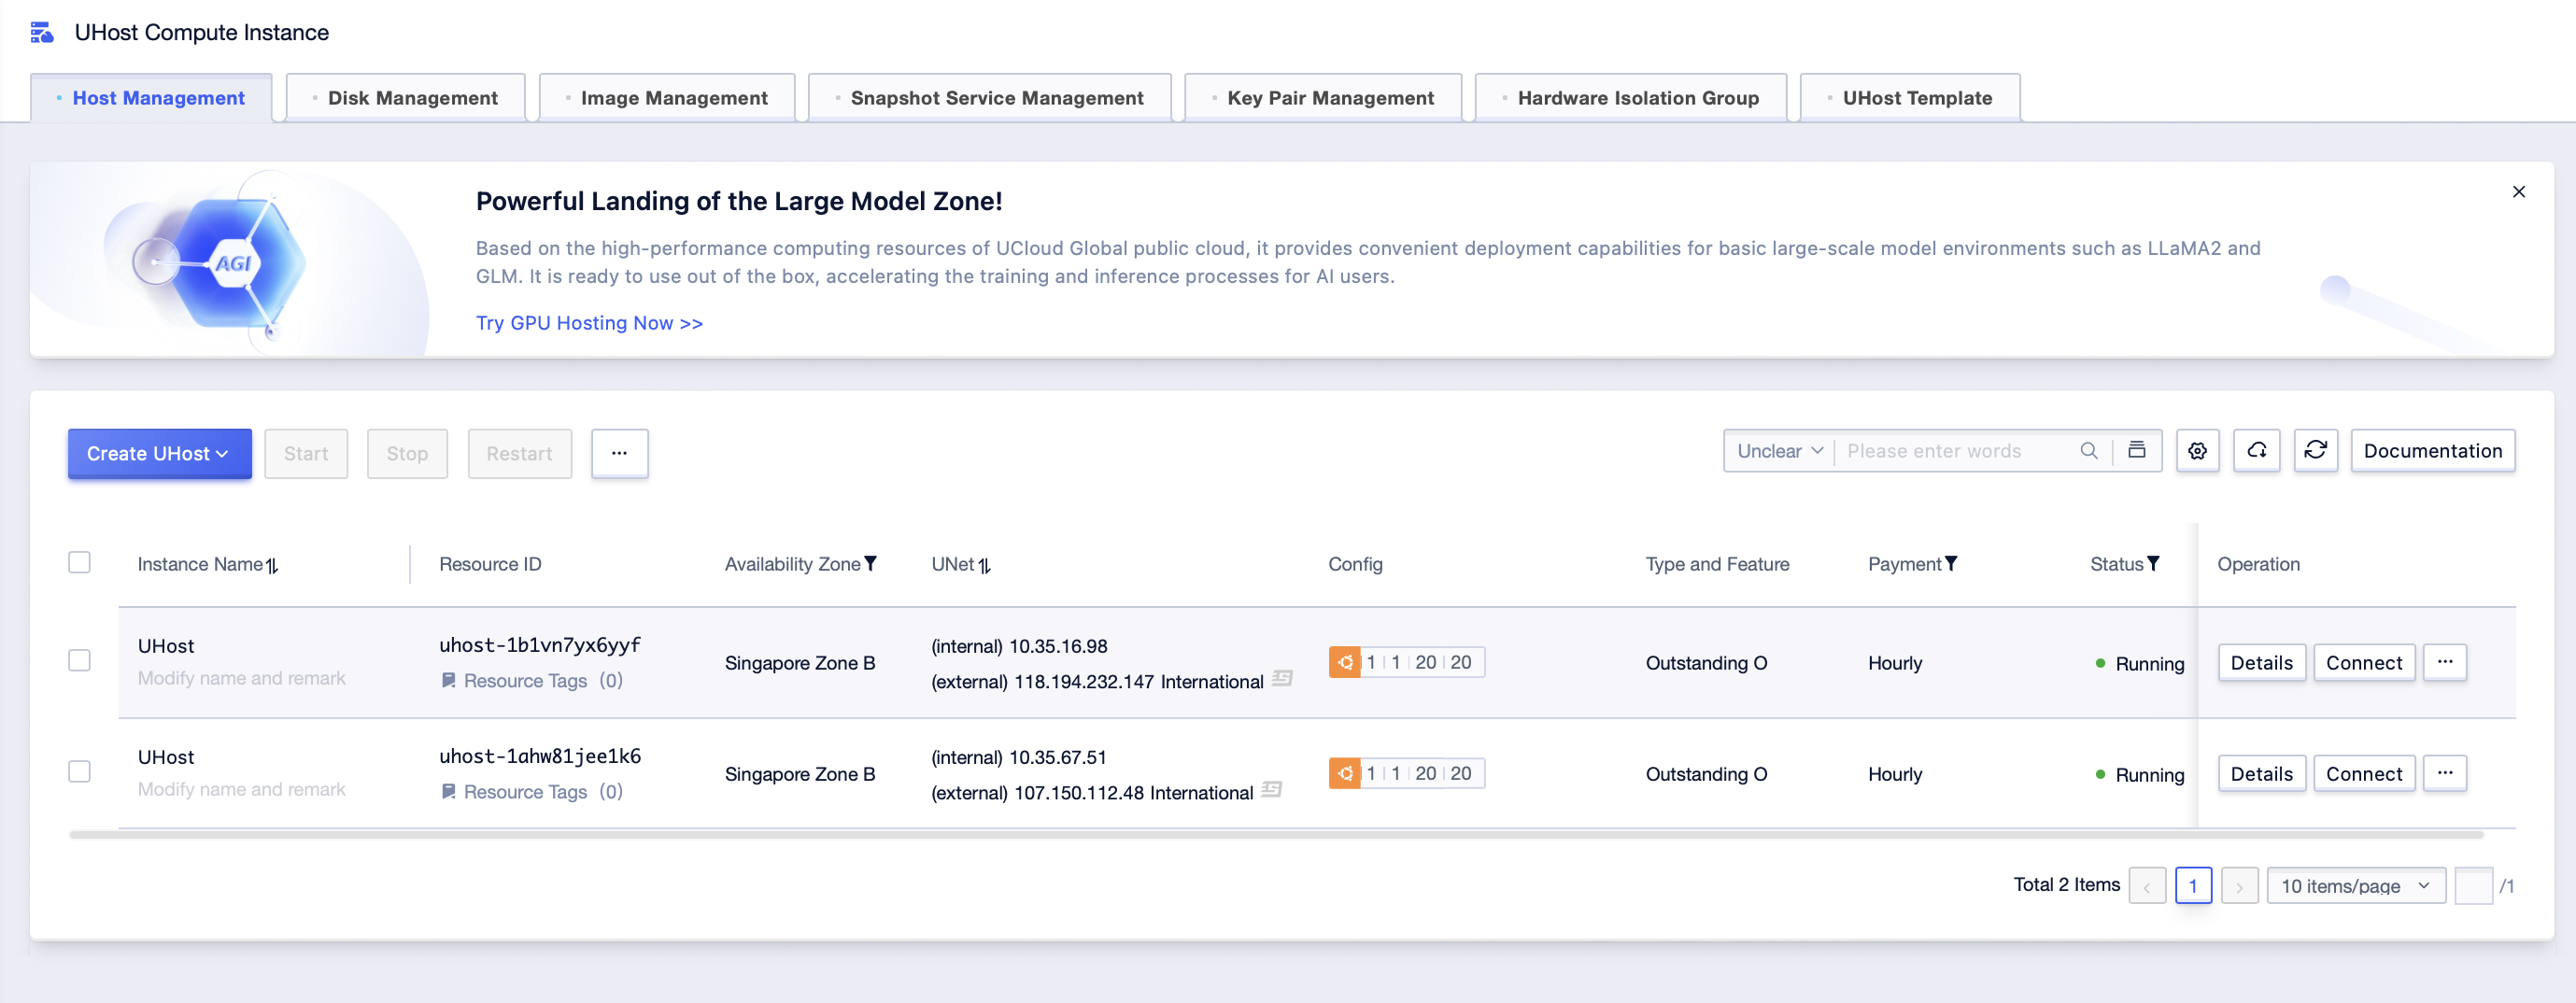
Step1: Click [All Products]-[Computing]-[UHost]-[Host Management], and enter the management interface;
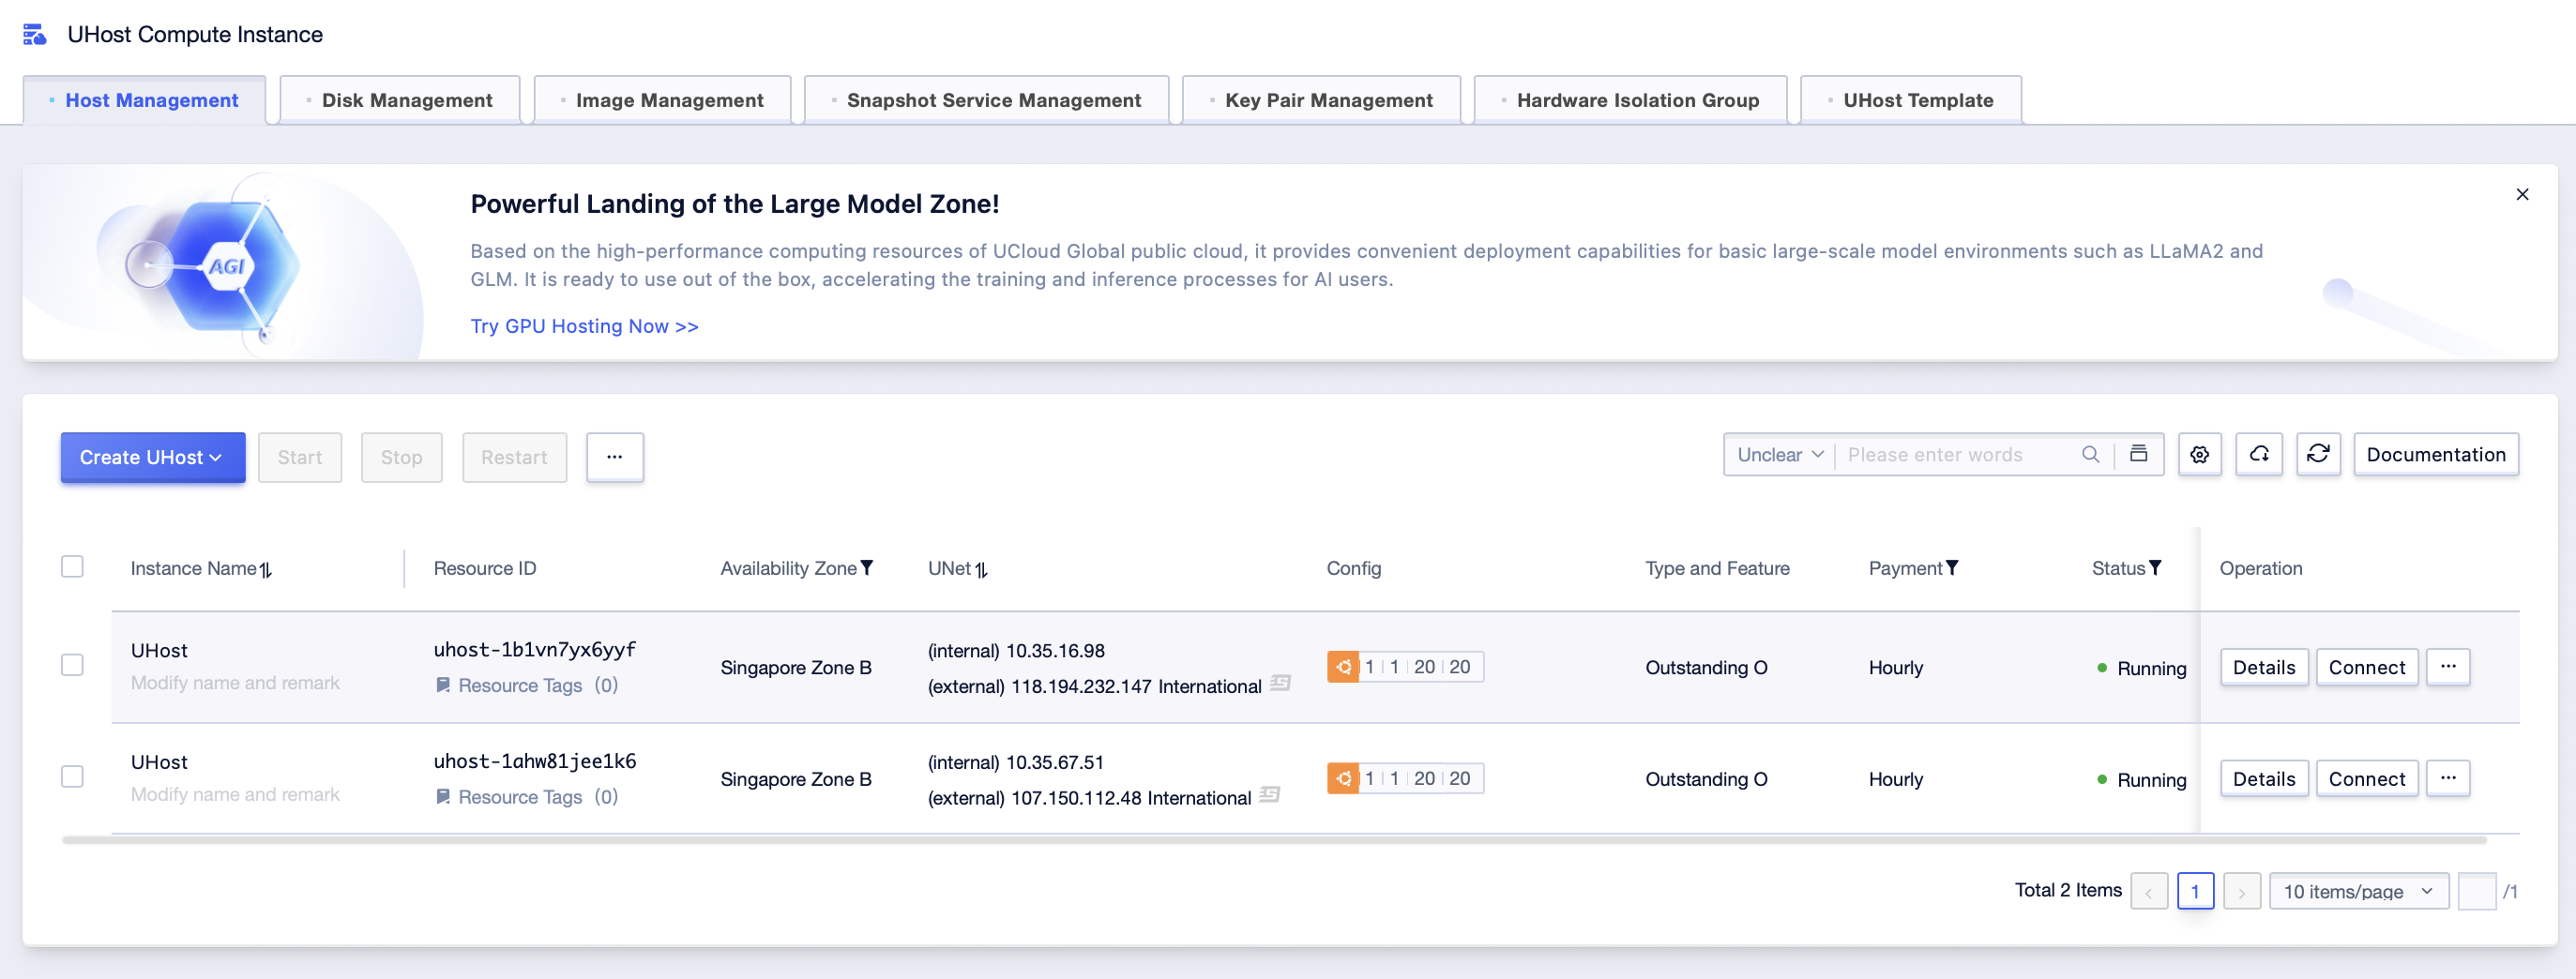
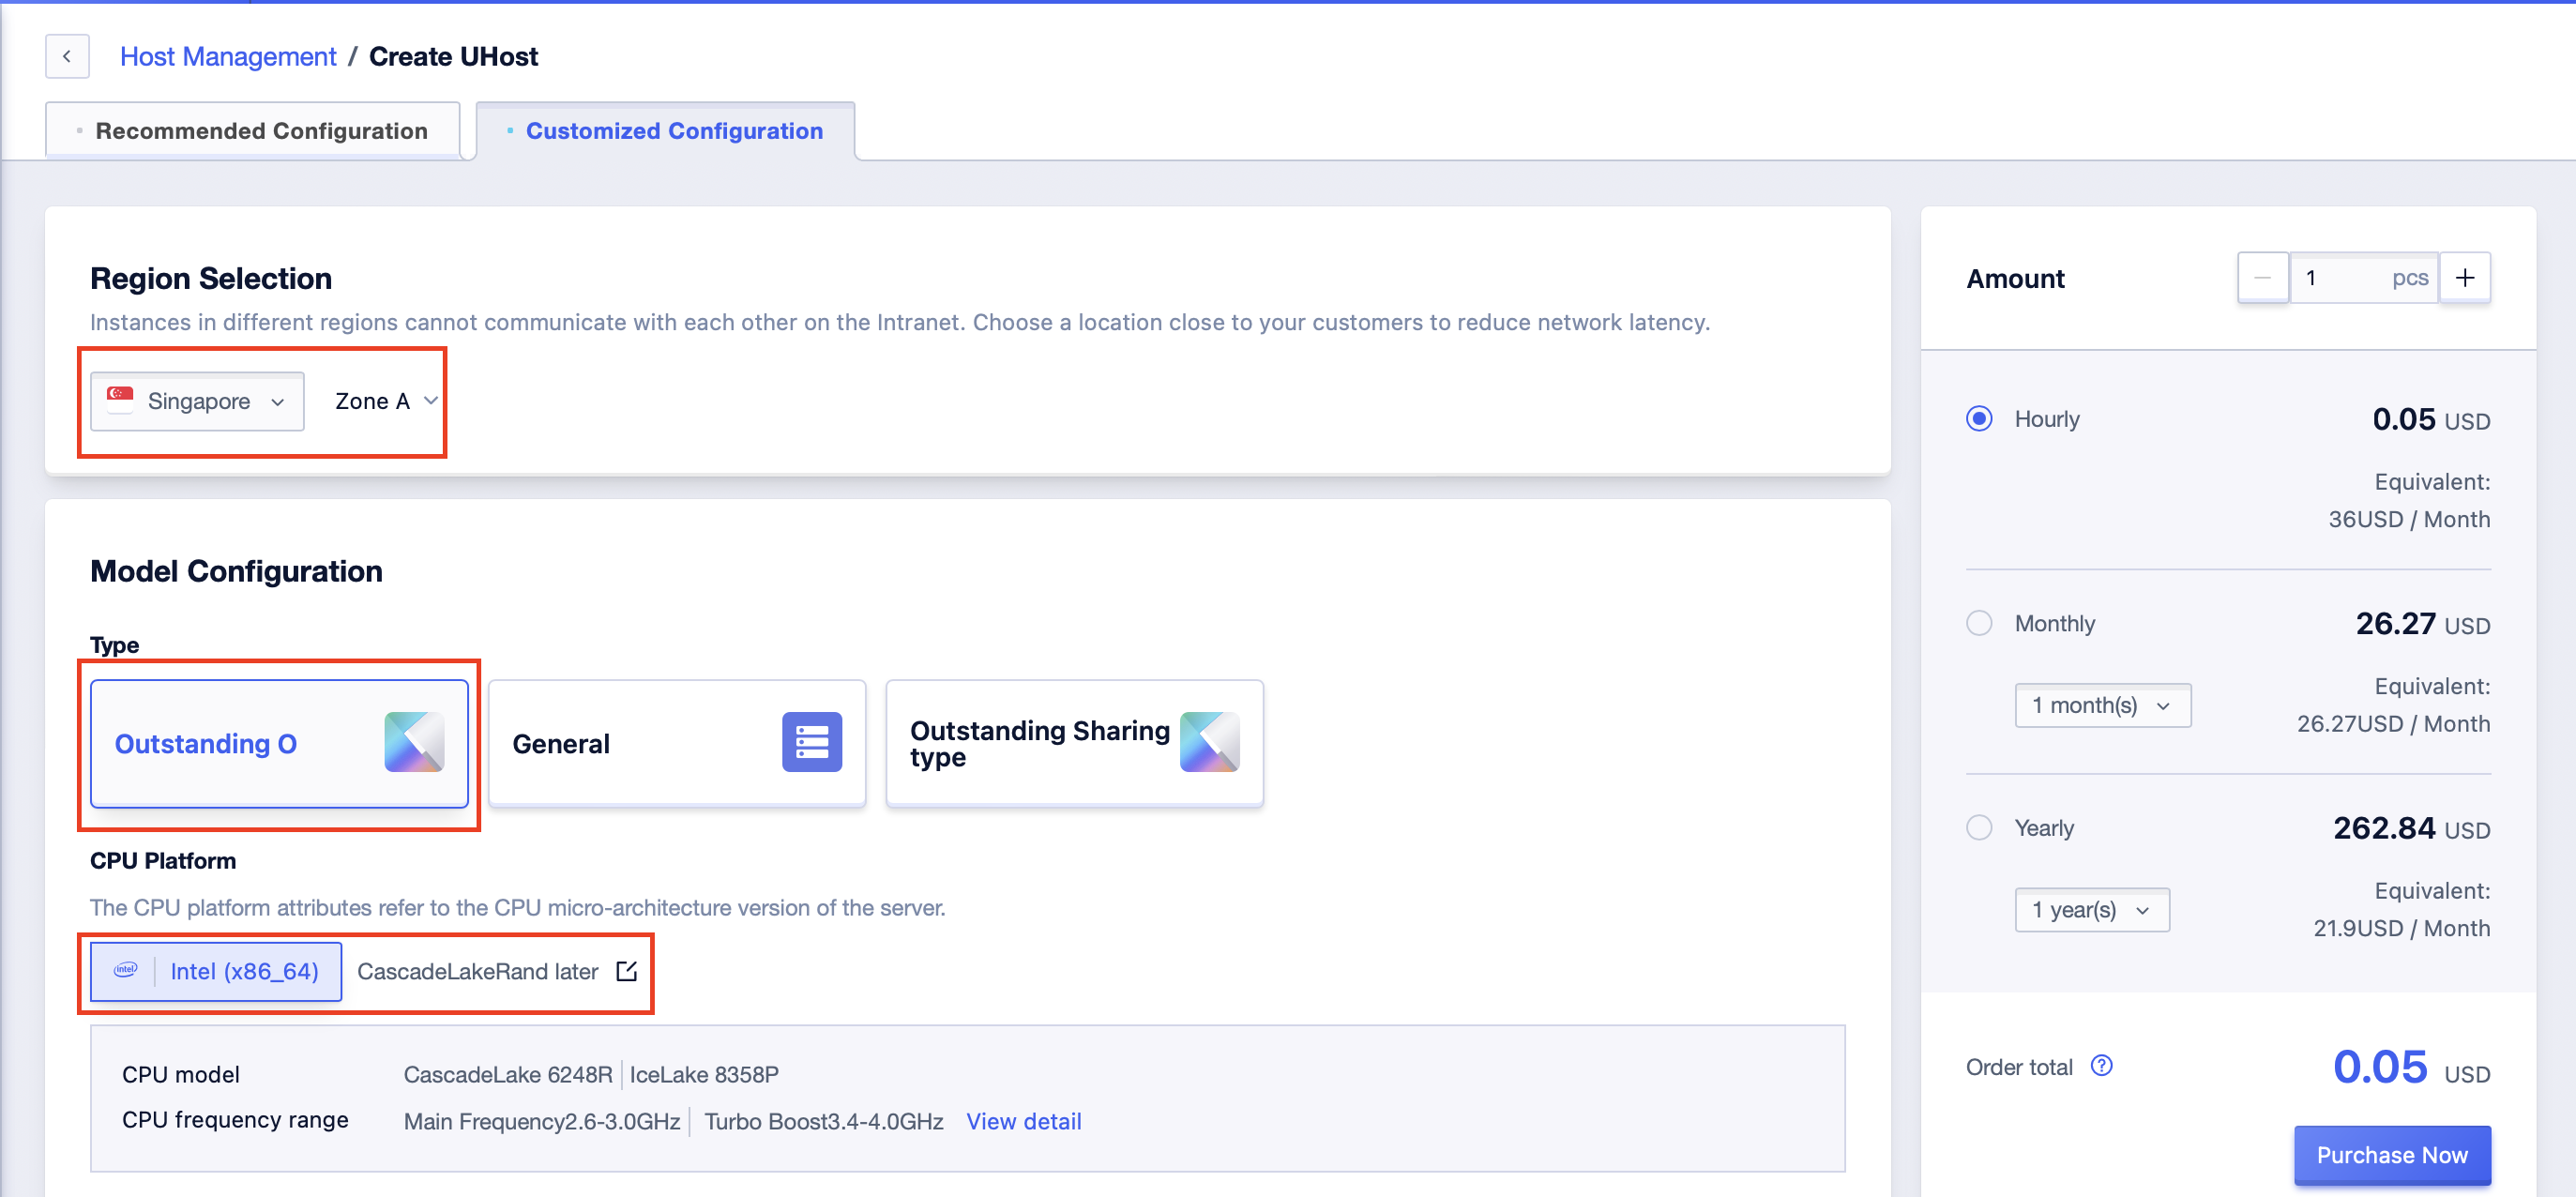
Step2: Click [Create UHost]. The available zones can only be: Singapore Availability Zone A. Model: Outstanding O. CPU platform: Intel (x86_64) IceLake or above, or cascades or above;
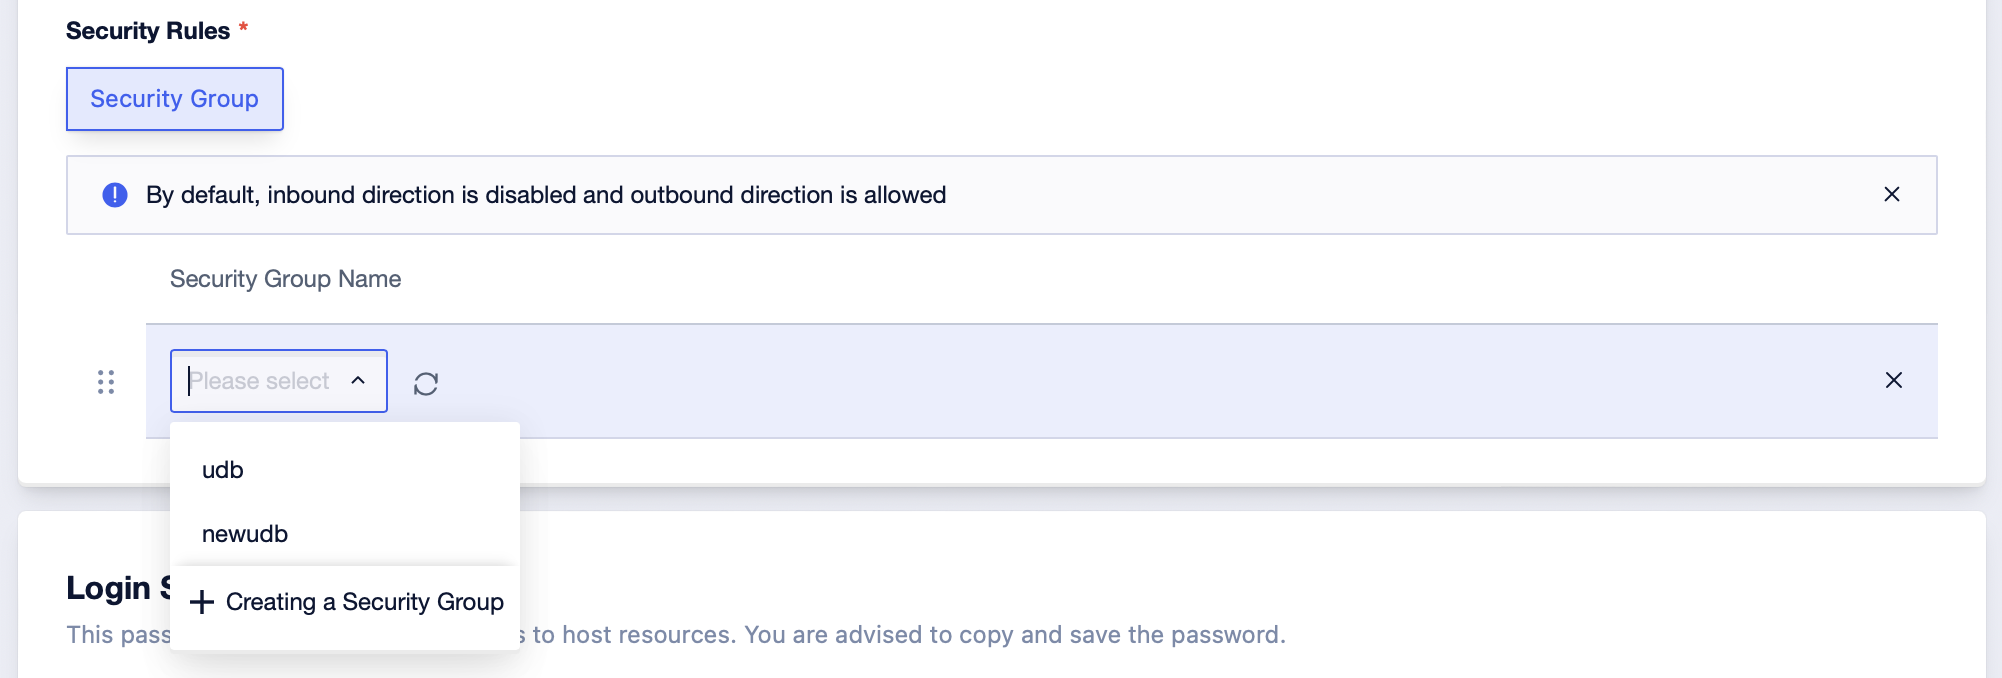
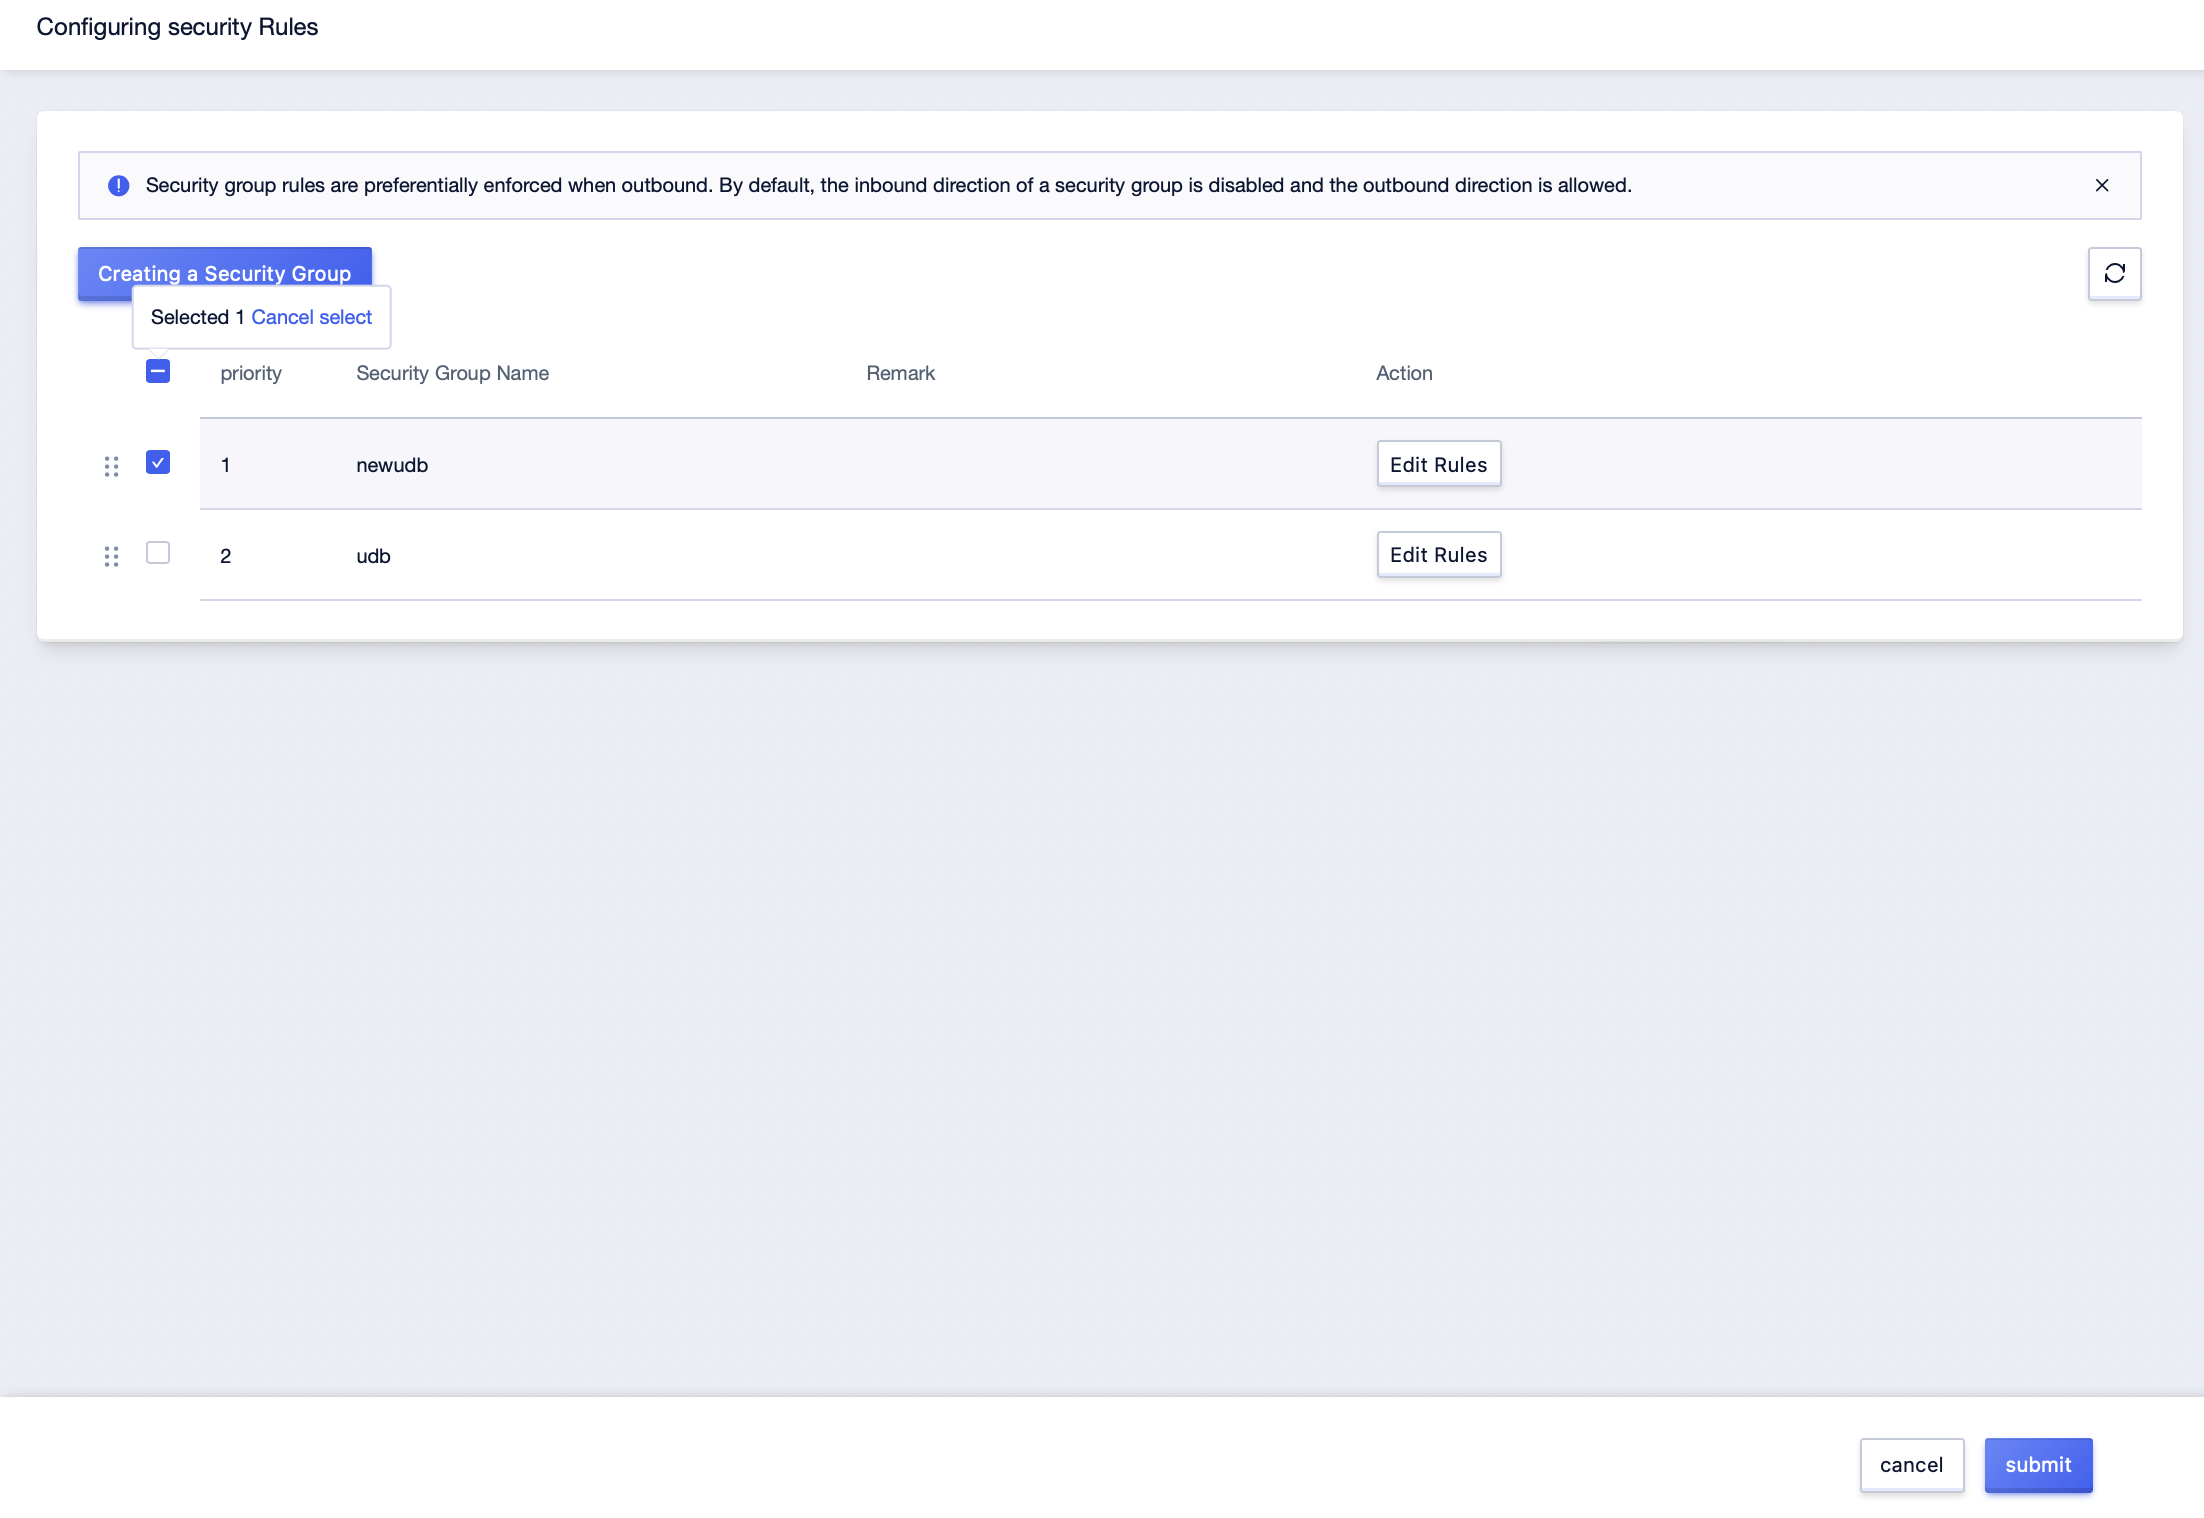
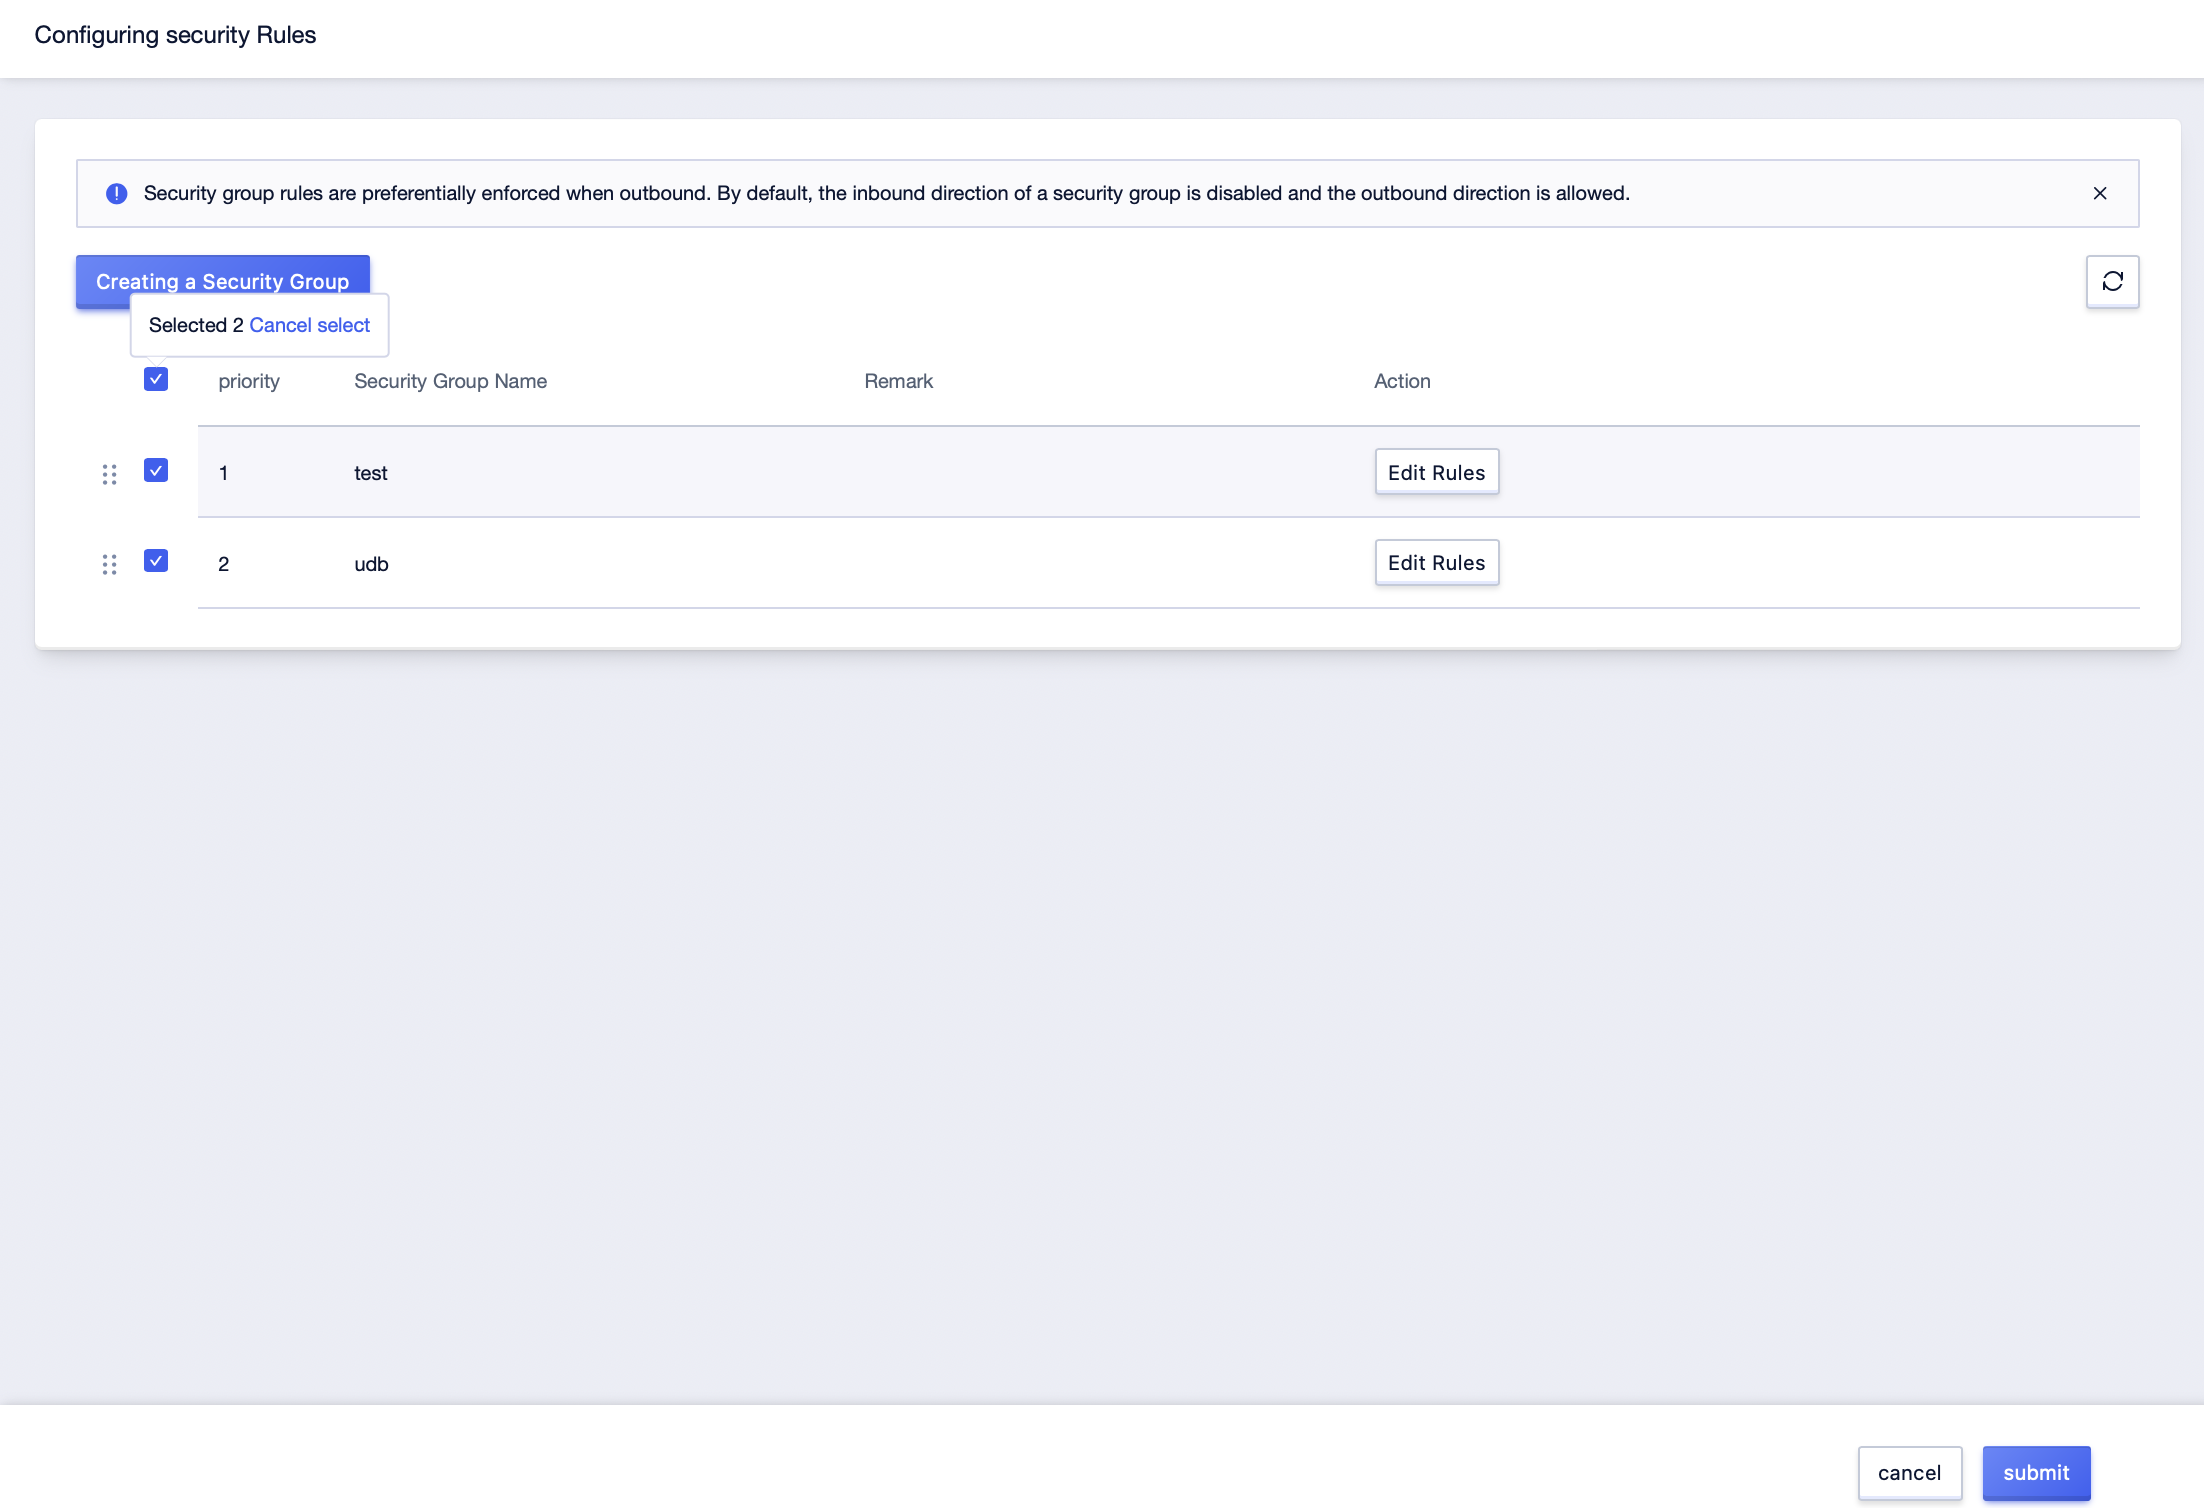
Step3: Choose security rules to be: security group, and add the corresponding security group name. This interface supports manual drag-and-drop adjustment of the priority between security groups. After parameter configuration, confirm payment and purchase, and the creation of UHost with security rules being a security group can be done;
Bind a Security Group in Virtual Network Card Management Interface
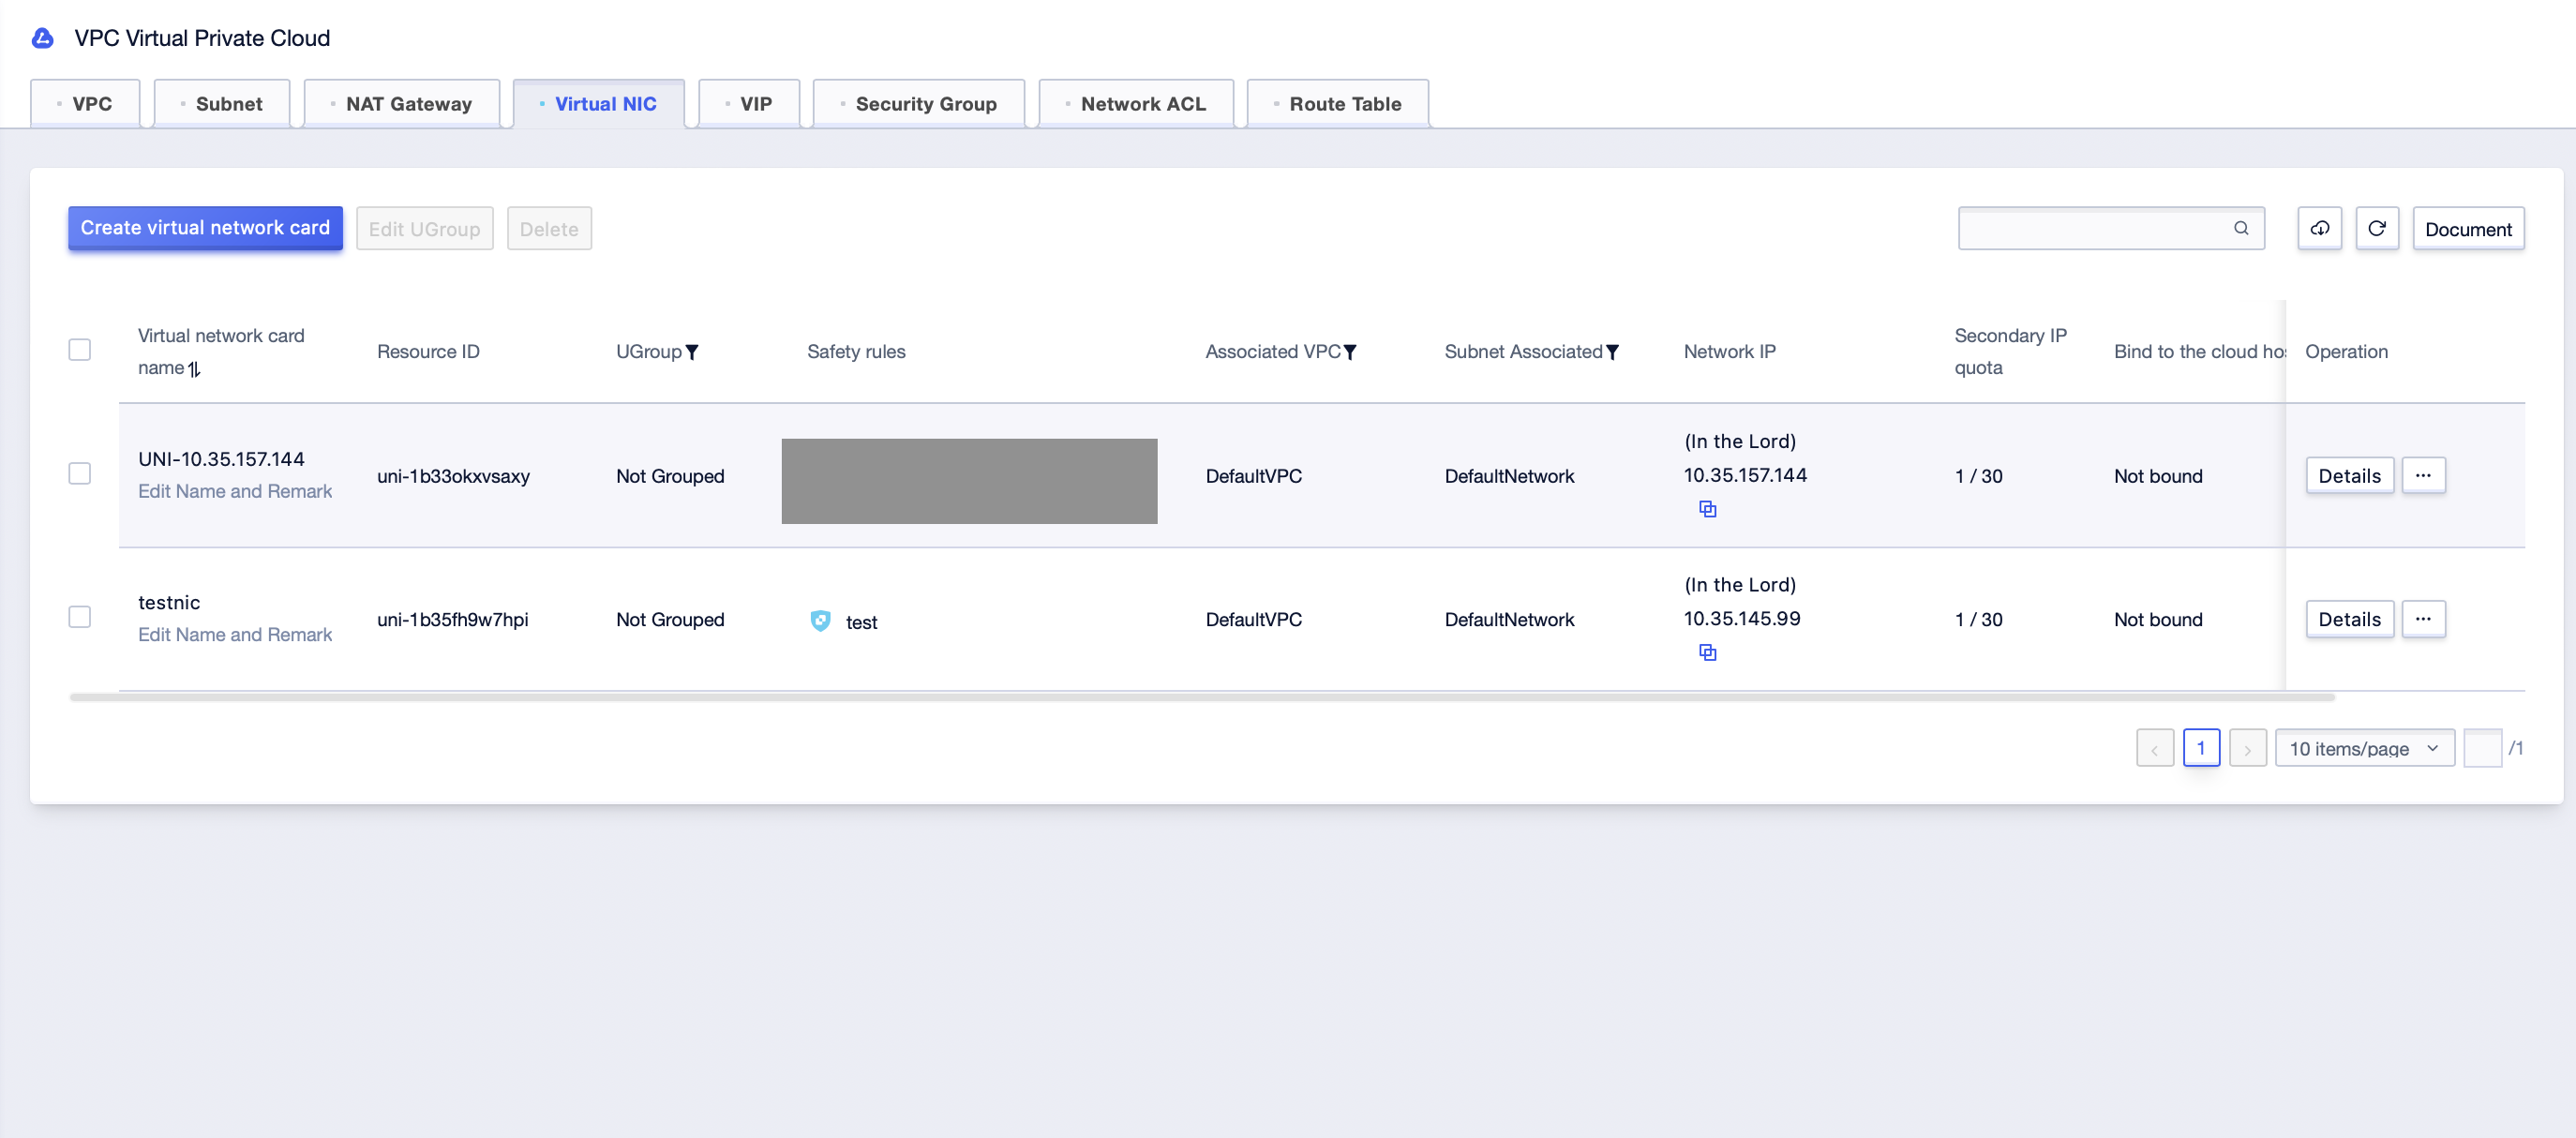
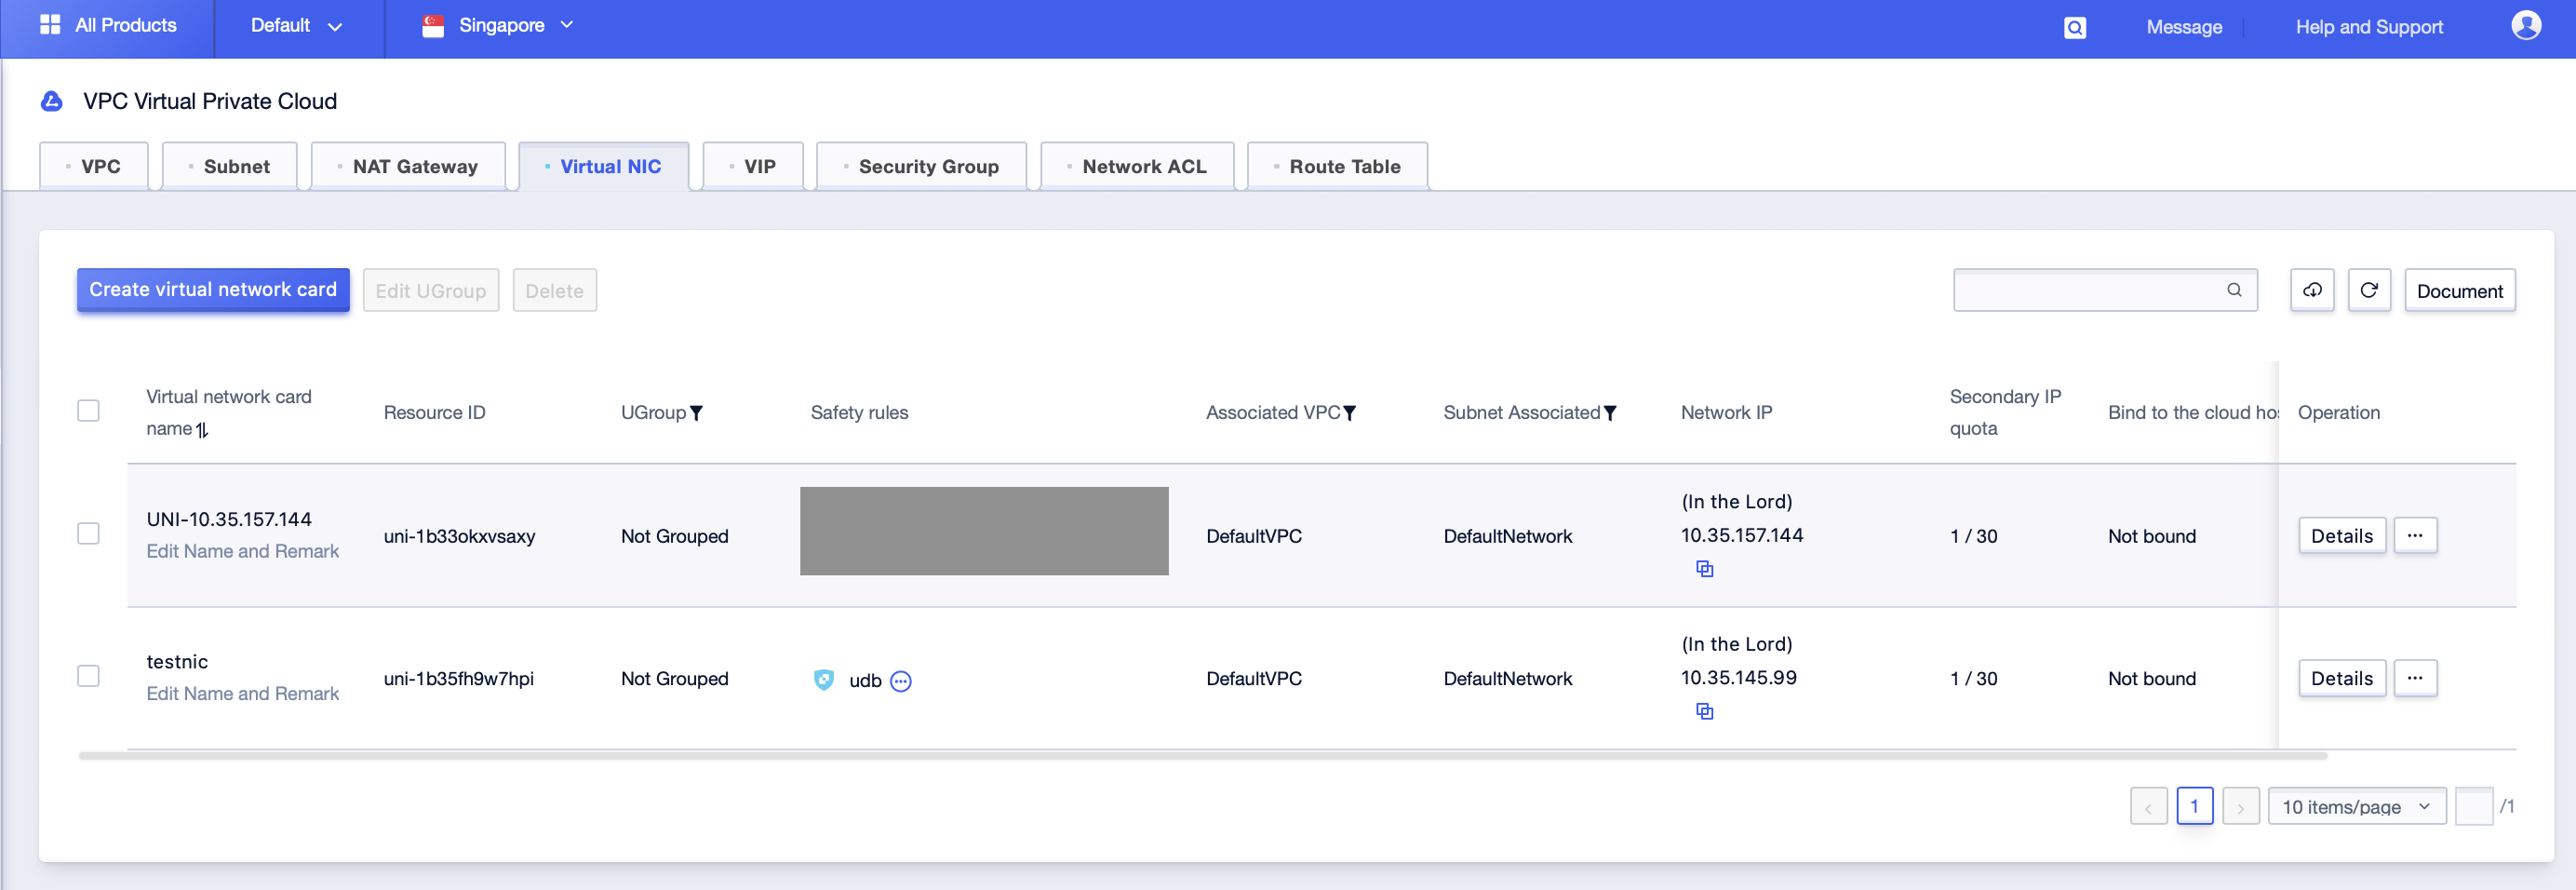
Step1: Click [All Products]-[Cloud Network]-[UVPC]-[Virtual NIC] to enter the virtual network card management interface;
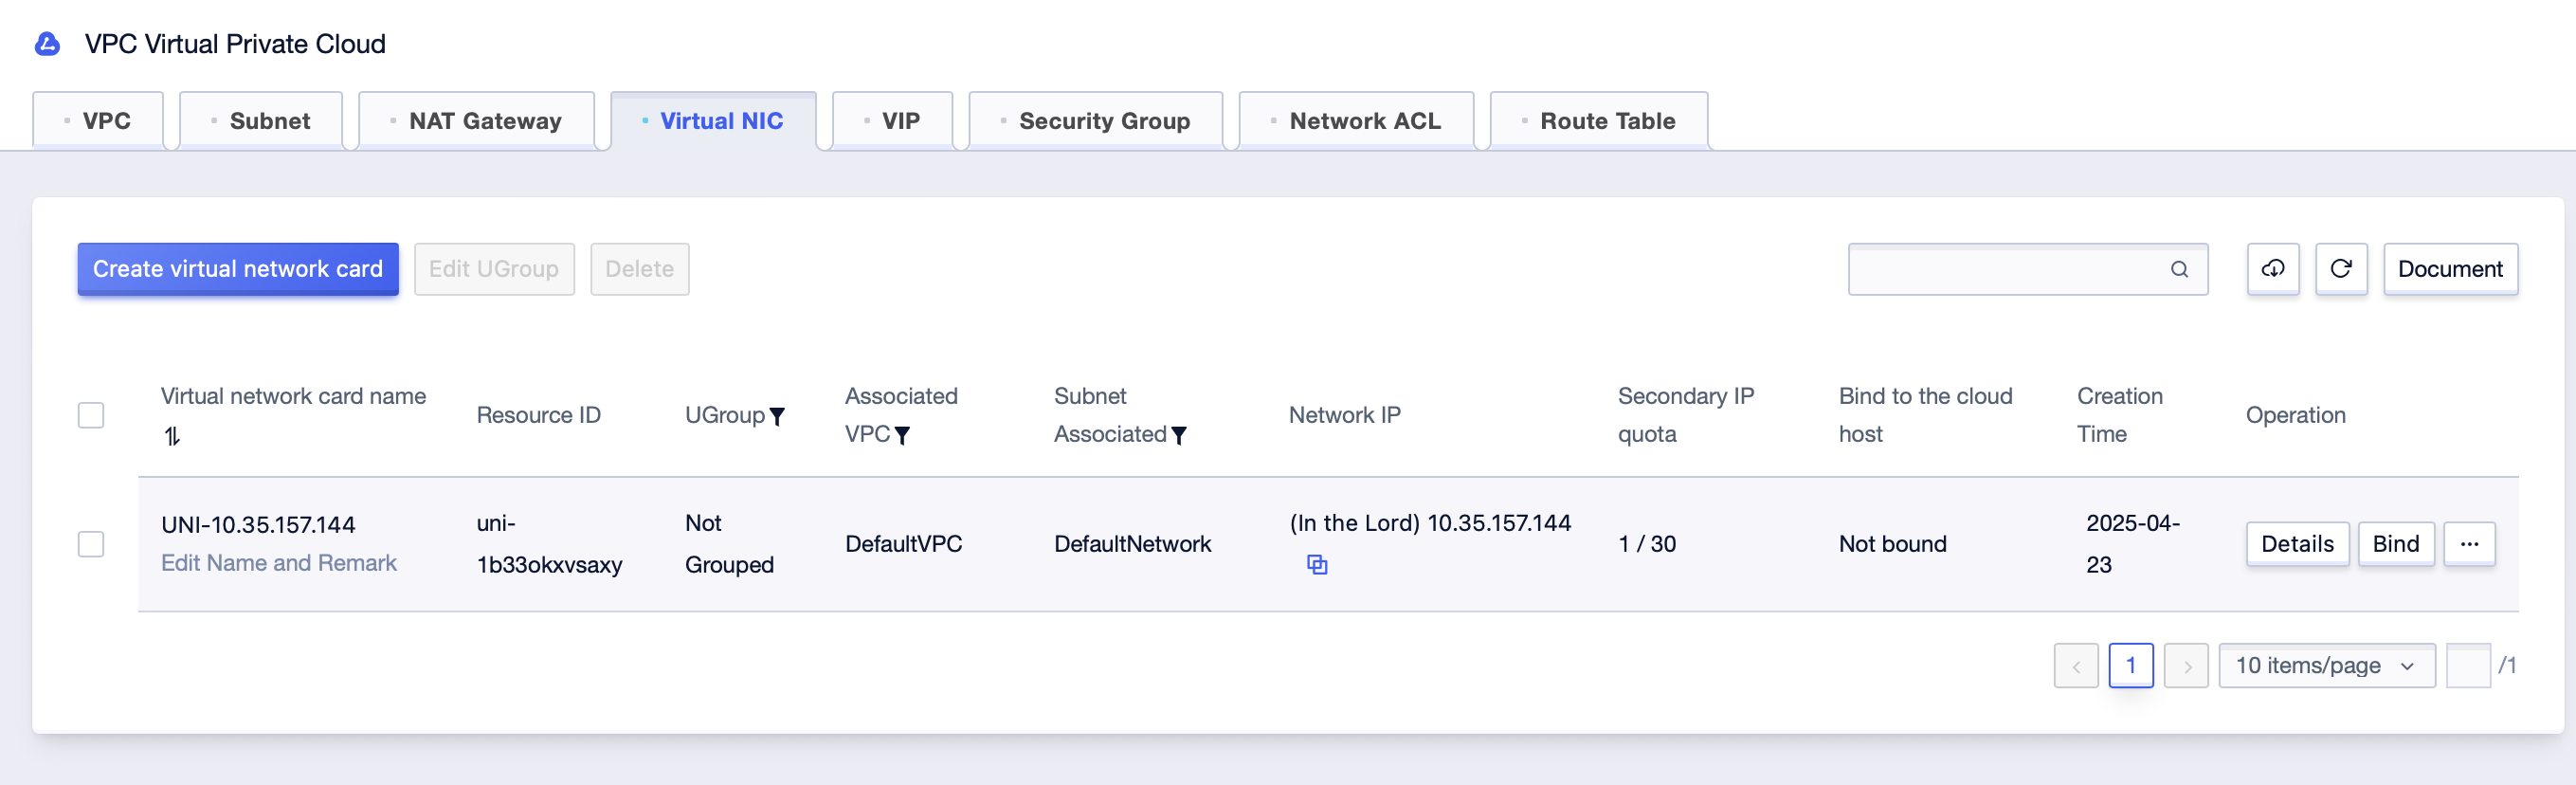
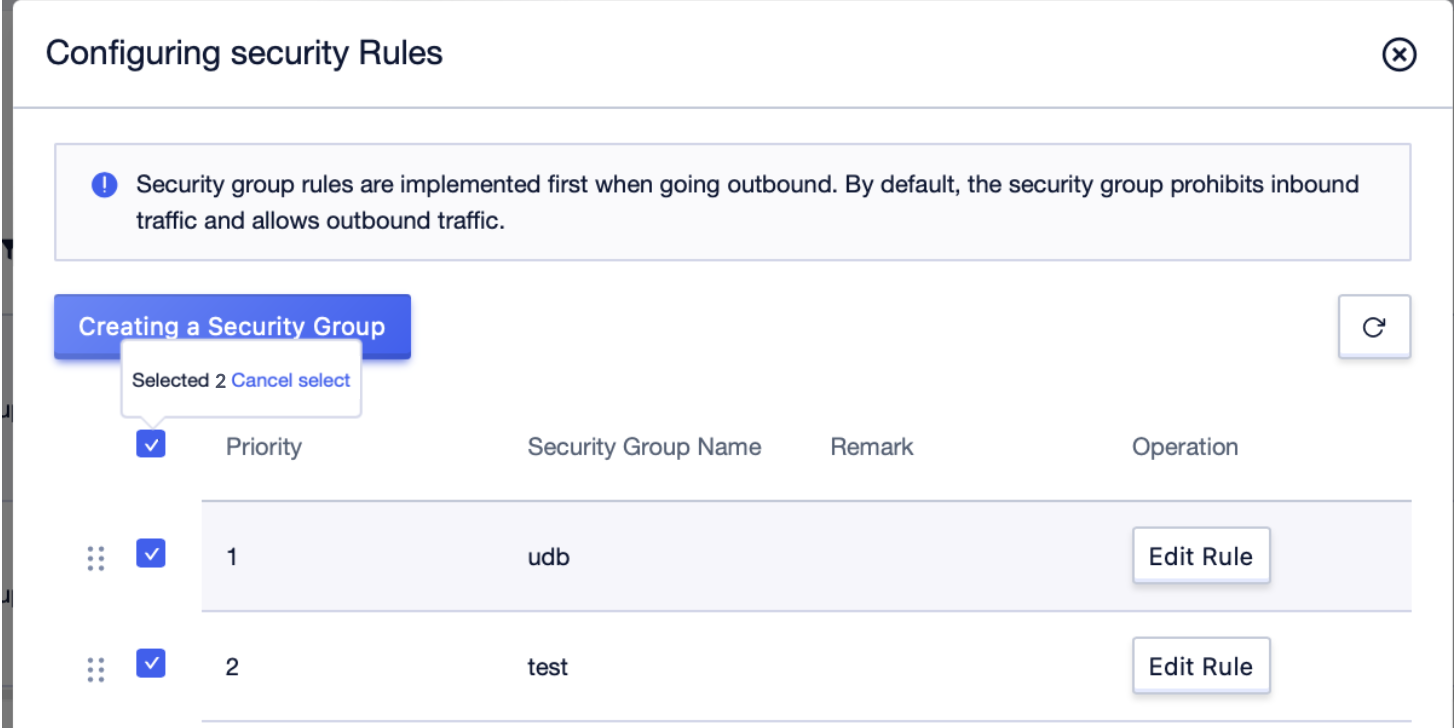
Step2: Click [Create virtual network card]. In the pop-up interface, select “Security Group” for the rules. Under the security group option, select the currently created security group. If multiple security groups are selected for this virtual network card, you can adjust the order of execution of each security group by dragging. Security groups execute sequentially from top to bottom;
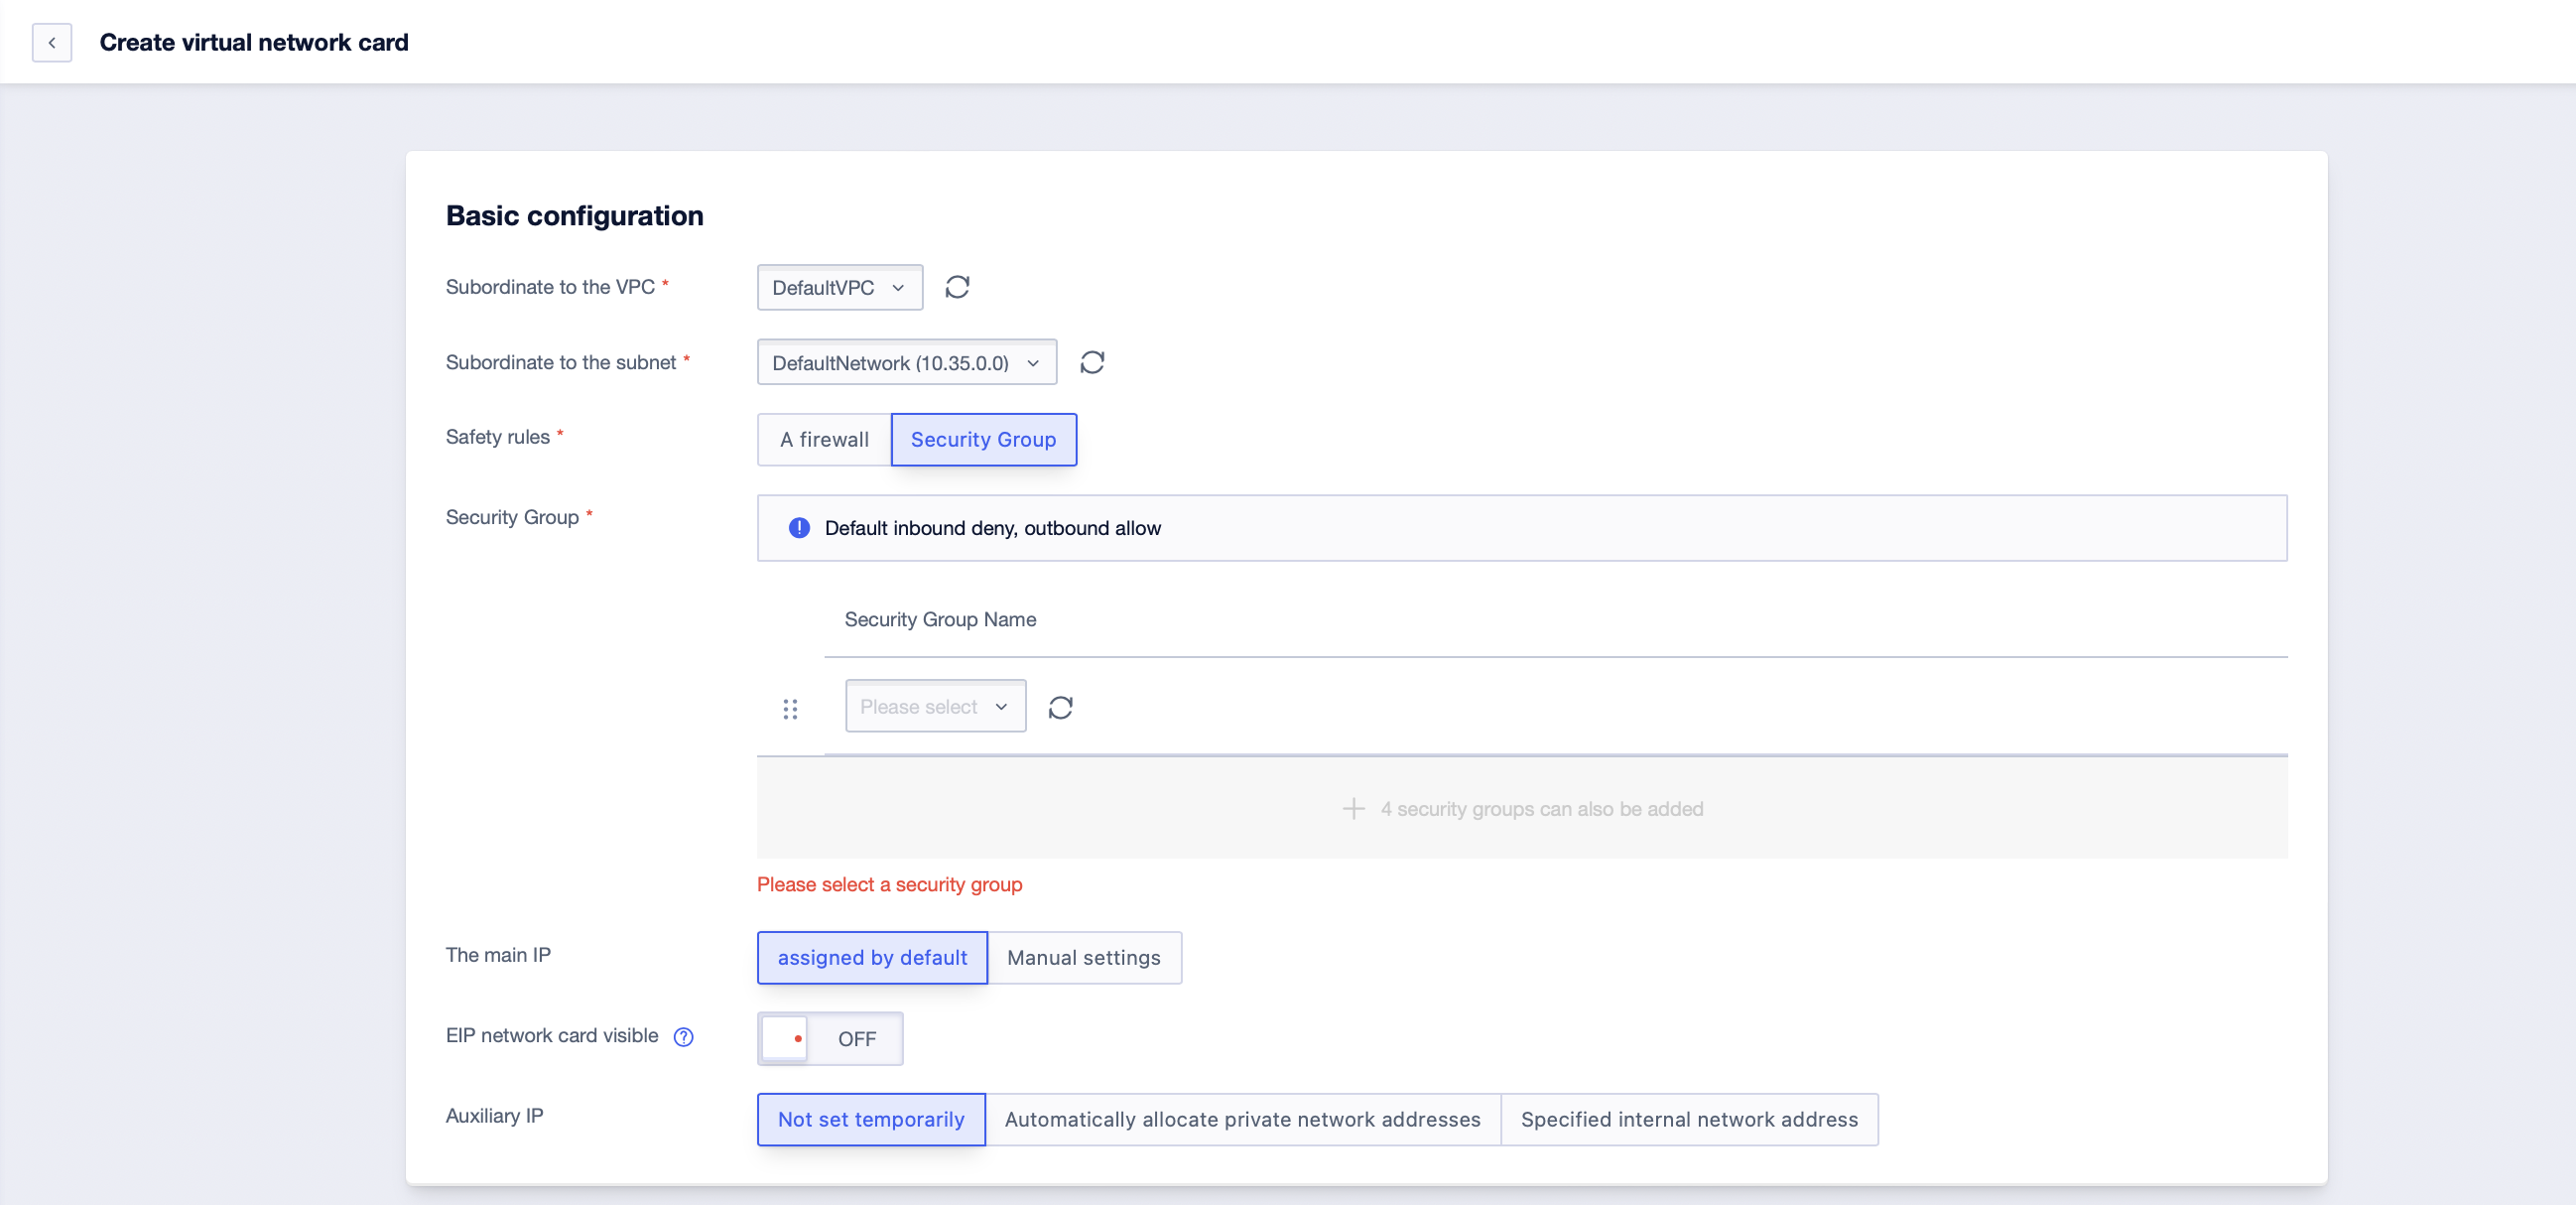
Step3: Fill in the necessary information for creating the virtual network card and click [Confirm];
(Optional) Manage Security Groups
View Security Groups
Scene One: View all security group information under a certain region;
Operation Steps:
Click [All Products]-[Cloud Network]-[VPC Virtual Private Cloud]-[Security Group]. By selecting the corresponding “Project Name” and “Availability Zone” under the account, you can see all the security group information under this availability zone;
Scene Two: View specific security group information under a certain region;
Operation Steps:
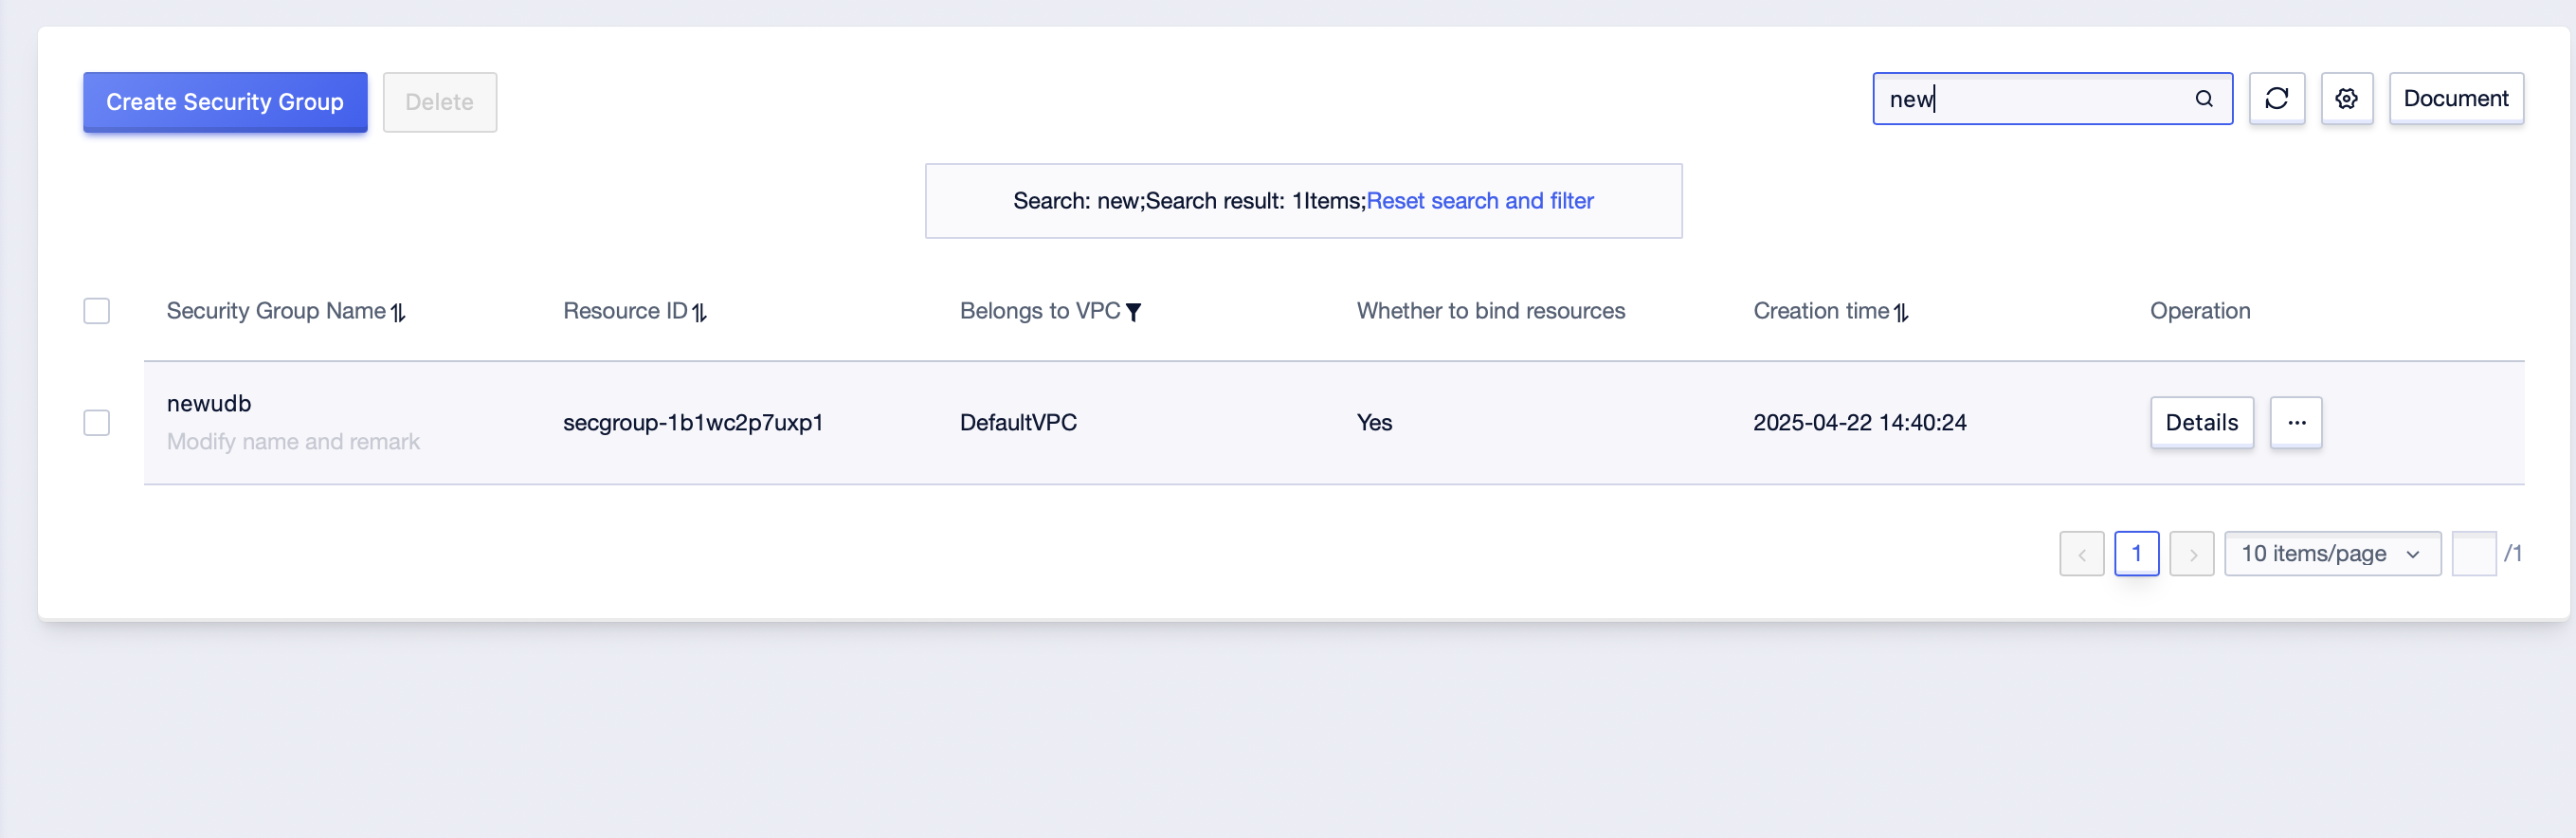
Step1: Click [All Products]-[Cloud Network]-[VPC Virtual Private Cloud]-[Security Group]. By selecting the corresponding “Project Name” and “Availability Zone” under the account, you can see all the security group information under this availability zone;

Step2: In the search box in the upper right corner of the page, enter the “Security Group Name” of a specific security group and click query;
Unbind a Security Group
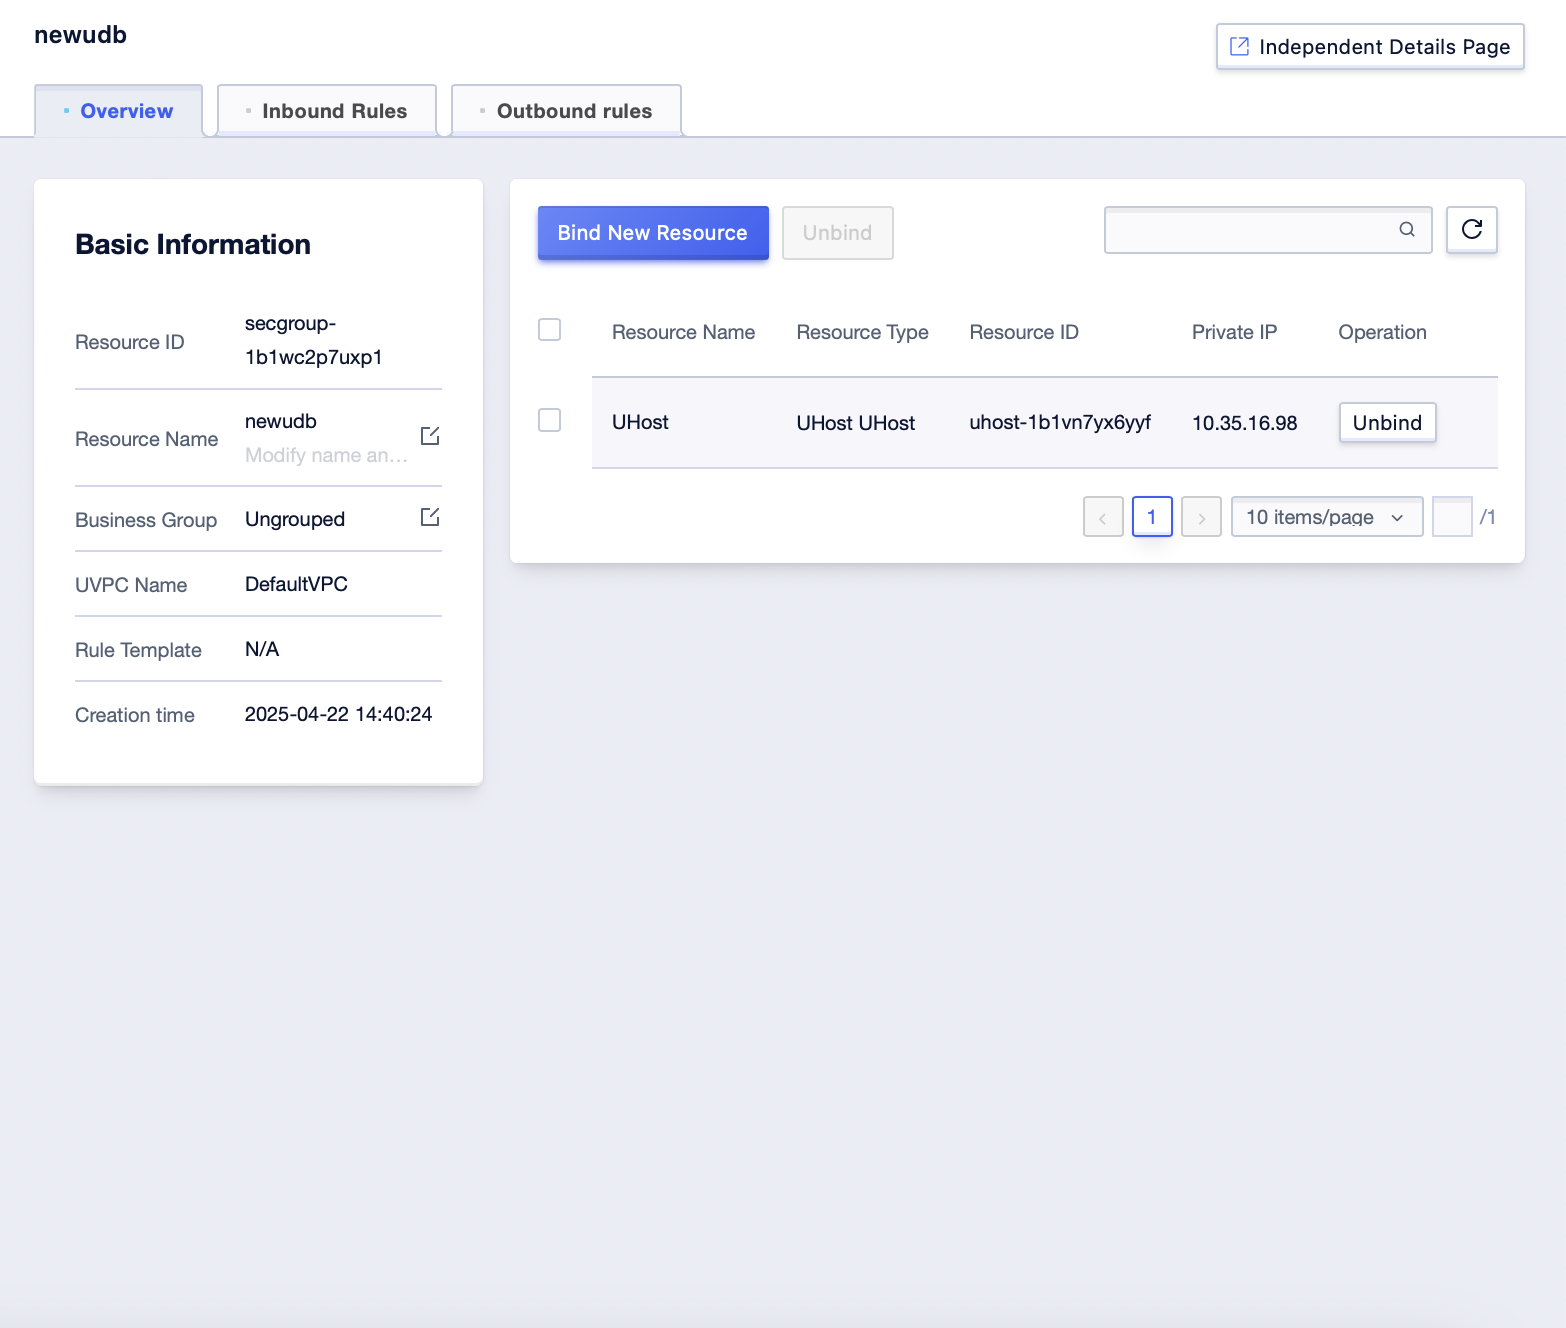
Security Group Side Disassociation of an Instance
Step1: Click [All Products]-[Cloud Network]-[VPC Virtual Private Cloud]-[Security Group]. Select the corresponding “Project Name” and “Availability Zone” under the account to enter the security group management interface;
Step2: Click the [Details] button to enter the “Overview” of the security group;
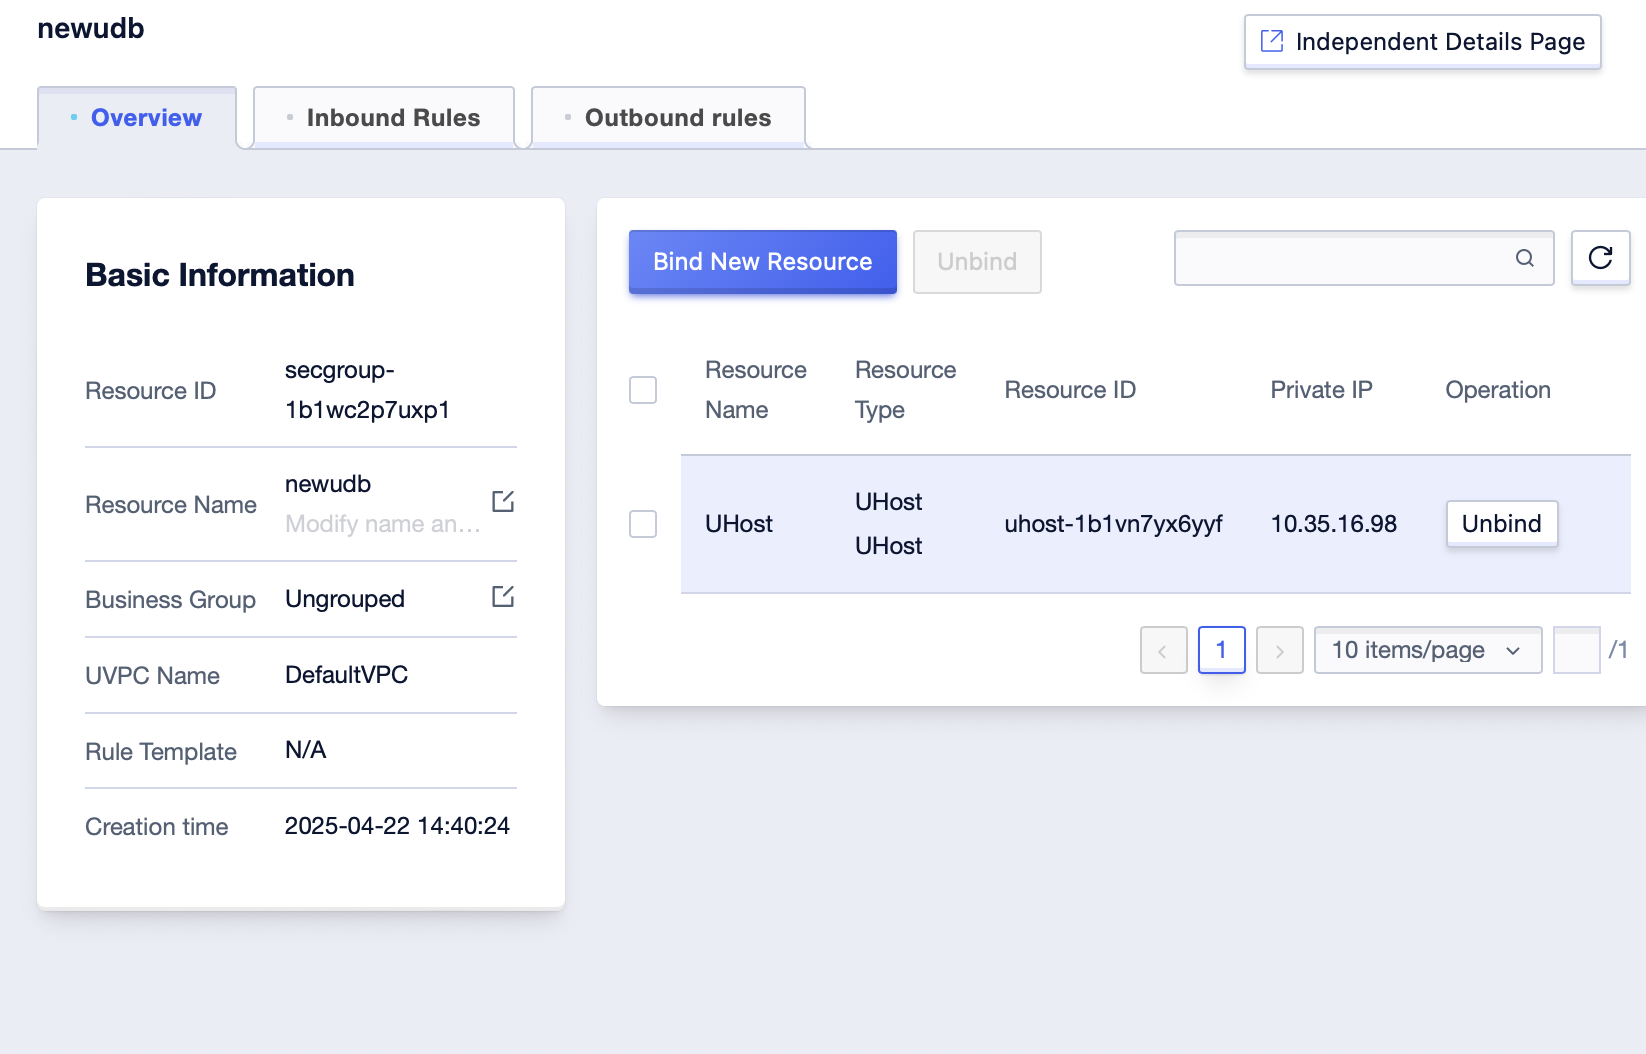
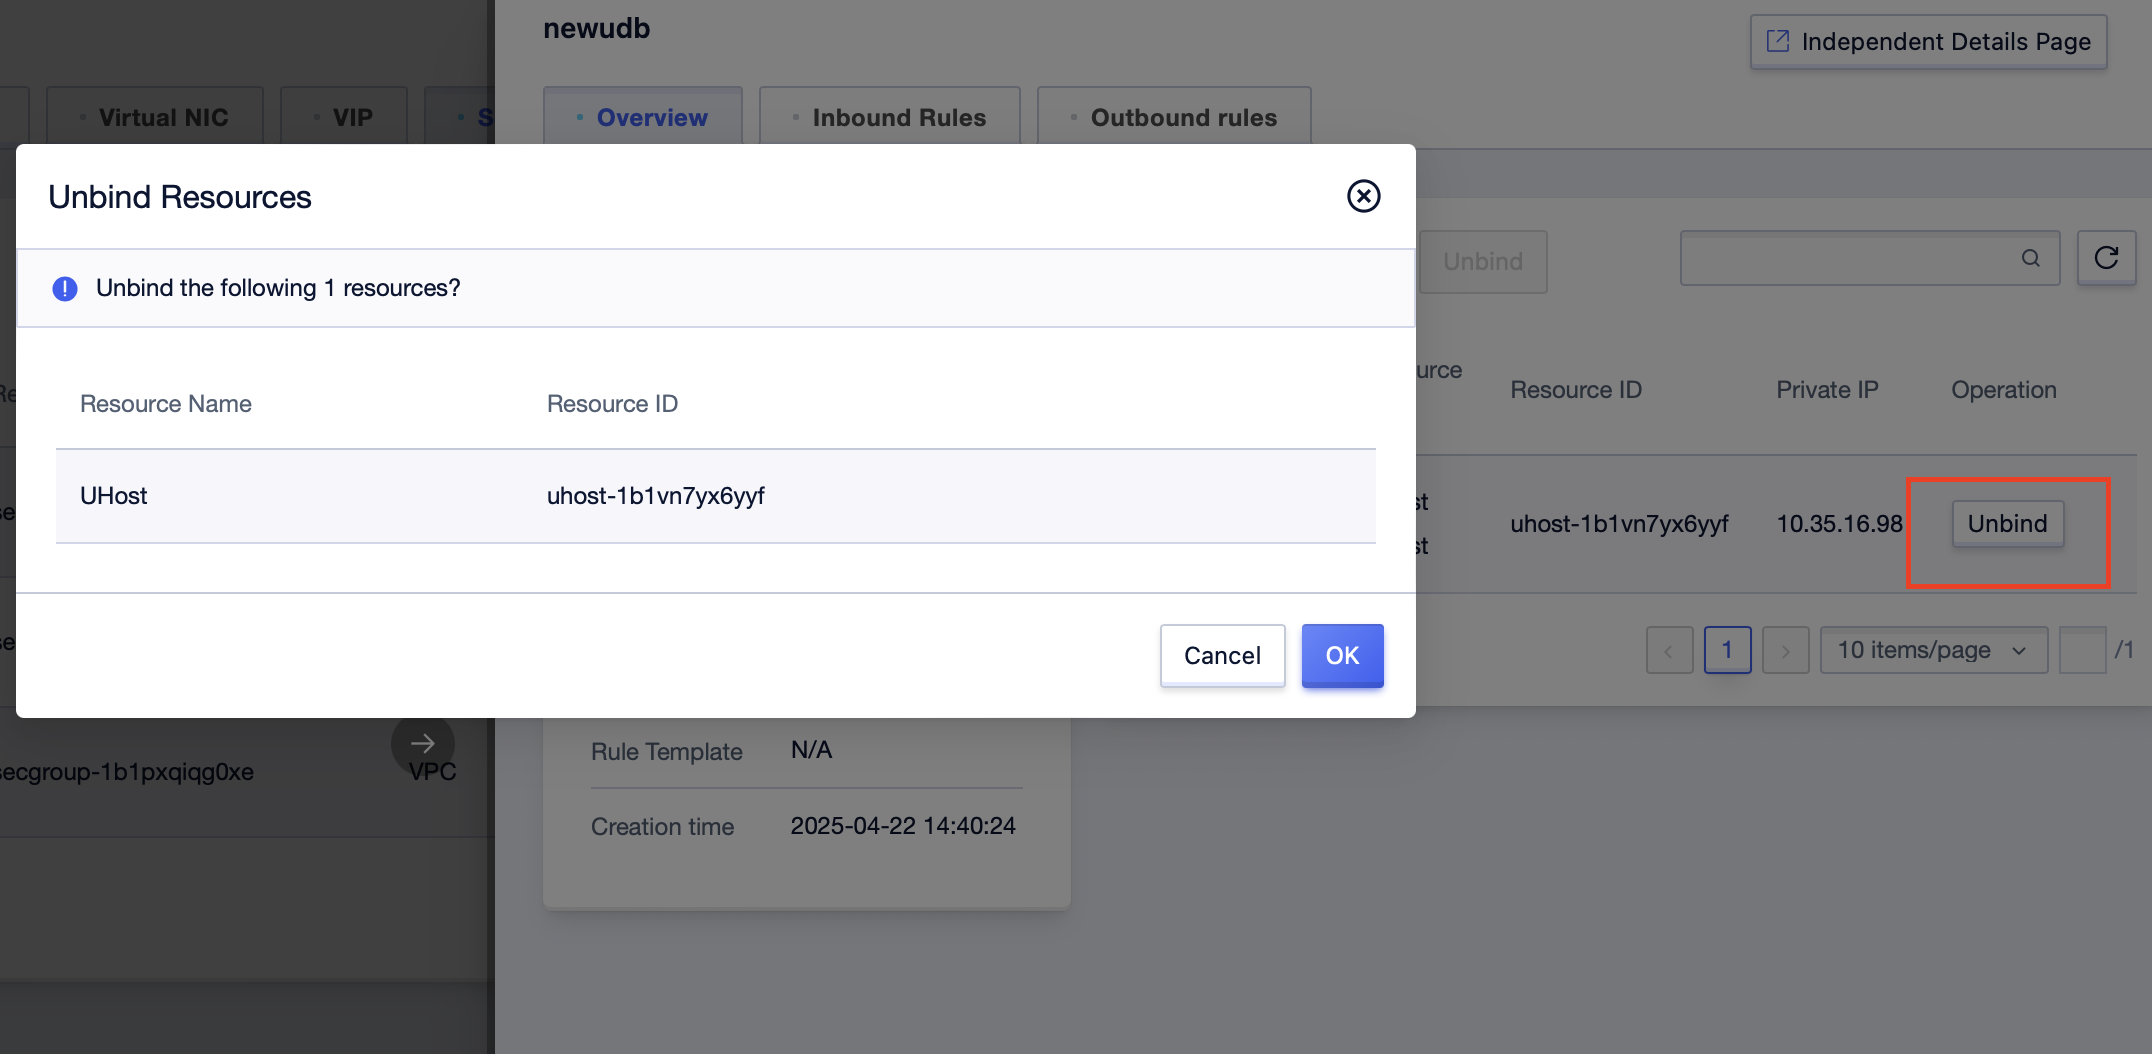
Step3: Click the [Unbind] button, and click [OK];
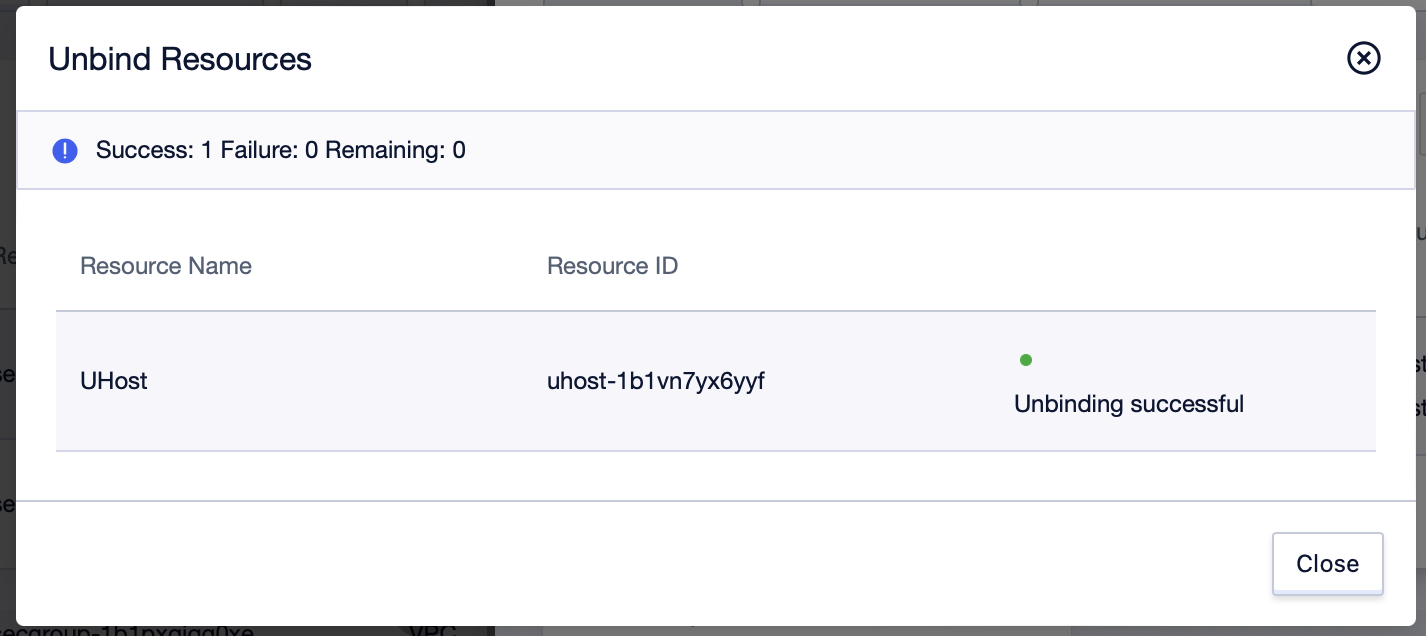
Step4: After the operation is completed, the disassociation operation can be completed;
Host Side Unbinding of a Security Group
Step1: Click [All Products]-[Computing]-[UHost]-[Host Management] to enter UHost management interface;
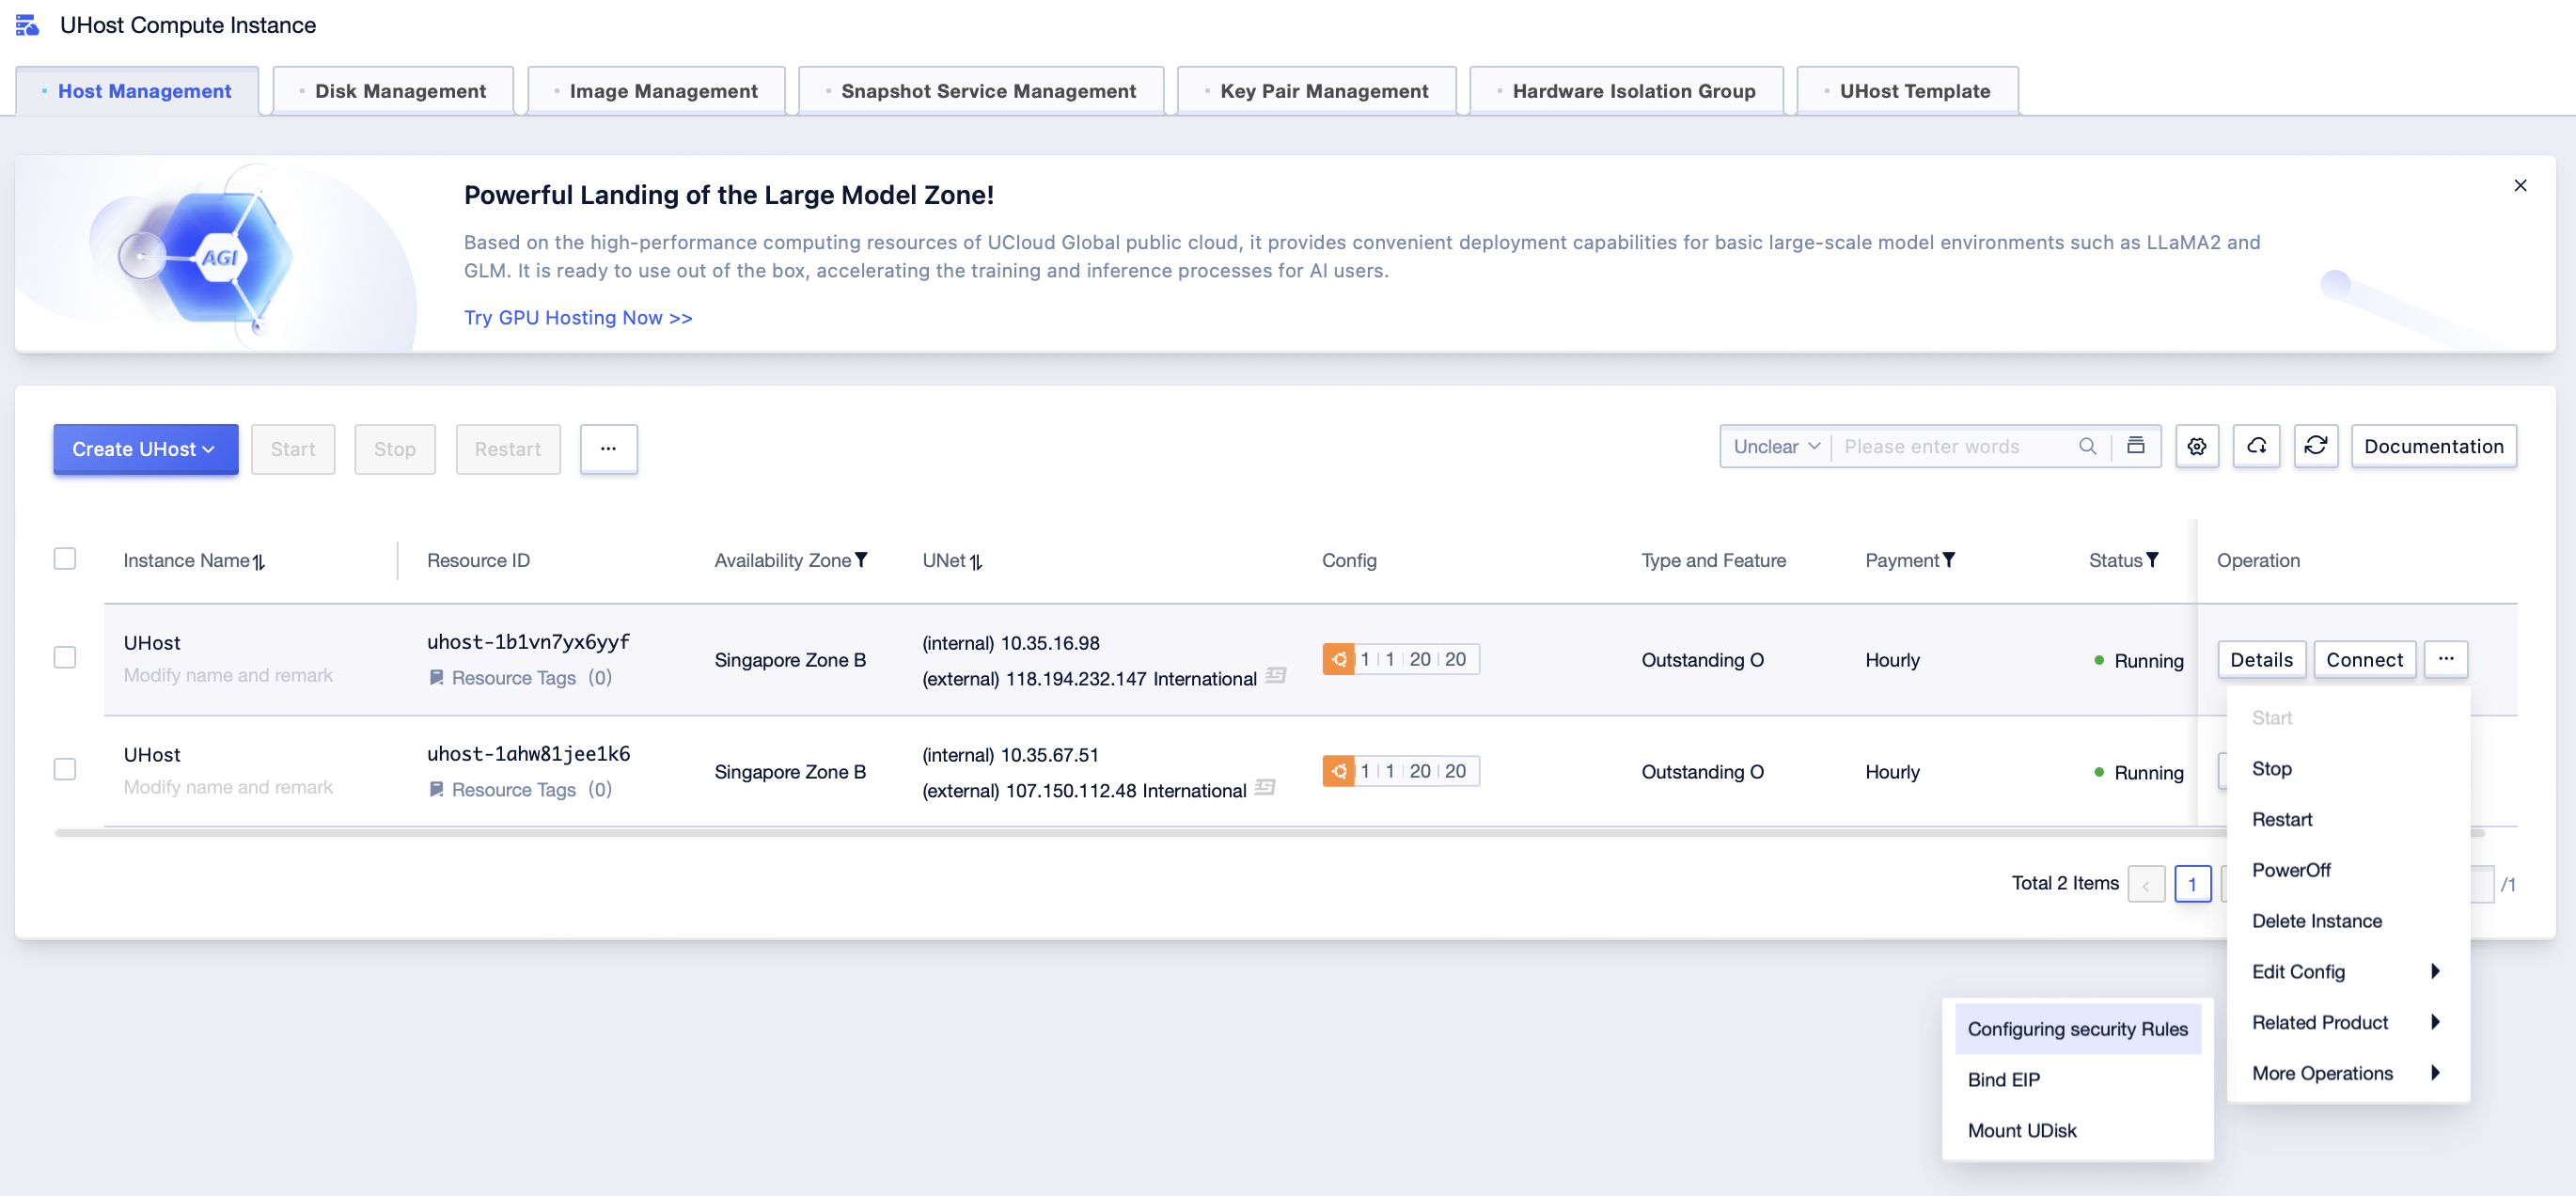
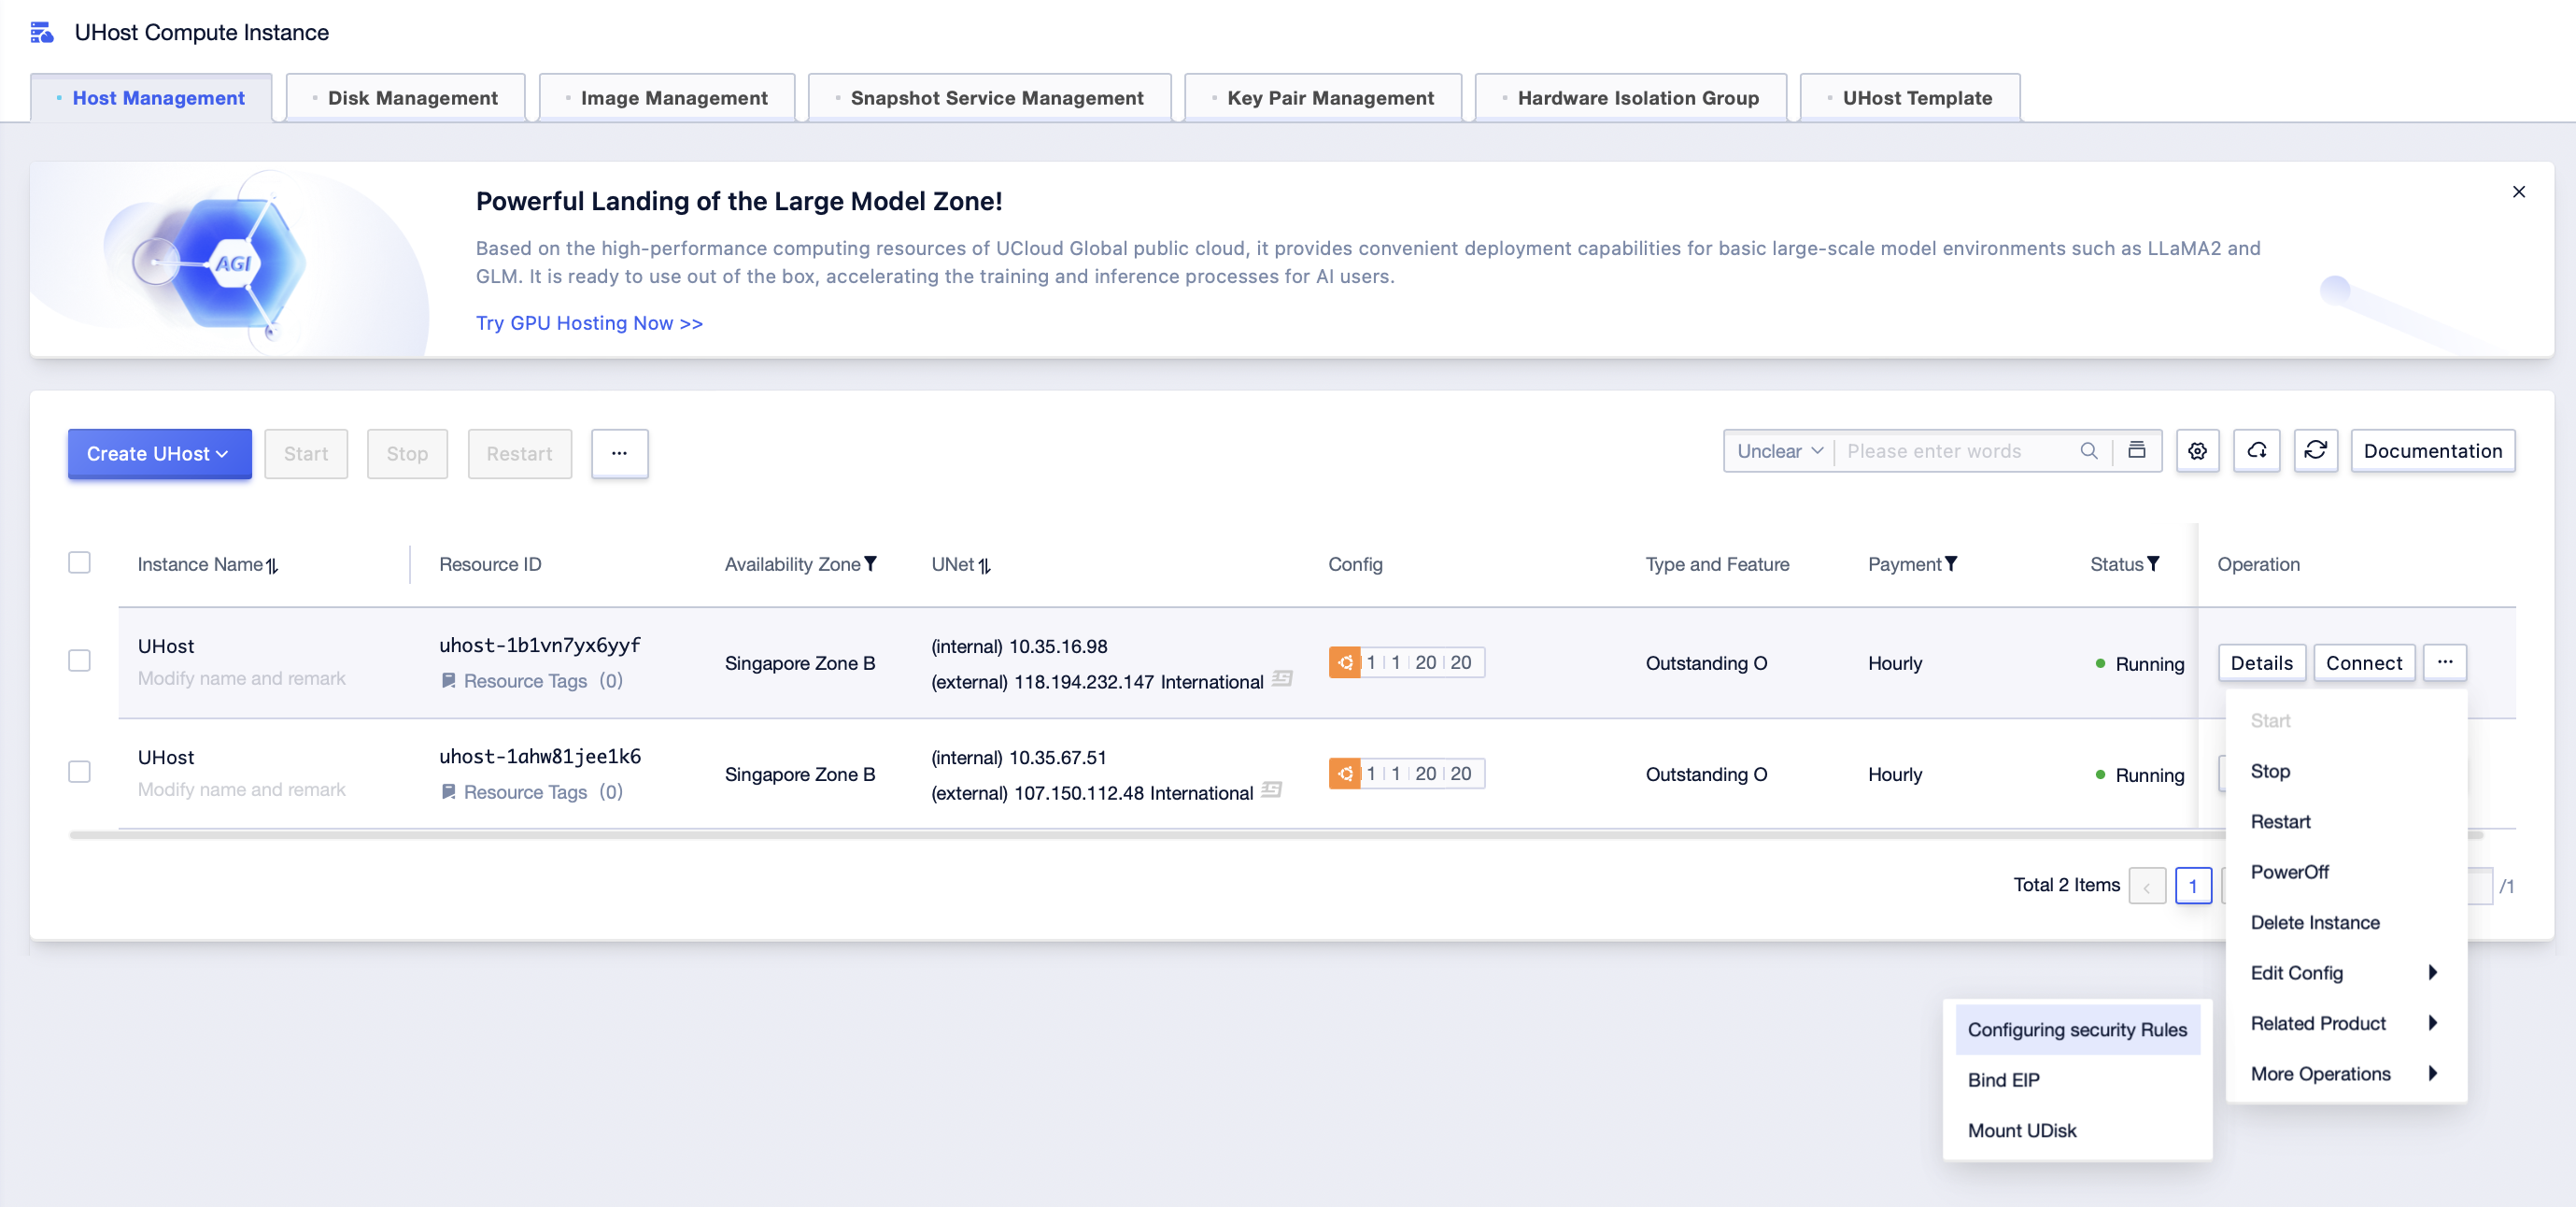
Step2: Click […]-[Related Product]-[Configure Security Rules] to enter the security rule configuration interface of UHost;
Step3: Select the security rule to be security group, deselect the security group to be disassociated, and click [submit];
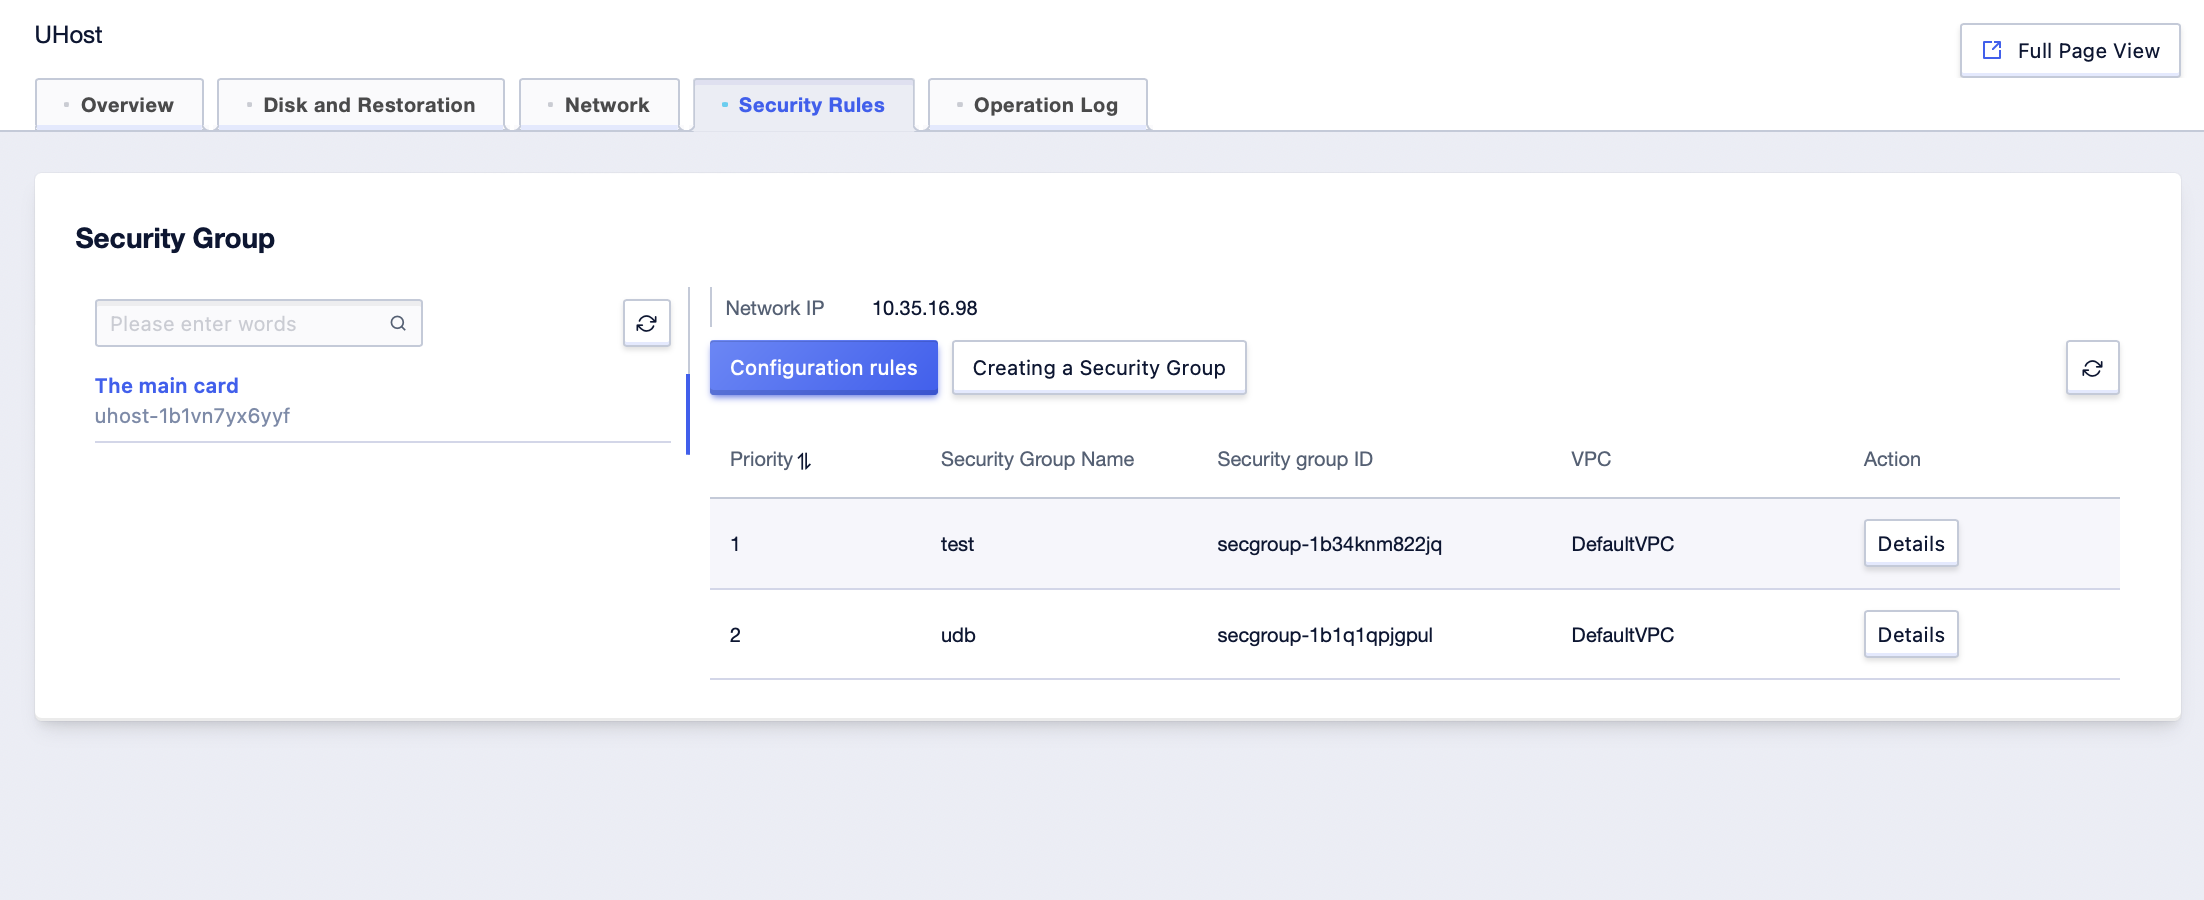
Step4: Click the [Details] button to enter the host [Security Rules] management interface and check the security group information bound to the current UHost network card;
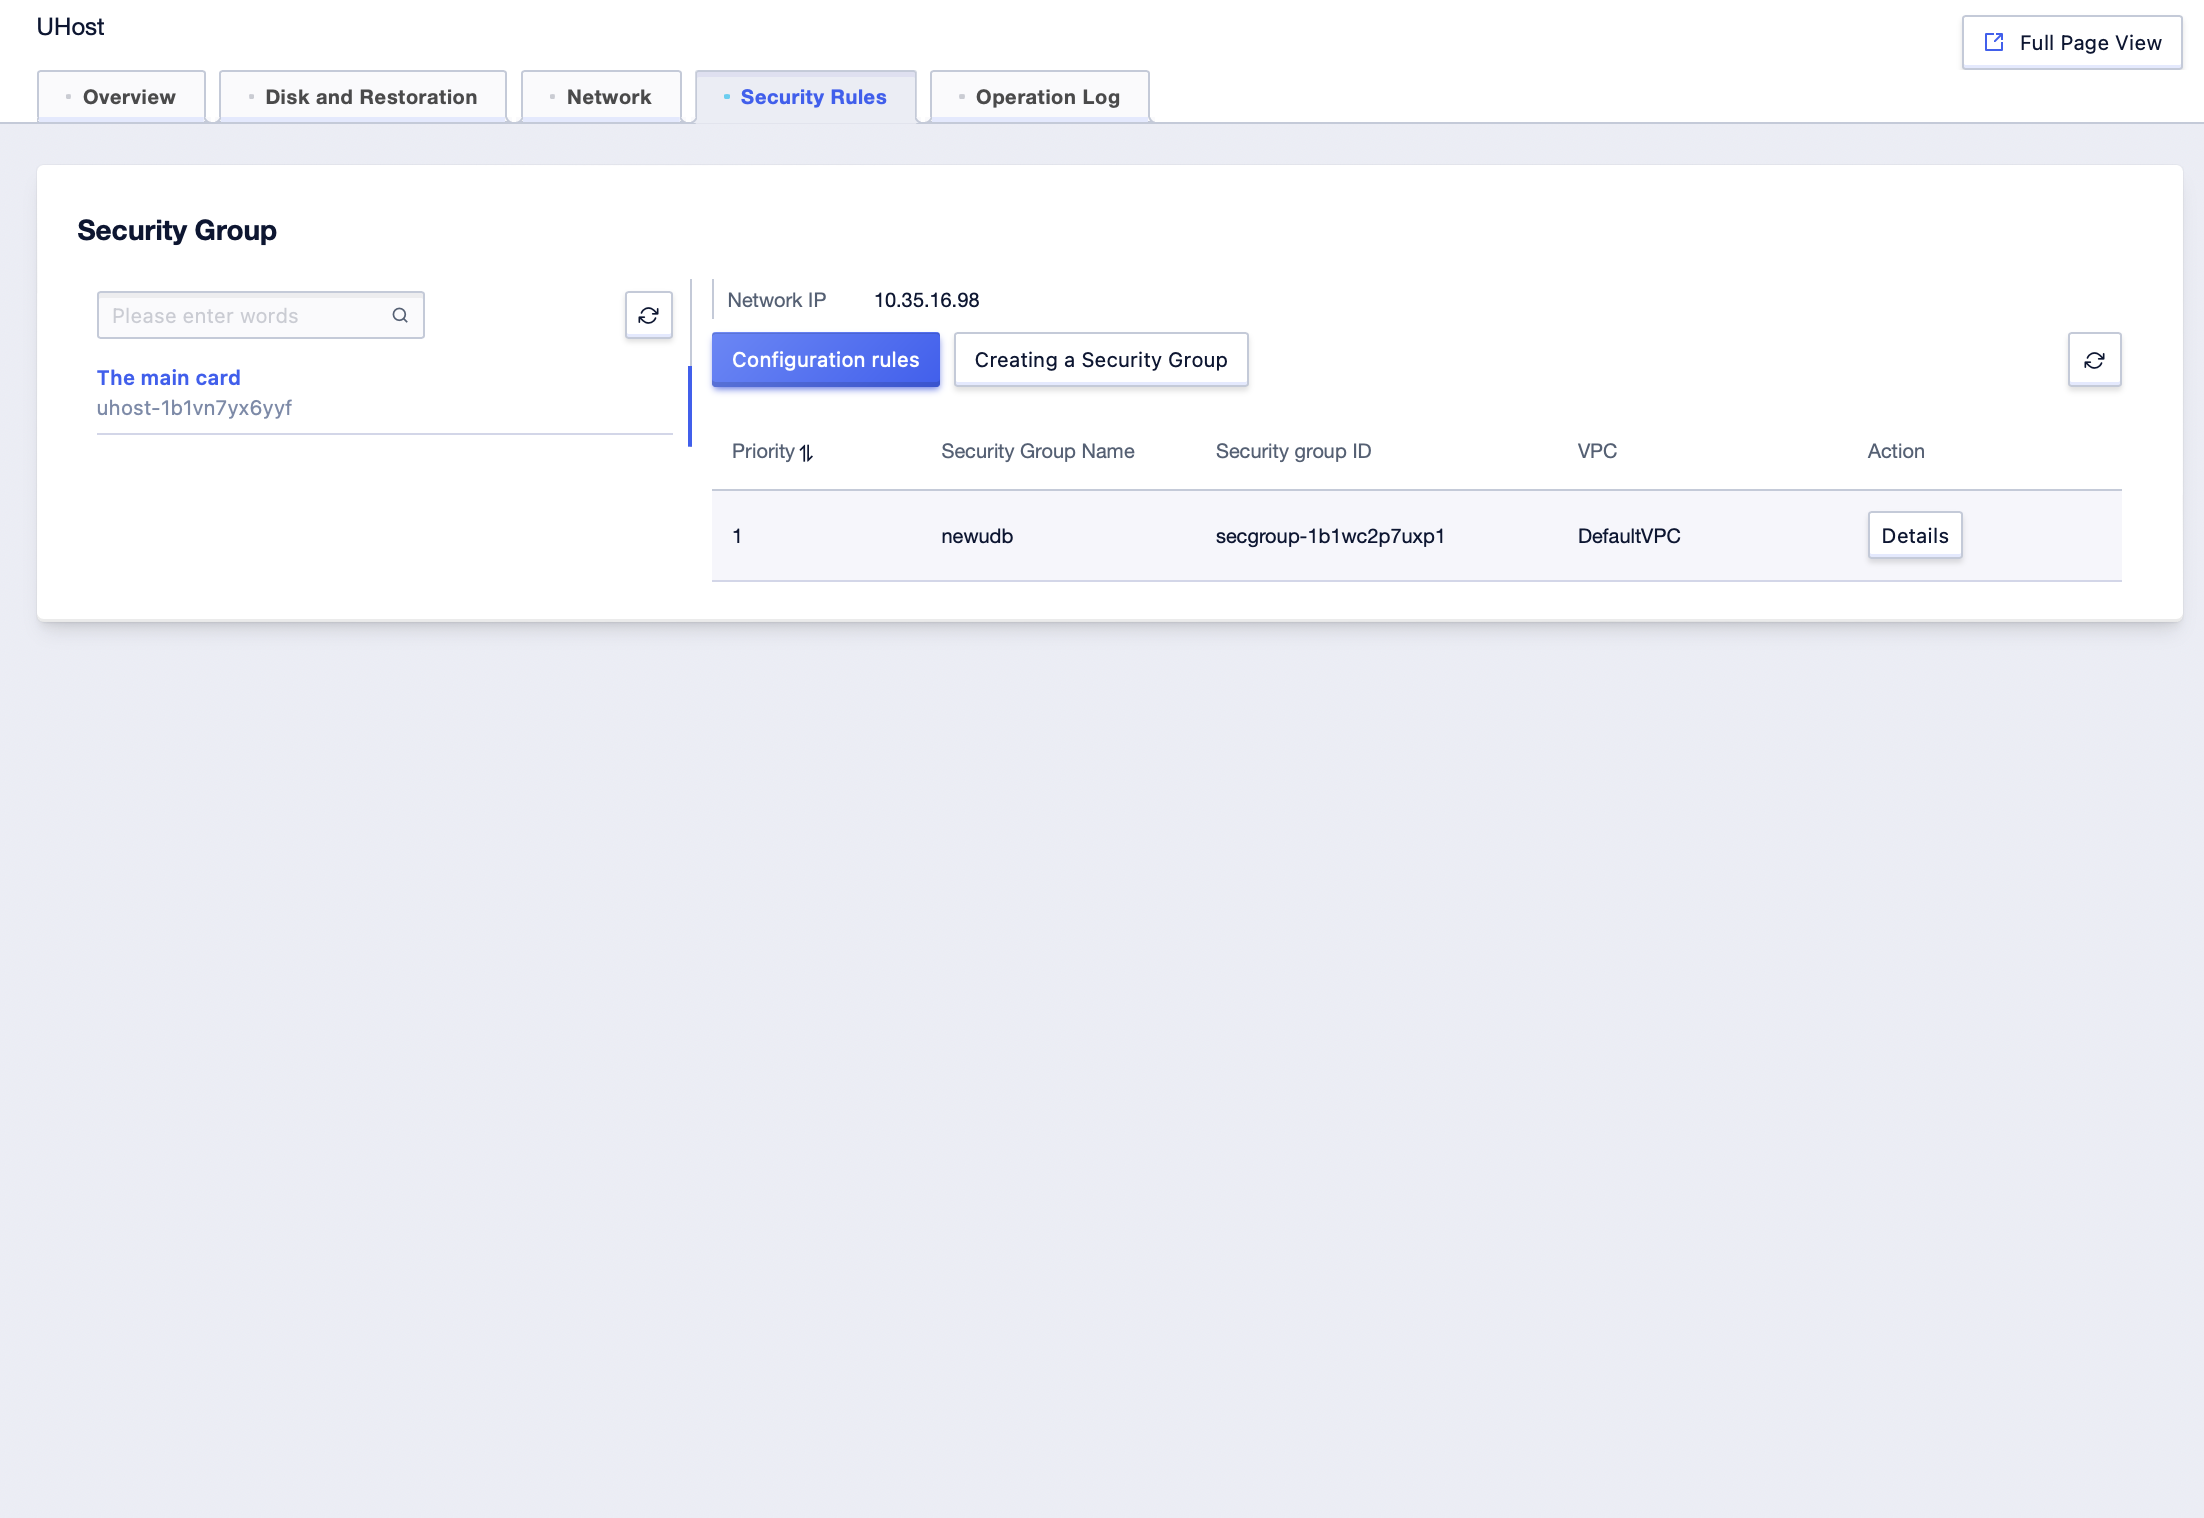
Virtual Network Card Side Disassociation of a Security Group
Step1: Click [All Products]-[Cloud Network]-[VPC Virtual Private Cloud]-[Virtual Network Card]. Select the corresponding “Project Name” and “Availability Zone” under the account to enter the virtual network card management interface;
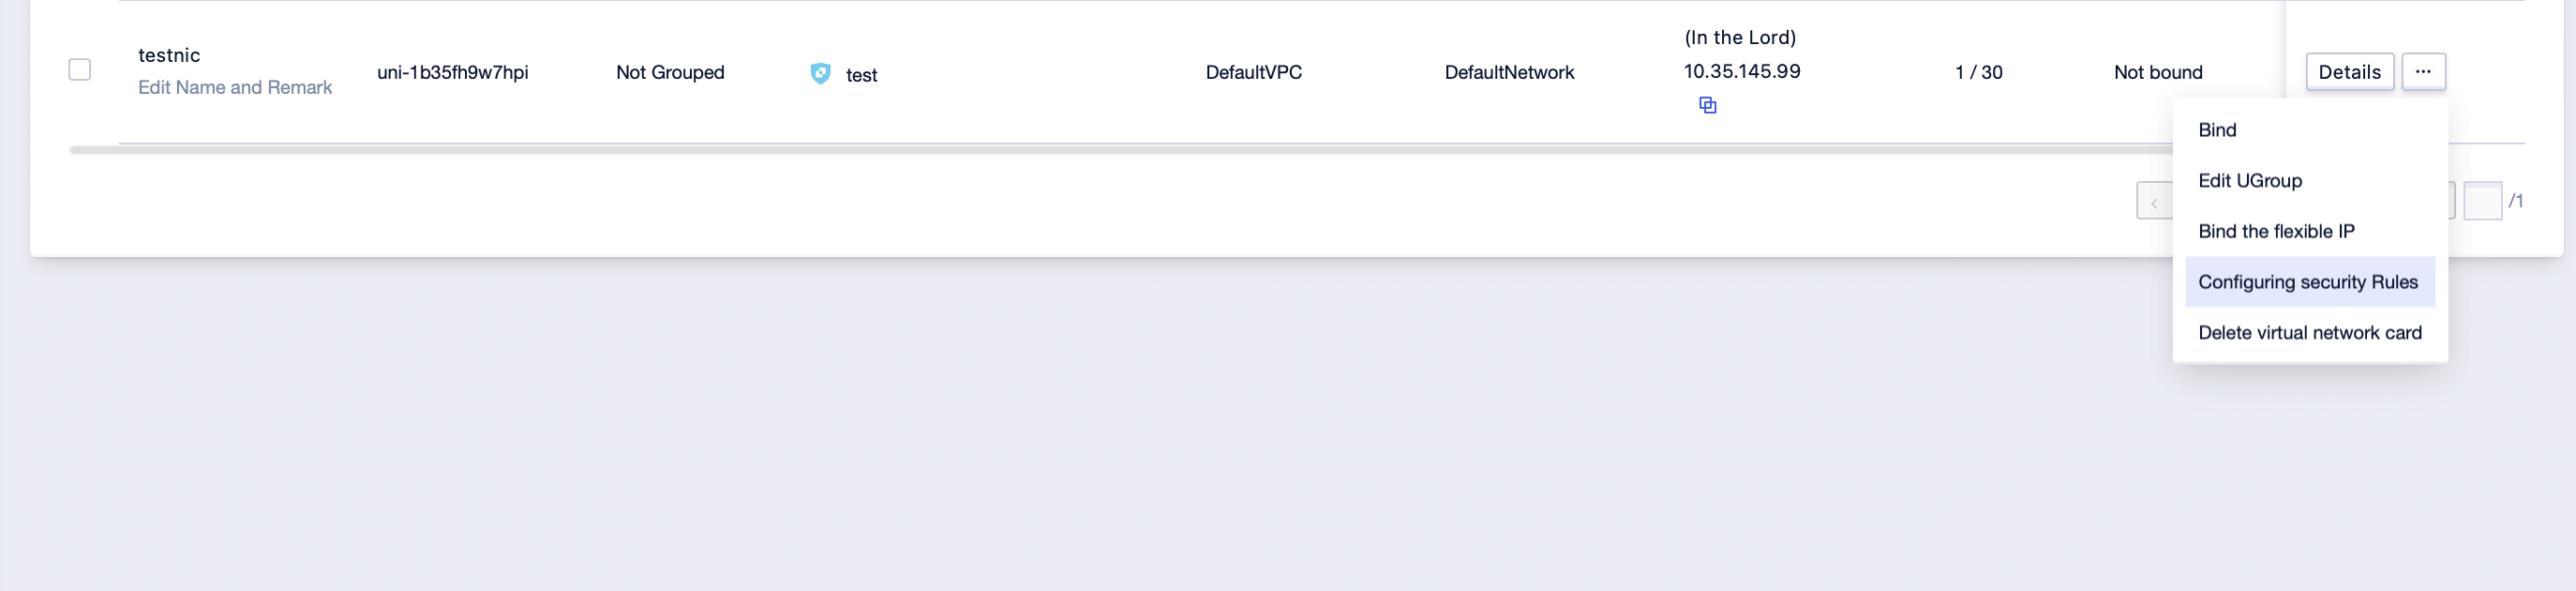
Step2: Click […]-[Configure Rules] to enter the security rule configuration interface of the virtual network card;
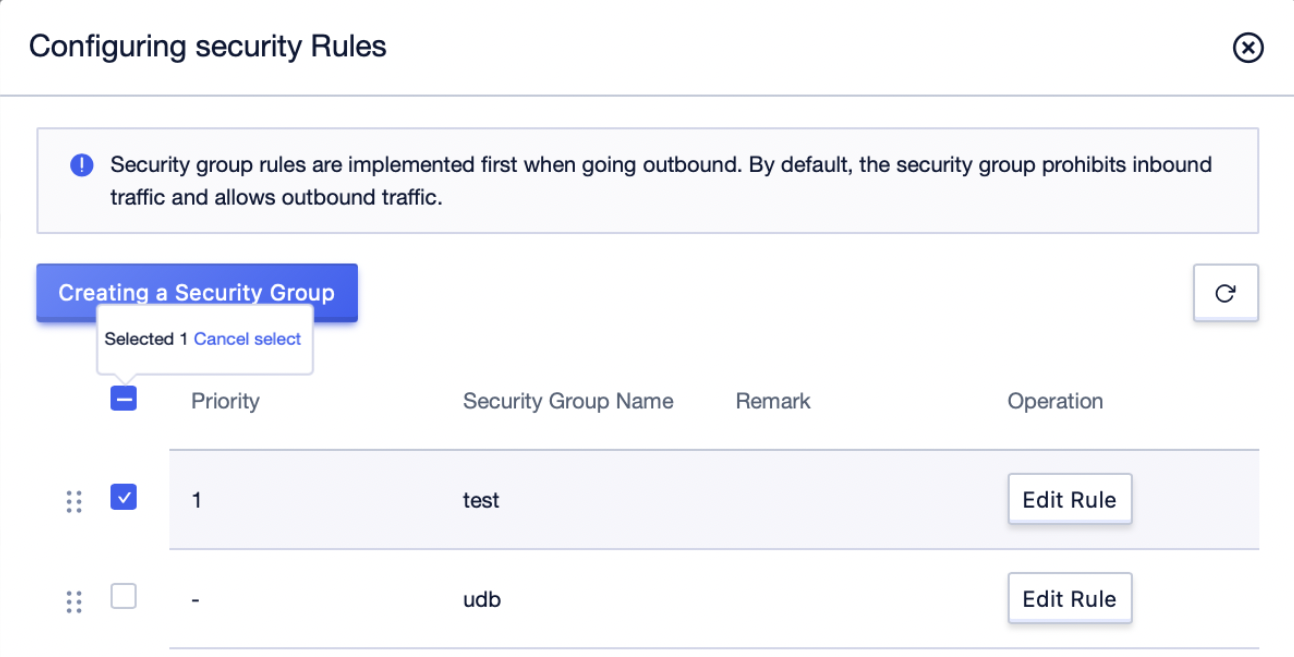
Step3: Select the security rule to be security group, deselect the security group to be disassociated, and click [submit];
Step4: Click the [Details] button to enter the [Security Rules] management interface of the virtual network card.Under the security group card, check the security group information bound to the current network card;
Delete a Security Group
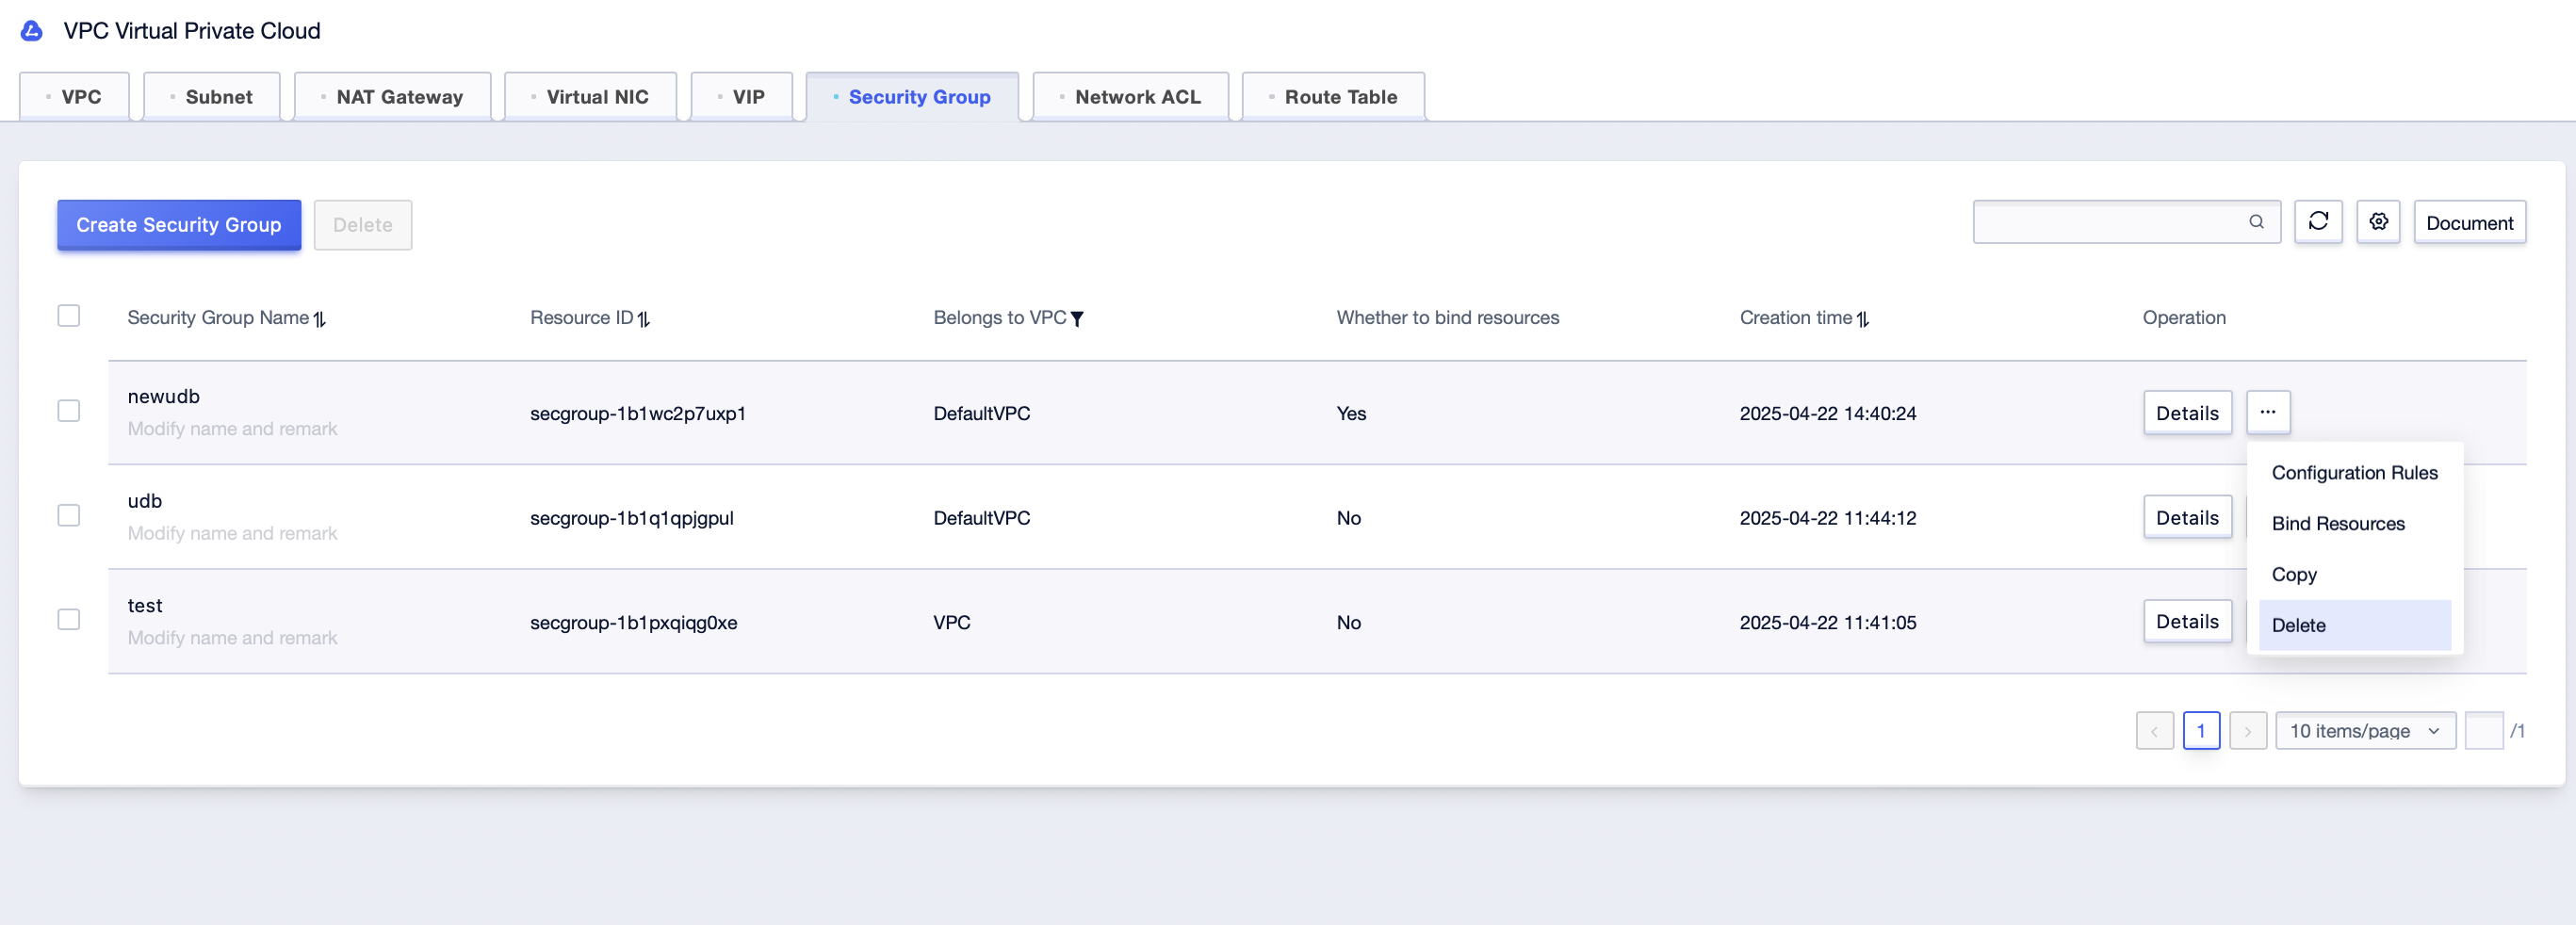
Step1: In the security group management interface, click the […]-[Delete] button;
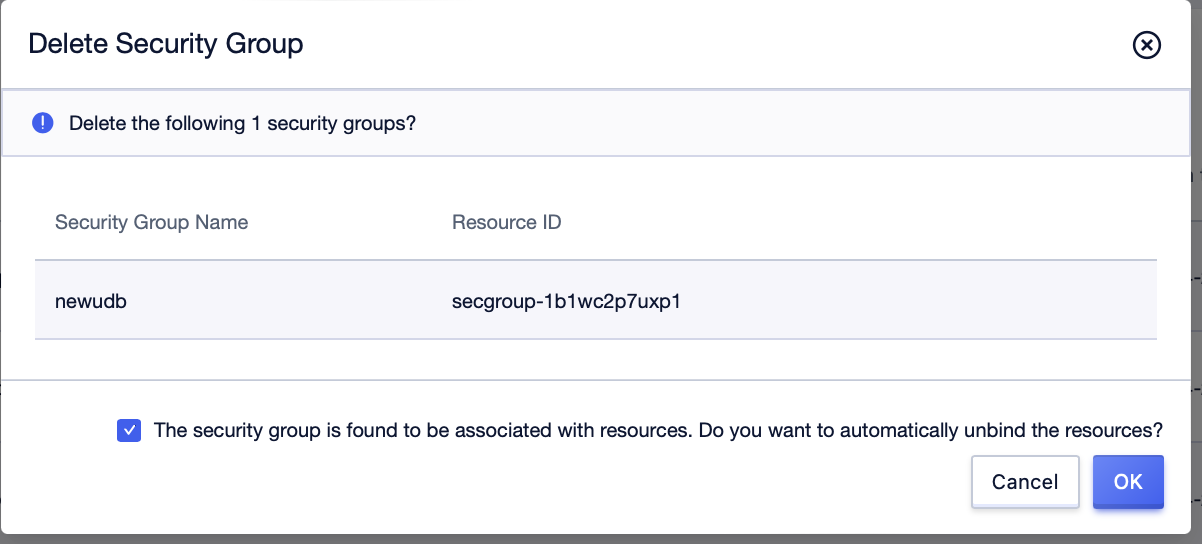
Step2: Check the automatic prompt for resource disassociation, and click [OK];
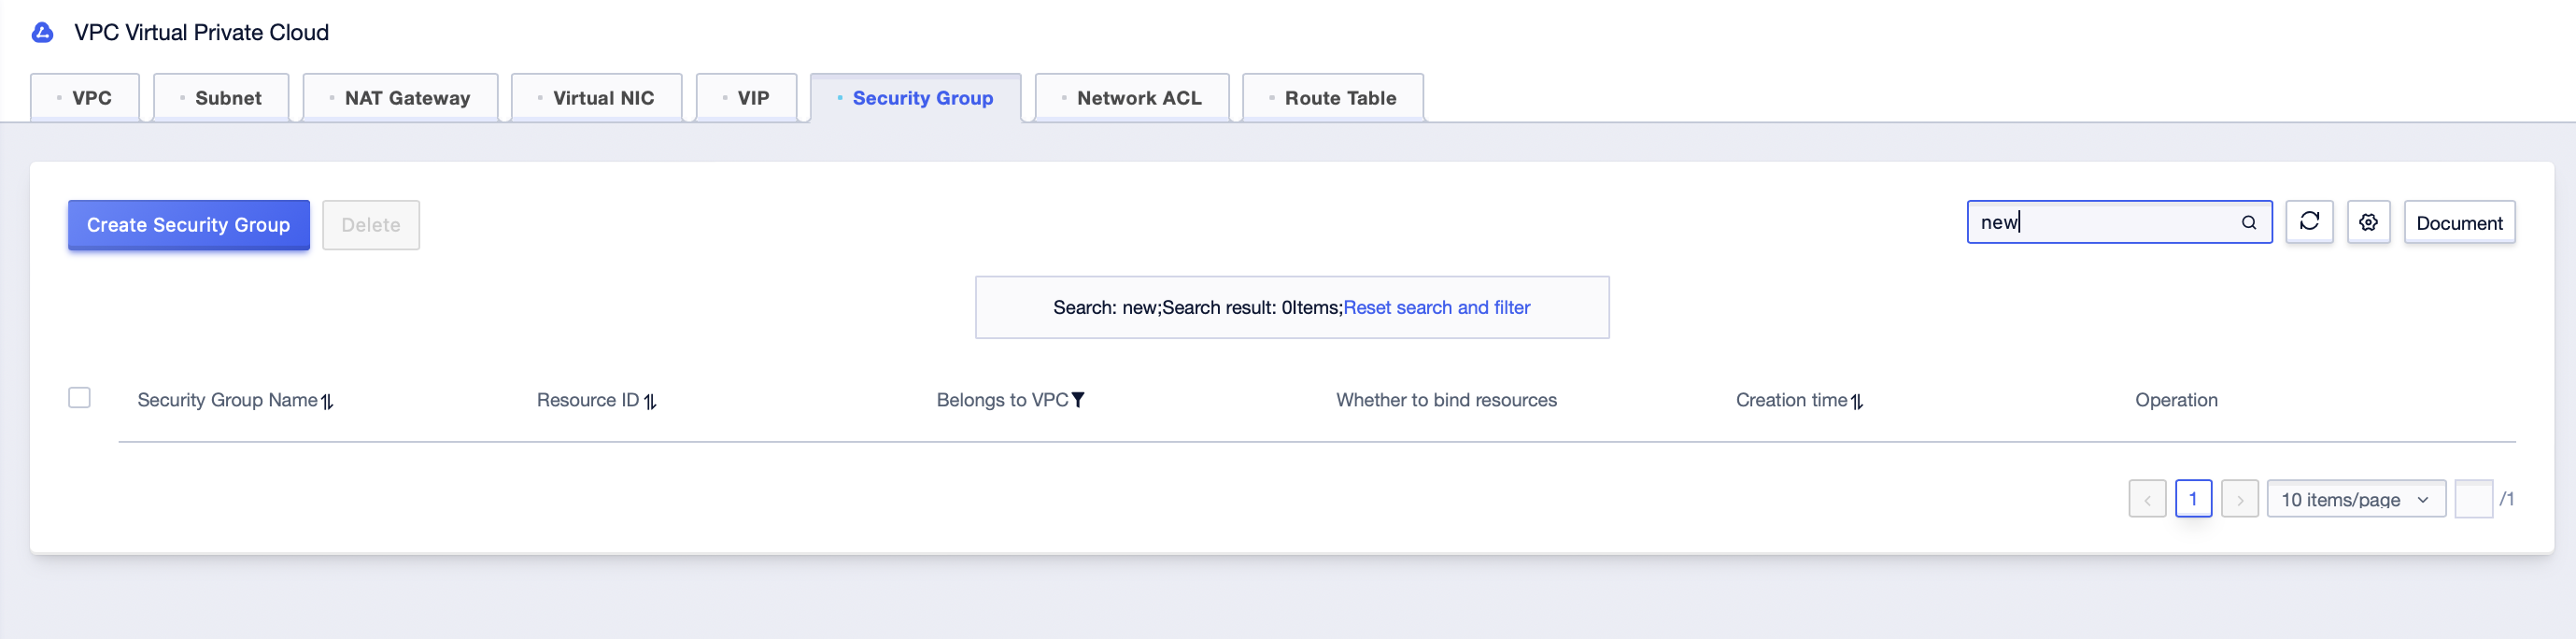
Step3: Filter the security group name just deleted in the security group management interface to confirm that the security group has been deleted;
Adjust the Priority of Security Groups
Adjust Security Group Priority on Host Management Interface
Step1: Click [All Products]-[Computing]-[UHost]-[Host Management] to enter UHost management interface;
Step2: Click […]-[Related Product]-[Configure Security Rules] to enter the security rule configuration interface of UHost;
Step3: Select the security rule to be security group, move the selected security group to adjust the priority between the security groups, and click [Submit] after adjustment;
Step4: Click the [Details] button after the host management list to enter the host [Security Rules] management interface and check the information and priority level of the security group associated with the current UHost network card;
Adjust Security Group Priority on Virtual Network Card Management Interface
Step1: Click [All Products]-[Cloud Network]-[VPC Virtual Private Cloud]-[Virtual Network Card], select the corresponding “Project Name” and “Availability Zone” under the account to enter the virtual network card management interface;
Step2: Click […]-[Configure Rules] button to enter the security rule configuration interface of the virtual network card;

Step3: Select the security rule to be security group, move the selected security group to adjust the priority between the security groups, and click [submit] after adjustment;
Step4: Click the [Details] button to enter the [Safety Rules] management interface of the virtual network card, and under the security group card, check the information of the security group that is currently bound to the network card;

(Optional) Manage Security Group Rules
View security group rules
After the successful creation of the security group, the user can view the corresponding security group rules in the console;
Operation steps
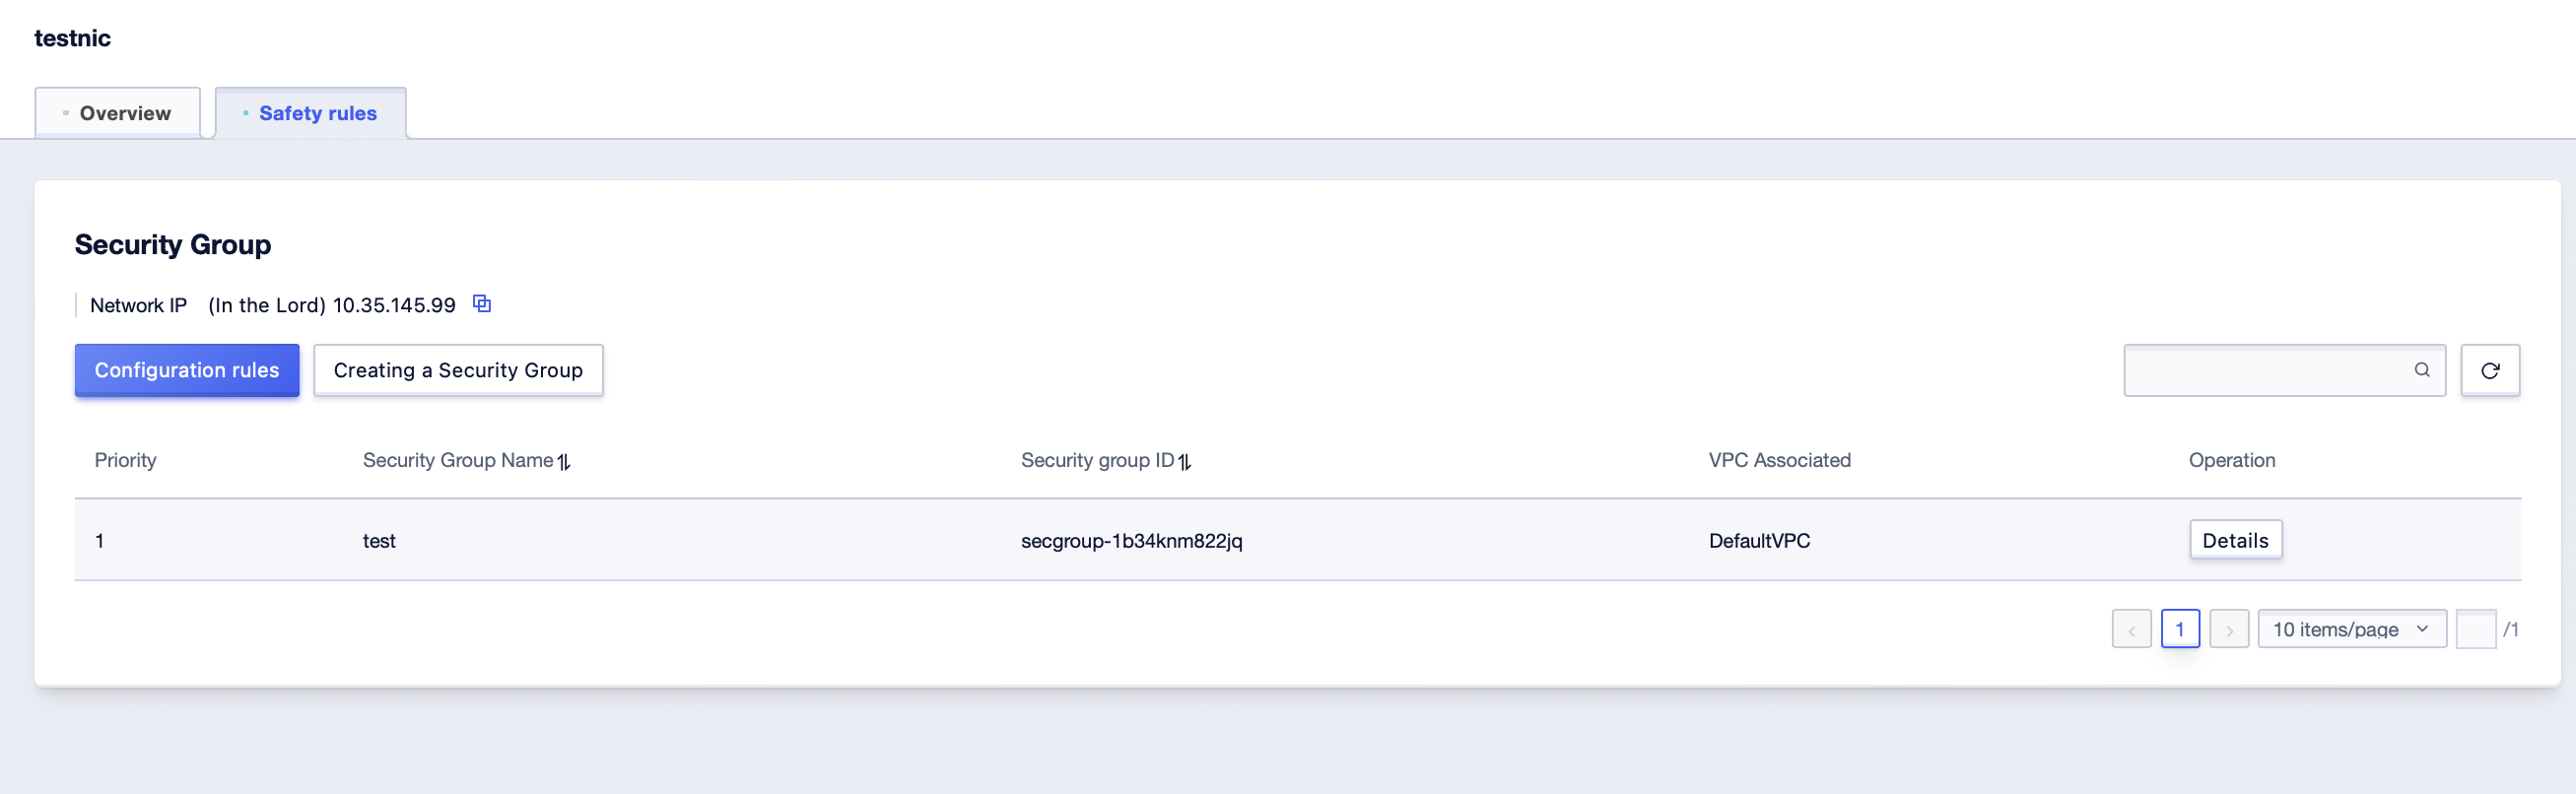
Step1: Click [All Products]-[Cloud Network]-[VPC Virtual Private Cloud]-[Security Group], select the corresponding “Project Name” and “Availability Zone” under the account, to enter the security group management interface;
Step2: Click the [Details] after the corresponding security group in the list, check the rule information in the [Inbound Rules] and [Outbound Rules] interface;
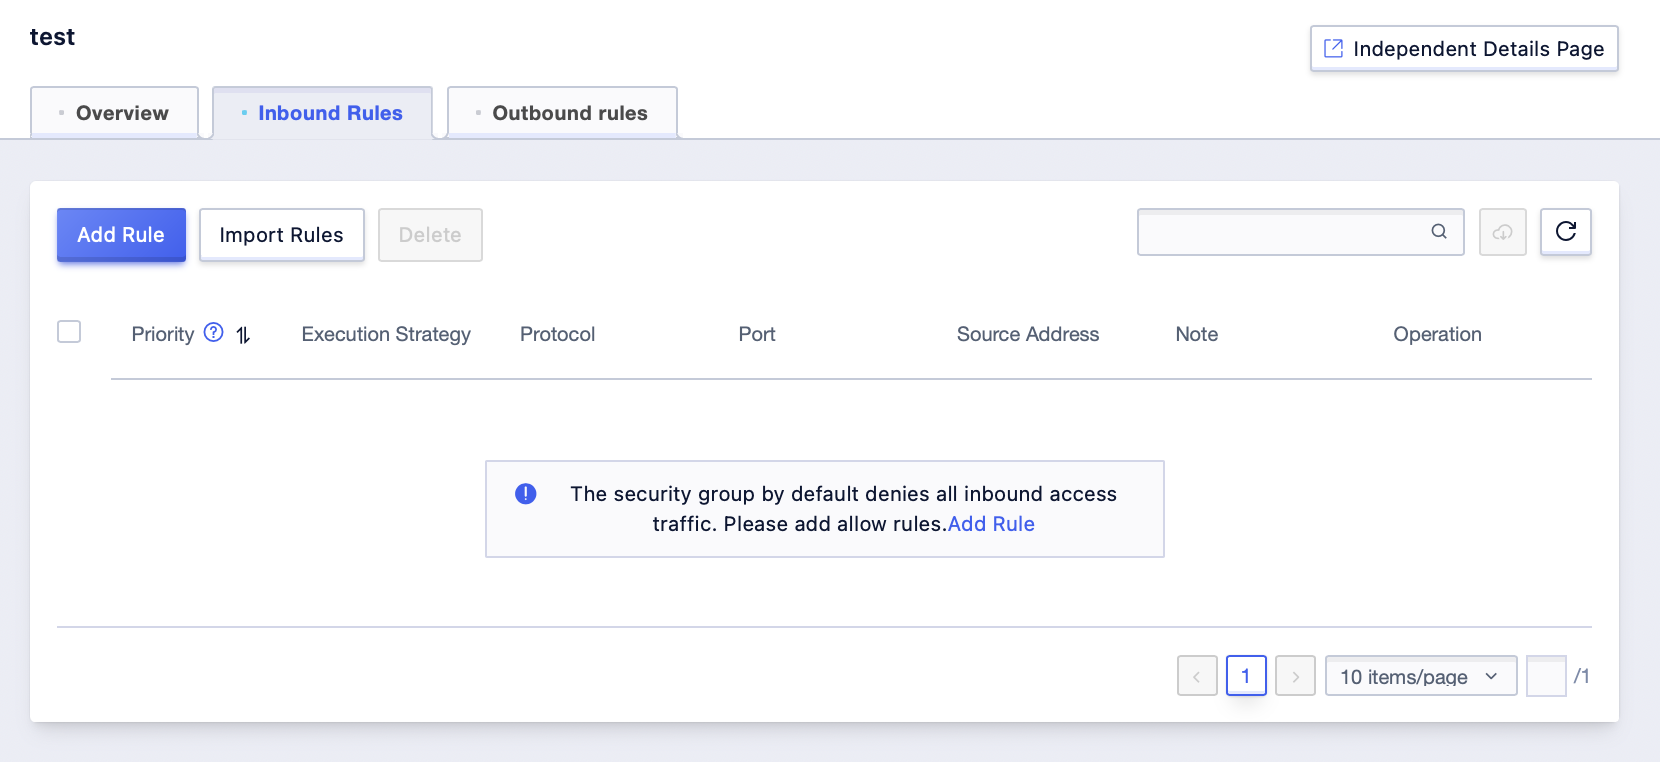
Edit security group rules
Step1: In the security group management interface, click the [Details] button after the security group item;
Step2: Enter the “Inbound Rules” and “Outbound Rules” interface respectively;

Step3: Click [Add Rules] in the rule management interface, enter the related rule parameters, and click [Confirm]. You can successfully create a new rule item; (Priority value is unique)
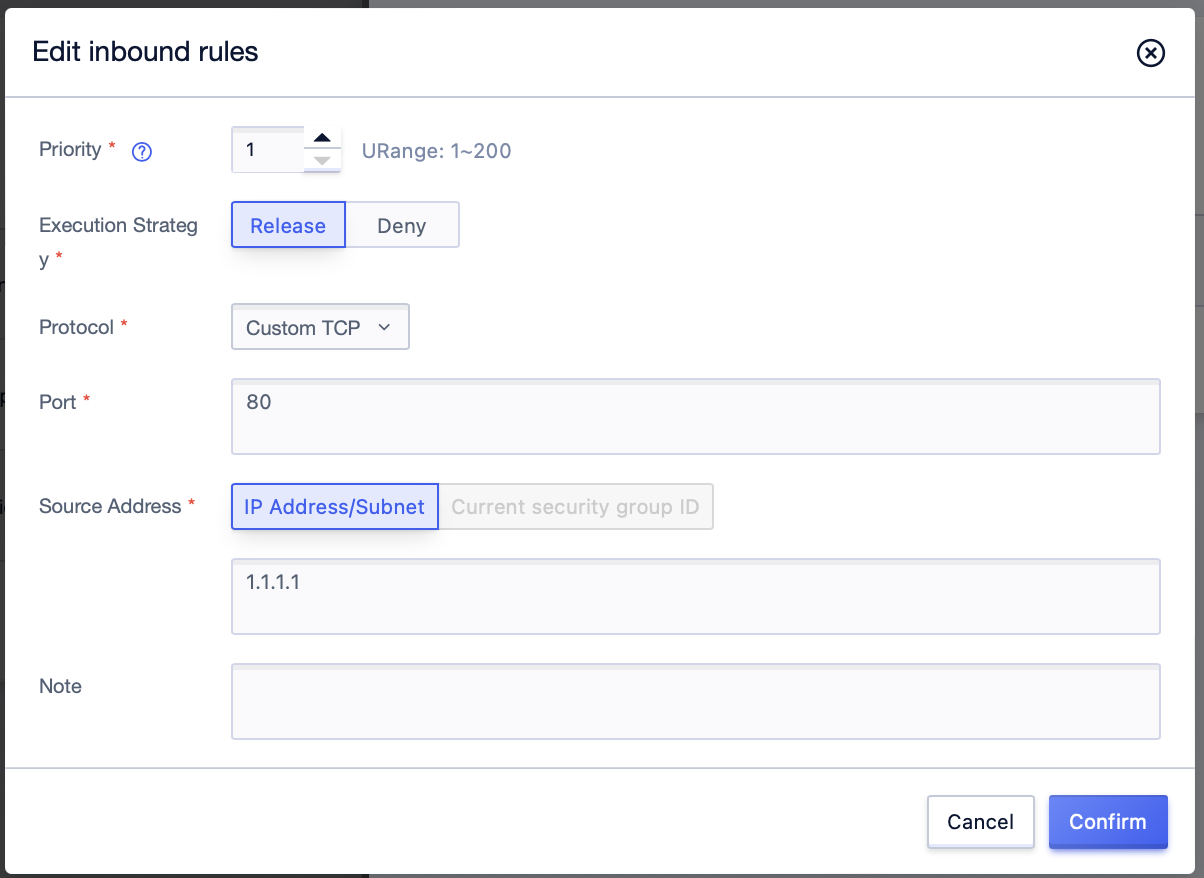
Step4: Clicking the [Edit] button after the rule item in the management list, you can perform the rule parameter change operation. Click [Confirm] to take effect after the operation is completed;
Step5: The creation and editing operations of the outbound rules are the same as those of the inbound rules. You can refer to the steps of the inbound rule operation.
Delete security group rules
Step1: In the “Inbound Rules” management interface, click the [Delete] button after the rule item, and confirm operation;
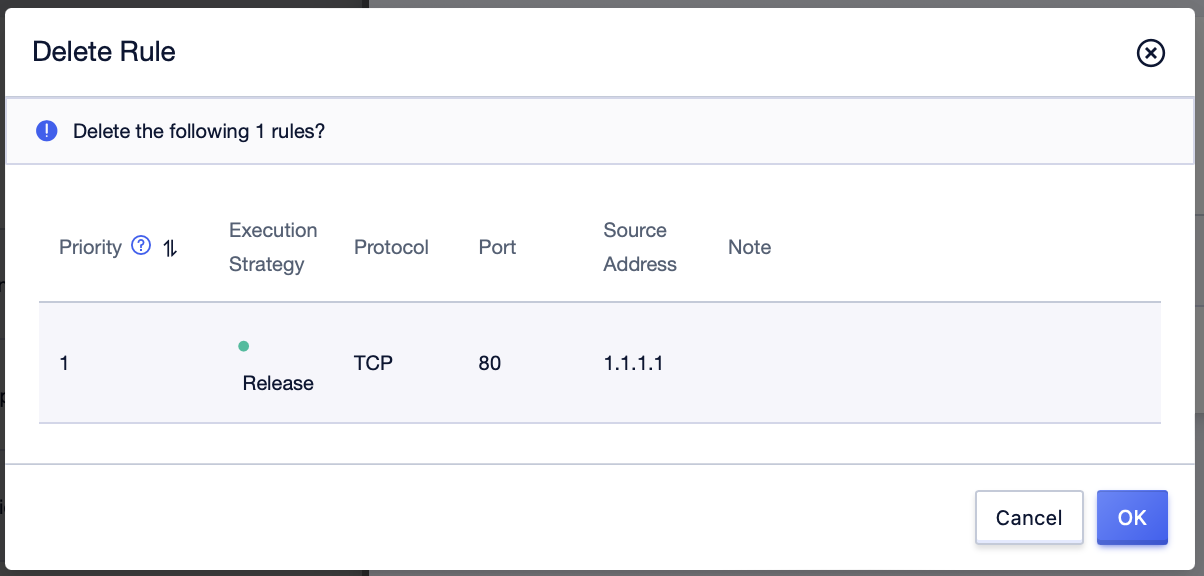
Step2: After the operation is successful, the management interface will delete the corresponding rule information;
Step3: The operation of deleting outbound rules is similar to that of inbound rules, you can refer to the steps of inbound rule operation;
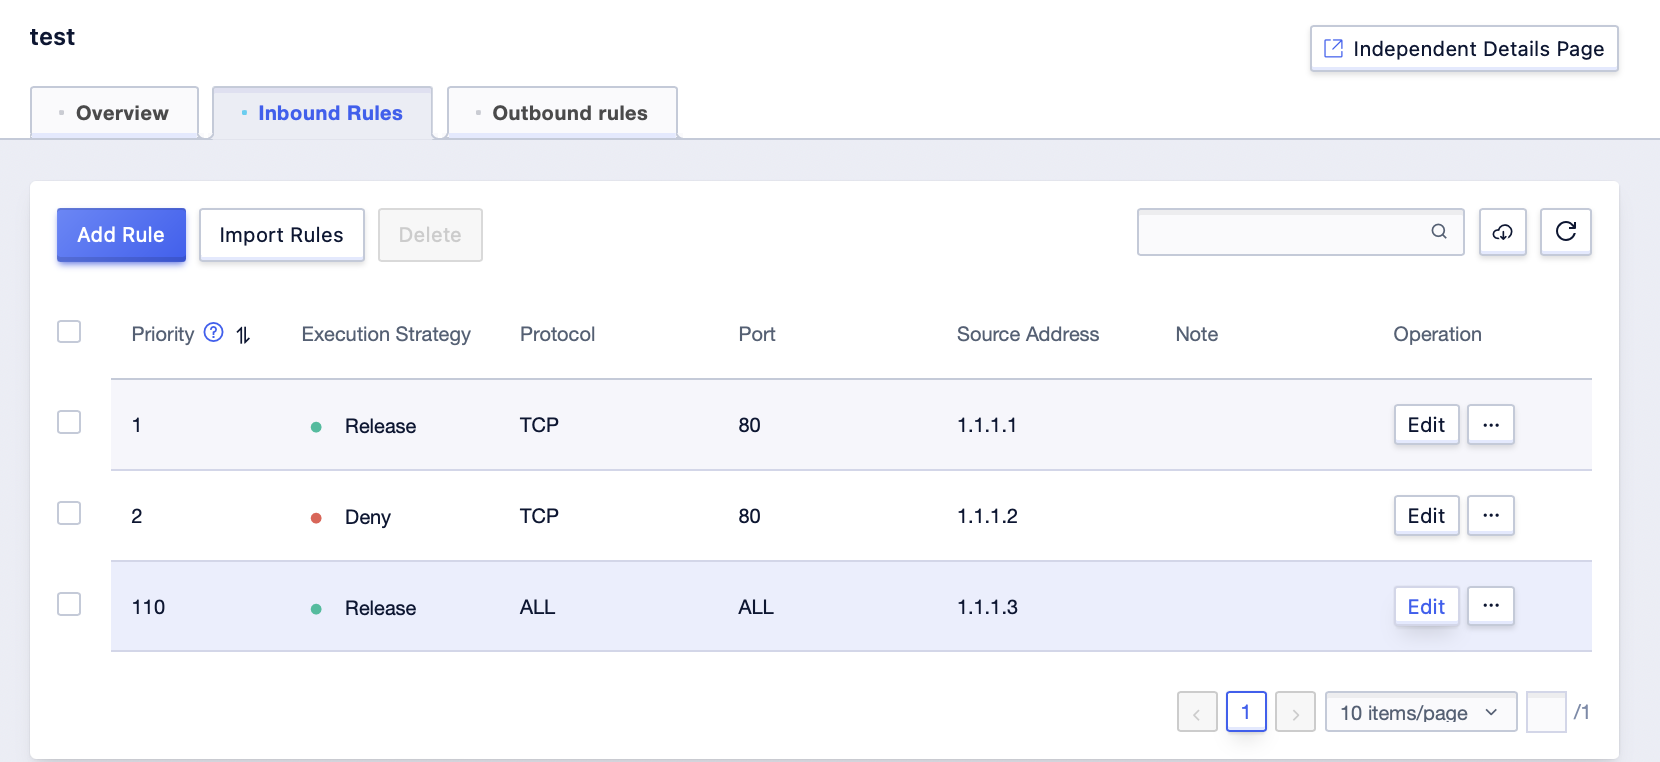
Adjust the priority of security group rules
Step1: In the inbound rule management interface, click the [Edit] button after the rule item whose order needs to be adjusted;
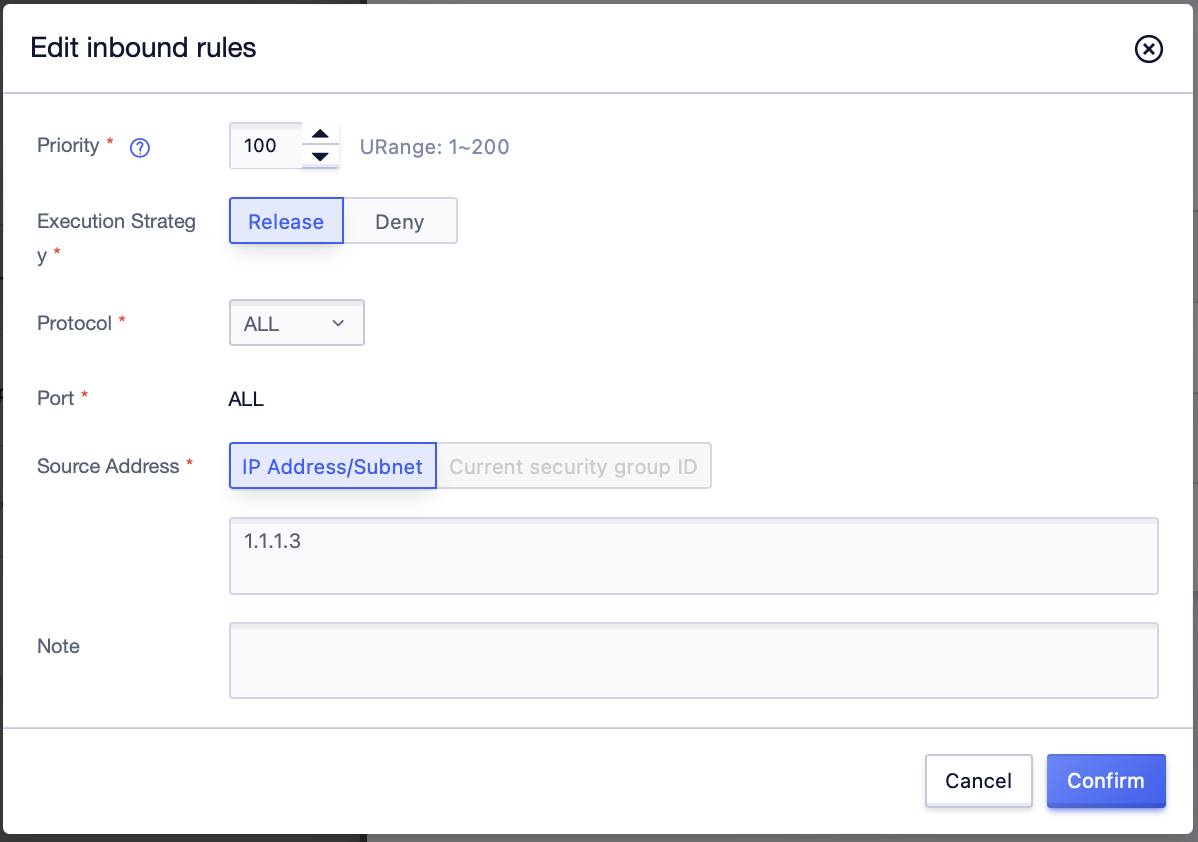
Step2: In the pop-up dialog box, edit the priority of the rule. The new priority must not conflict with the priority of all rules on the current interface. Click [Confirm] after adjustment;
Step3: After adjustment, you can view the new priority information of the rule on the current interface;
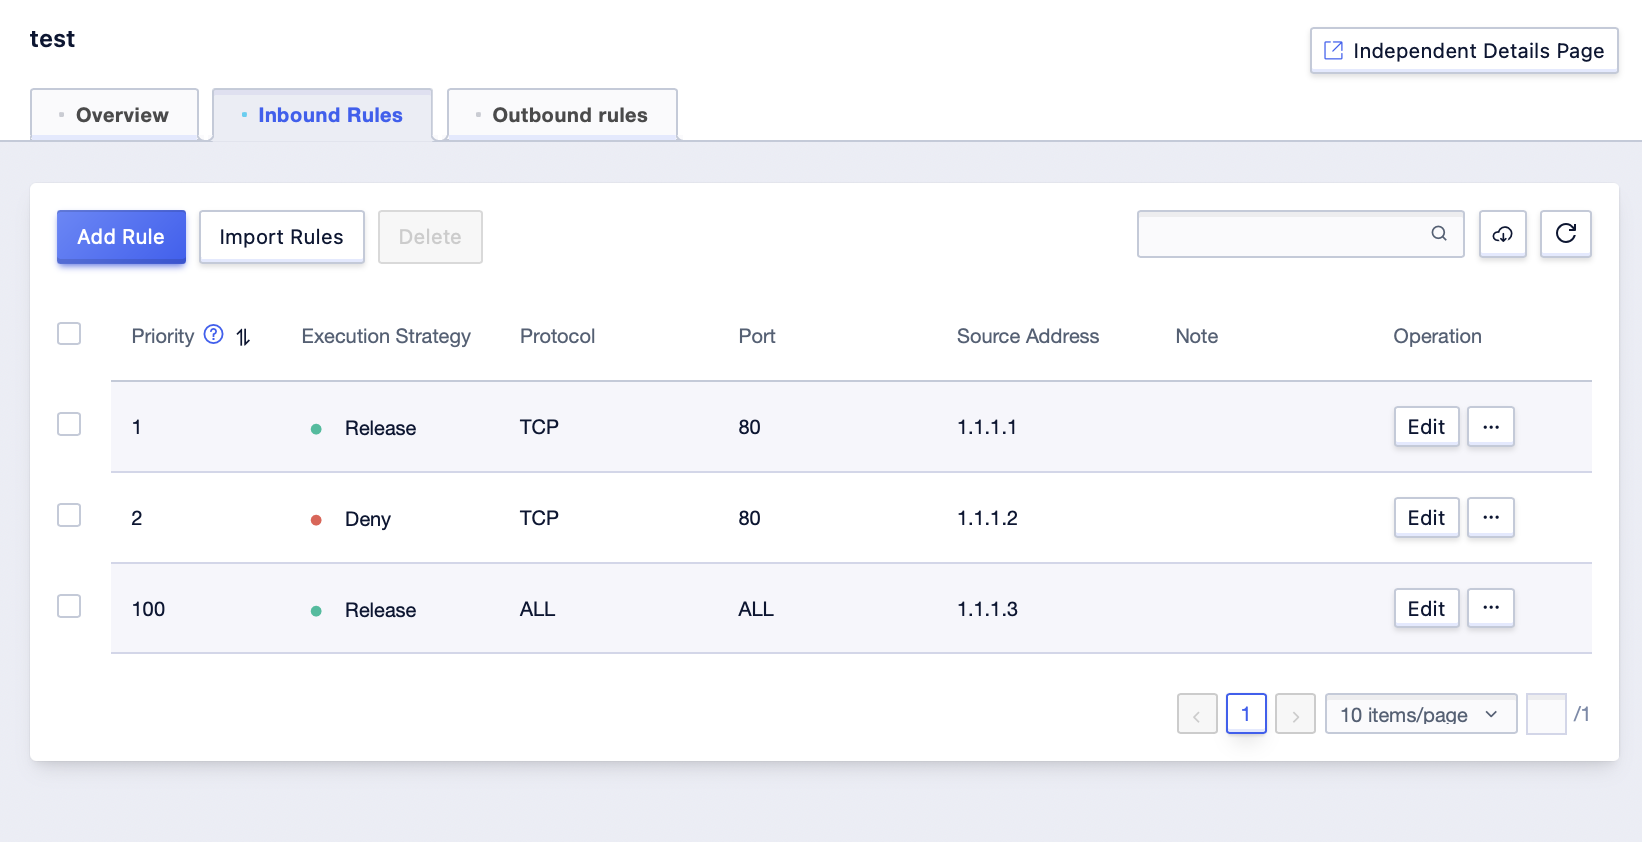
Step4: The outbound rule priority adjustment process is consistent with the inbound rule, so you can refer to the inbound rule priority adjustment process;